• Home
  • About
  • Kid Zone
    • Activities
    • Arts + Crafts
    • Books Books Books
  • Food
    • Family-Friendly
    • Kids
    • Sweets
    • Dog-Friendly
  • Life + Motherhood
    • Pregnancy
    • Parenting
    • House + Home
  • Let’s Party
    • Birthdays
    • Holidays
    • Instagram
    • Pinterest

Capturing Parenthood

Ugly Pie

in Books Books Books, Food, Sweets on November 15, 2018

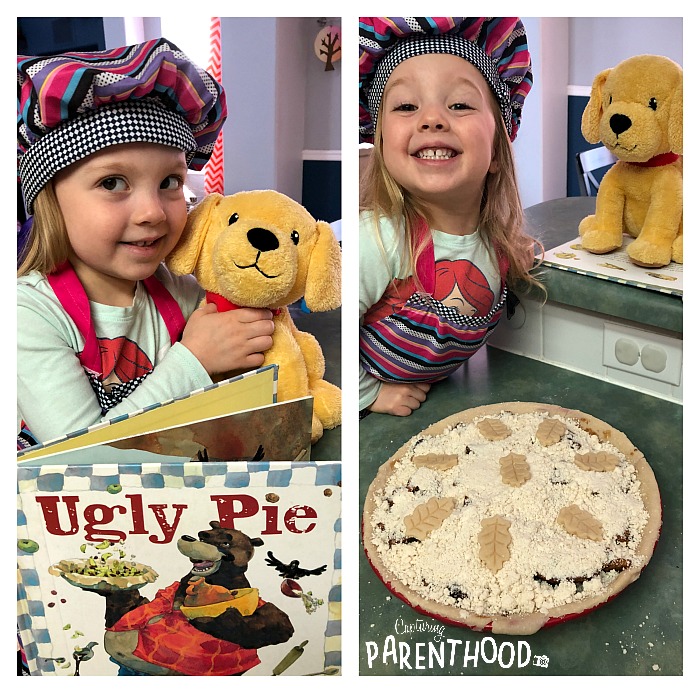
“My-oh-my-oh-my! Do I smell Ugly Pie?” If you caught our Favorite Thanksgiving Books post on Tuesday, you already know how fond we are of Ol’ Bear…the main character in the charming story, Ugly Pie by Lisa Wheeler. Bear wakes up one morning with a hankering for Ugly Pie…but the only ugly thing in his kitchen is some sweet molasses.Β So, Bear takes a stroll through the neighborhood, where he finds that his family and friends have all made pies of their own…a pleasing pumpkin pie, a righteous rhubarb pie, and a heavenly honey pie. But no Ugly Pie. And Ol’ Bear is “just itchin’ – truly itchin’ – for some Ugly Pie.” After acquiring various ugly items (wrinkled red raisins, sour green apples, and bumpy brown walnuts) from each of his neighbors, Bear returns home and sets out to make the pie that he’s been dreaming about all day.

Ugly Pie Β© Capturing Parenthood

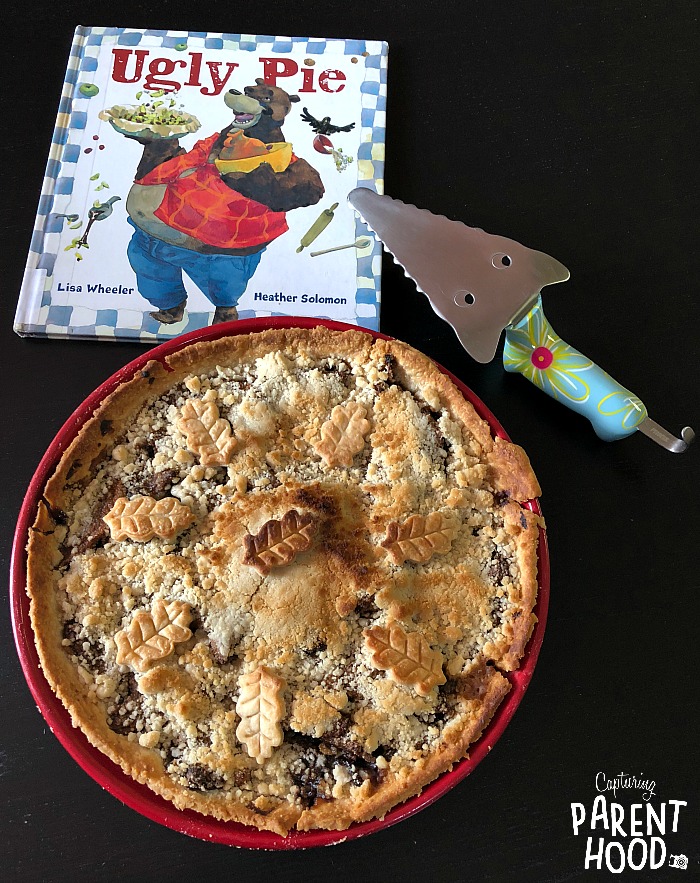
After reading this delightful story numerous times, my little nugget and I started getting our own hankering for Ugly Pie. Luckily, Bear shares his delicious recipe in the back of the book.

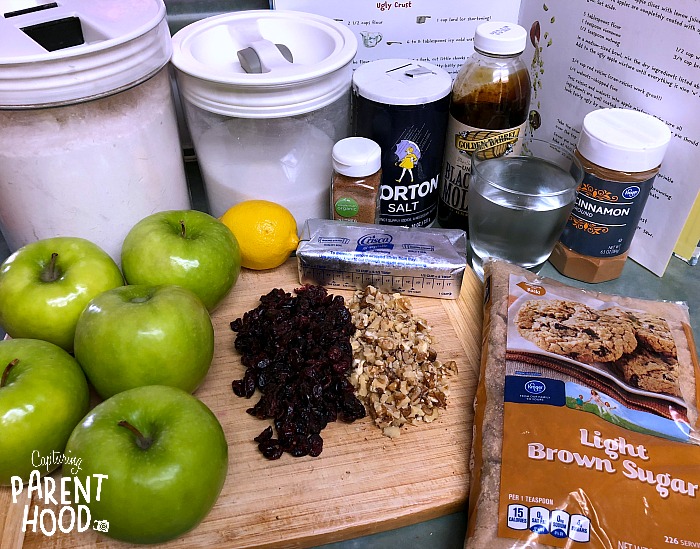
We gathered our ugly ingredients, donned our aprons, and embarked on a baking adventure!


Ugly Pie

**Note: The following recipe appears in the book, Ugly Pie by Lisa Wheeler, and is by no means my own personal recipe.**

Ingredients:

Ugly Pie Β© Capturing Parenthood

For the Crust:

  • 2-1/2 Cups All-Purpose Flour
  • 1 Cup Shortening
  • 1/2 tsp. Salt
  • 6-8 Tbsp. Icy Cold Water

For the Filling:

  • 6 Cups Granny Smith Apples, Peeled & Sliced
  • 1/4 Cup Molasses
  • 1 tsp. Lemon Juice
  • 5 Tbsp. All-Purpose Flour
  • 1 tsp. Cinnamon
  • 1/2 tsp. Nutmeg
  • 1/2 Cup Sugar
  • 3/4 Cup Brown Sugar
  • 3/4 Cup Dried Cranberries
  • 1/4 Cup Walnuts, Chopped

Instructions:

Ugly Pie Β© Capturing Parenthood

Preheat the oven to 400Β° F. Spray a 9-inch deep-dish pie plate with cooking spray, and set aside.

For the Crust:

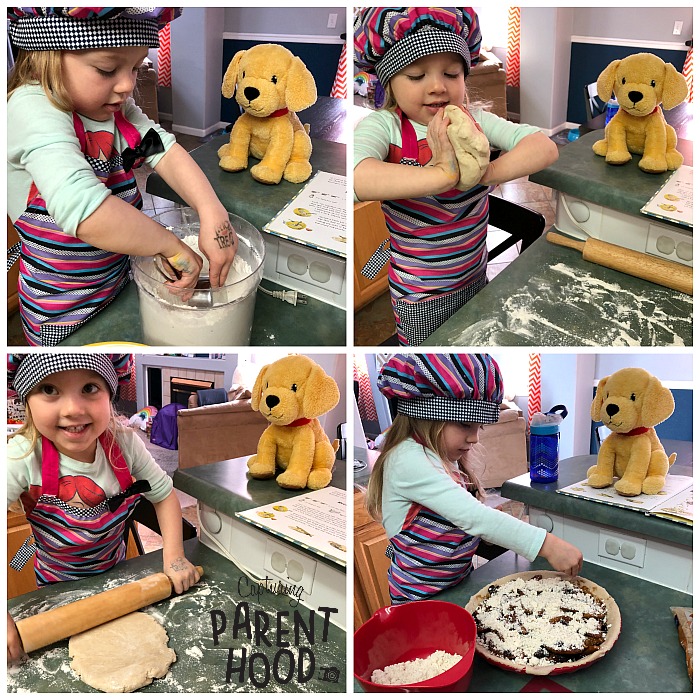
  1. Combine the flour and salt in a large bowl. Using a fork, cut small squares of shortening into the flour mixture, until the mixture turns into pea-sized balls. Measure out half of the mixture and set aside for later (it will become the pie topping).
  2. Next, add 1 tablespoon of the icy cold water to the remaining flour mixture. Toss with a fork. Continue adding icy cold water by the tablespoon, until the flour mixture forms into a ball of dough. Knead the dough with your hands.
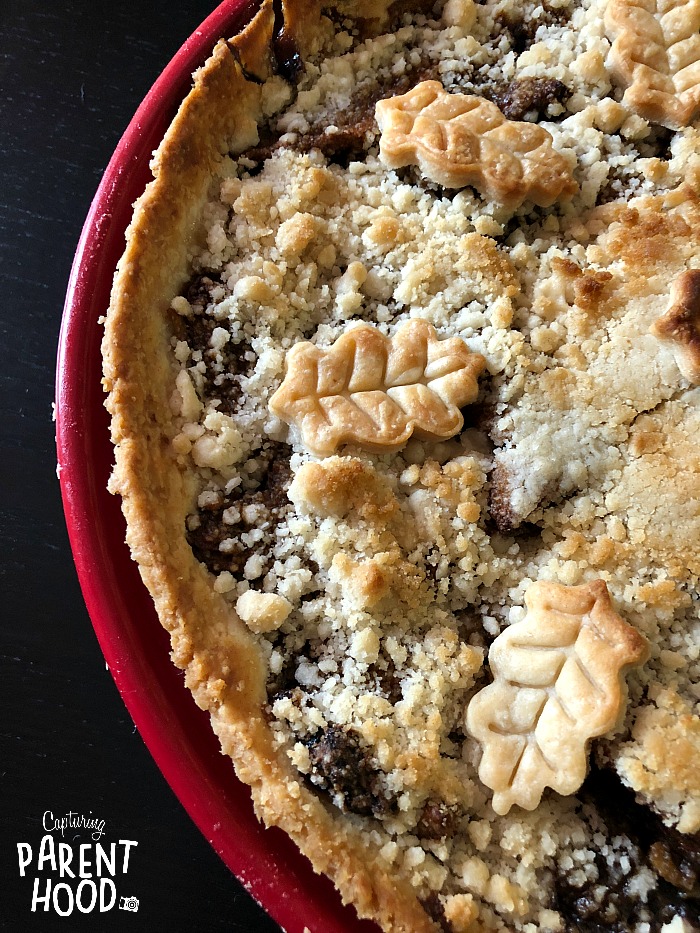
  3. Sprinkle some flour onto a flat surface. Roll the dough out evenly, until you have a large enough sheet of dough to fill your pie dish. Carefully place the dough into the pie dish and press firmly on the bottom and sides. Cut off any over-flowing dough with a knife. Feel free to create some decorative pie toppers with any extra dough. We used a leaf-shaped pie crust stamper to add a little more pizzazz to our pie.
  4. Set the crust aside and start working on the pie filling.

For the Filling:

  1. In a large bowl, toss the sliced apples with the lemon juice. Pour in the molasses and mix until the apple slices are thoroughly coated. Set aside.
  2. In another bowl, combine the flour, cinnamon, nutmeg, sugar, and brown sugar.
  3. Add the dry ingredients to the apple mixture and mix until thoroughly combined.
  4. Stir in the dried cranberries and walnuts.
  5. Pour the filling into the pie crust.
  6. Sprinkle the remaining flour/shortening mixture (that you set aside earlier, while making the crust) on top of the pie. Add any decorative pie toppers you may have created.
  7. Place the pie on a baking sheet and tent with aluminum foil.
  8. Bake atΒ 400Β° F for 40 minutes. Remove the foil and bake an additional 20 minutes. If you want the top to be more golden in color, place it under the broiler (set to low) for just a couple of minutes.
  9. Remove from the oven and place on a wire cooling rack. Let cool, prior to serving.
  10. Place a warm slice on a plate and top with a scoop of vanilla ice cream (if so desired). Enjoy!

I always associate the holidays with pie-baking season. My mom bakes an apple pie and pumpkin pie for both Thanksgiving and Christmas. And the occasional peach cobbler for my birthday (because it’s my favorite)! I’ve only made a few homemade pies in my lifetime…I usually stick with cakes…pies just seem so time-consuming and temperamental (those crusts can be tricky)! And I’m not very skilled at making them look pretty. But an Ugly Pie…a pie that doesn’t have to look perfect…sign me up! πŸ™‚

Ugly Pie Β© Capturing Parenthood

I had so much fun in the kitchen with my little nugget as we prepared our ugly crust and ugly filling. And we had another special helper (as you may have noticed in some of the photos). Biscuit (the dog) is the class pet in my daughter’s Pre-K class, and he was joining us for a few days. He was more than happy to help with our baking project. Scout and Max (our family dogs) were a bit jealous that Biscuit got to sit on the kitchen counter, and enjoy an entire piece of pie all to himself. I’m happy to report that our Ugly Pie received Biscuit’s (and our entire family’s) stamp of approval – two paws up!

Ugly Pie Β© Capturing Parenthood

I bet it would also be a lot of fun to make a non-edible Ugly Pie. Let your kiddo’s imagination run wild with all things ugly – mud, dirt, worms, dead leaves and grass. I think this might be next on our agenda. πŸ™‚ I can only imagine the recipe that our little nugget might concoct. Isn’t it fun to sit back and watch their creativity spring to life?

START SPREADING THE NEWS!

Related Posts

  • Summertime Citrus PotionsSummertime Citrus Potions
  • Sticker Color SortSticker Color Sort
  • DIY Pool Noodle SprinklerDIY Pool Noodle Sprinkler
  • Camping Crafts for KidsCamping Crafts for Kids
« Celebrating Holidays Through Literature – Thanksgiving Books 2018
Reese’s Turkeys »

Comments

  1. Karen C Holzwarth says

    May 27, 2019 at 11:52 AM

    Thank you so much for sharing the entire recipe! We own the book but I can’t find it and we want to make Ugly Pie for our Memorial Day cookout dinner! We’ve made it in the past when we first got the book and my girls were little. I always LOVED the book and the recipe!

    • Stacey says

      May 27, 2019 at 7:53 PM

      Hi Karen! I’m so happy that I could help! I hope that your Ugly Pie turned out great, and that you and your family had a wonderful Memorial Day!

Hello! Nice to meet you!

Welcome to the Capturing Parenthood blog! I'm Stacey...wife and first-time parent, former full-time working mom, turned stay-at-home mom. Join me as I capture and share my thoughts and experiences on this crazy adventure we call parenthood! Click here to learn more about me!

Search Capturing Parenthood

Instagram

Ok...@artwithmrs.e Haunted House project is hands- Ok...@artwithmrs.e Haunted House project is hands-down the best Halloween-themed art project out there! πŸ™ŒπŸ™ŒπŸ™Œ
We had a blast creating haunted houses for homeschool art this month! 🧑
...
We followed Kaitlyn's extremely helpful Haunted House Drawing Guide (you can find it over on her Teachers Pay Teachers account) and completed the project over the course of 3 lessons.
...
During our first lesson, we sketched our houses in pencil, and added some eerie exterior landscaping. πŸͺ¦πŸ¦‡
We popped in a few spooky characters (ghosts, spiders, pumpkins, and a vampire). πŸ‘»πŸ•·πŸŽƒπŸ§›
And then we traced over our pencil lines with black Sharpie.
...
During our next lesson, we used a coloring technique that we learned from Kristian @friendsartlab ❀️ We colored our pictures with oil pastels...and then painted over the top of the oil pastels with baby oil...it causes the oil pastels to bleed and blend together! 🀩
...
During our final lesson...we added more spooky characters to the inside of our house...that can peek out behind the doors and windows. πŸ’€πŸ§™β€β™€οΈπŸ‘»
To do this...I used an X-acto knife and carefully cut around the outside edges of the doors/windows (leaving the hinge sides intact so that they could fold open and closed).
We placed yellow construction paper in the background...and added witches, ghosts, skeletons, a mummy, and a Frankenstein! 😍
This step made our haunted houses really come to life...and we just can't thank Kaitlyn @artwithmrs.e enough for sharing this awesome lesson and drawing guide! THE ABSOLUTE BEST! ❀️❀️❀️
...
It was very evident how much our daughter loved this project...as we worked through each step...but the thing that solidified just how much she enjoyed it was - one weekend morning I walked downstairs to find her and her dad sitting at the table - and she was very excitedly teaching him how to draw his own haunted house - while she drew a few more herself (scroll to the last picture in the carousel)! πŸ₯°
...
#hauntedhouse #hauntedhouses #hauntedhousedrawing #directeddrawing #spookyart #halloween #happyhalloween #halloweenart #halloweenfun #elementaryart #homeschoolart #homeschool #homeschoolfun #capturingparenthood
I decided that these six little pumpkins needed a I decided that these six little pumpkins needed a permanent place on our feed...because WE GREW THEM OURSELVES!!! πŸŽƒ
That's right...first-time pumpkin-growers over here...and it was all actually a bit of a surprise. πŸ˜ƒ
...
You see, when we went to prep our garden beds this spring, we noticed a plant that had already started growing. We assumed it was a cucumber plant, since it was in the same place we had cucumbers last year.
We left it alone and planted a couple of other cucumber plants nearby. πŸ₯’
At first, the leaves on our mystery plant looked very similar to the leaves on our other cucumber plants.
But a couple of weeks later the plant had grown A LOT bigger. It was now obvious that it was not a cucumber plant. But what was it? πŸ€·β€β™€οΈ
...
And that's when it suddenly dawned on these exhausted parents, that our daughter had spontaneously tossed seeds from her pumpkin (last Halloween), into the garden bed. πŸ€¦β€β™€οΈ The mystery was finally solved...and by the looks of the large golden flowers that were emerging all over the vines...we figured we might have a few pumpkins come fall! πŸ™ŒπŸŽƒπŸ™Œ
...
It was so much fun to watch the pumpkin plant grow! 🀩 We had to cut down the wire on one side of our garden bed to let the vines out...and they ended up growing 6-10 feet long in both directions! 😳 It was crazy!
They put out the most gorgeous flowers...that the bees absolutely loved! 🧑 And soon enough, we spotted a few round gourds growing at the base of some of the flowers. They grew quickly...and then turned a beautiful shade of orange! 😍
...
Needless to say, we are now officially pumpkin-growing people! πŸ˜‚ My husband can't wait to plant more next year...and he's already looking in to different varieties - hoping to grow some larger jack-o-lantern style ones next season! πŸŽƒ
…
#pumpkins #growingpumpkins #ourpumpkinpatch #homegrownpumpkins #homegrown #homegarden #pumpkingrowing #gardening #fallharvest #happyhalloween #timetocarvesomepumpkins #gardensurprises #gardenfun #capturingparenthood
Free the Frankensteins from the Frozen Rainbow Bra Free the Frankensteins from the Frozen Rainbow Brain! 😬🌈🧠
…
Yesterday, we shared how we made this colorful, frozen rainbow brain - full of Frankenstein mini erasers…and today we wanted to show you what became of our beautiful brain! πŸ˜ƒ
…
We popped it out onto a tray, grabbed a shaker of salt, a bottle of warm water (colored red for added effect), and some tongs.
And then it was time to Free the Frankensteins (our daughter coined the phrase)! πŸ˜‰
…
This spooky activity provides chilly sensory play, motor skills practice, and scientific exploration (salt and warm water speed-up the melting process)! πŸ™ŒπŸ™ŒπŸ™Œ
As an added bonus…you also get some color-mixing! And the addition of the salt makes it extra sparkly too! 😍🀩😍
…
Eventually, all you’re left with is some mini erasers floating in a pool of colorful water…and a happy kid! ❀️❀️❀️
…
#frozenbrain #rainbowbrain #frozenrainbowbrain #brains #freethefrankensteins #halloween #happyhalloween #halloweenactivities #halloweenactivitiesforkids #halloweensensoryplay #sensoryplay #sensoryexploration #motorskills #motorskillsdevelopment #scienceforkids #kidscience #funactivities #funactivitiesforkids #halloweenfun #capturingparenthood
We are definitely getting into the fall and Hallow We are definitely getting into the fall and Halloween spirit...so during a recent homeschool art session, we decided to make some air-dry clay pumpkins and jack-o-lanterns! πŸŽƒπŸŽƒπŸŽƒ
...
Back in 2019, Lauralee @2art.chambers shared several colorful, air-dry clay pumpkins that her students made...and after rediscovering the saved post, I decided that it would be a perfect October art lesson for us too! 🧑
...
We used various colors of air-dry clay, and rolled each color into whatever pumpkin shape we wanted...and then we added our lines/indentations using the side of a credit card. πŸ’³ The stems are just small, broken pieces of old crayons (another genius idea from Lauralee). πŸ– And we topped our stems with pieces of pipe cleaner, to create the little curly cues. 😍
...
Once we had our pumpkins...we decided to change things up a bit, and grabbed our stash of googly eyes. πŸ‘€ (Most of) our fall pumpkins then transformed into Halloween jack-o-lanterns! πŸŽƒ
We pressed the googly eyes into the clay, and we used a few small tools (that came with our box of air-dry clay) to add their mouths. πŸ˜ƒ
...
And now we have a cute and colorful crew of clay pumpkins adorning our mantle! πŸŽƒπŸ§‘πŸŽƒ
...
#pumpkins #jackolanterns #claypumpkins #airdryclay #airdryclaycreation #airdryclayart #airdryclaypumpkins #elementaryart #fallartprojects #fallartprojectsforkids #halloweenart #halloweenartprojects #halloweenartprojectsforkids #homeschool #homeschoolart #homeschoolfun #halloween #happyhalloween #capturingparenthood
Andrew from @elementaryarts shared a patterned, bl Andrew from @elementaryarts shared a patterned, block letter name project a couple of weeks ago (I'll share the post in stories today), and I immediately added it to our list of art projects to do this year! 😍
But we decided to switch things up a little bit! Instead of using our names, we each picked a color that we like...wrote the name of the color in block letters on our paper...and created our color patterns using at least two different shades of our chosen color. πŸ–
...
This colorful project ended up being a lot of fun, and also very relaxing...as we all quietly focused, and zoned in on adding the color patterns around all of our letters. It was actually a bit hypnotizing! 🀩
...
Needless to say, we are really happy with the way our block letter color project turned out! πŸ™Œ We even had a special guest who wanted to join in on this art project! ❀️
...
P.S. We also used Andrew’s free TPT handout on how to make block letters! The bundle includes bubble letters, cursive letters, graffiti letters, and more! πŸ‘
…
#blockletters #blocklettering #colors #color #colorful #artproject #artforkids #kidart #elementaryart #artactivity #artactivities #artactivitiesforkids #colorfun #homeschool #homeschoolart #homeschoolfun #capturingparenthood
We created self-portraits for our first art projec We created self-portraits for our first art project of our homeschool year...and we are pretty obsessed with them! 🀩✏️🀩
...
I love the idea of doing a self-portrait project at the beginning of the year, and then again at the end of the year...so that we can see how much we've grown and changed.
...
We used Kaitlyn's @artwithmrs.e Simple Self-Portrait Drawing Guide and it was so incredibly helpful (especially for this new homeschool teacher who wouldn't necessarily list drawing as one of her stronger suits). πŸ˜‰
We actually purchased her entire Guided Drawing Bundle (over on Teachers Pay Teachers) and we highly recommend it! πŸ™ŒπŸ™ŒπŸ™Œ
...
We looked through the self-portrait drawing guide to get different ideas for our eyes, nose, mouth, and hair. πŸ‘€πŸ‘ƒπŸ‘„
...
Now...if you caught our stories earlier this week, you know that our daughter recently made a pretty big change to her hair (that included a partial side-shave and bob-length cut - she also dyed it blue). πŸ’‡β€β™€οΈ
She was used to drawing pictures of herself with her long, blonde locks...and her new hairstyle proved rather difficult. But she persevered, and ended up with a self-portrait that she was truly proud of! πŸ₯°
...
When we were finished drawing our likenesses, we decided to cut them out and create a special background to glue them onto. I went with random black and white designs...and our nugget decided to draw various things that she loves (her family, winter, candy, books, dolphins...and more)! ❀️
...
It was such a fun project...and I can't wait to see what our self-portraits look like at the end of our school year! πŸ˜ƒ
...
#selfportrait #selfportraits #homeschool #homeschoolart #elementaryart #artactivities #artactivitiesforkids #artforkids #kidart #homeschoolfun #capturingparenthood
Follow on Instagram

Popular Posts

Virtual Spring Break: Day Five - New York City

Virtual Spring Break: Day Five – New York City

Virtual Spring Break: Day Four - Mexico

Virtual Spring Break: Day Four – Mexico

Virtual Spring Break: Day Three - India

Virtual Spring Break: Day Three – India

Join Us on Instagram

Ok...@artwithmrs.e Haunted House project is hands- Ok...@artwithmrs.e Haunted House project is hands-down the best Halloween-themed art project out there! πŸ™ŒπŸ™ŒπŸ™Œ
We had a blast creating haunted houses for homeschool art this month! 🧑
...
We followed Kaitlyn's extremely helpful Haunted House Drawing Guide (you can find it over on her Teachers Pay Teachers account) and completed the project over the course of 3 lessons.
...
During our first lesson, we sketched our houses in pencil, and added some eerie exterior landscaping. πŸͺ¦πŸ¦‡
We popped in a few spooky characters (ghosts, spiders, pumpkins, and a vampire). πŸ‘»πŸ•·πŸŽƒπŸ§›
And then we traced over our pencil lines with black Sharpie.
...
During our next lesson, we used a coloring technique that we learned from Kristian @friendsartlab ❀️ We colored our pictures with oil pastels...and then painted over the top of the oil pastels with baby oil...it causes the oil pastels to bleed and blend together! 🀩
...
During our final lesson...we added more spooky characters to the inside of our house...that can peek out behind the doors and windows. πŸ’€πŸ§™β€β™€οΈπŸ‘»
To do this...I used an X-acto knife and carefully cut around the outside edges of the doors/windows (leaving the hinge sides intact so that they could fold open and closed).
We placed yellow construction paper in the background...and added witches, ghosts, skeletons, a mummy, and a Frankenstein! 😍
This step made our haunted houses really come to life...and we just can't thank Kaitlyn @artwithmrs.e enough for sharing this awesome lesson and drawing guide! THE ABSOLUTE BEST! ❀️❀️❀️
...
It was very evident how much our daughter loved this project...as we worked through each step...but the thing that solidified just how much she enjoyed it was - one weekend morning I walked downstairs to find her and her dad sitting at the table - and she was very excitedly teaching him how to draw his own haunted house - while she drew a few more herself (scroll to the last picture in the carousel)! πŸ₯°
...
#hauntedhouse #hauntedhouses #hauntedhousedrawing #directeddrawing #spookyart #halloween #happyhalloween #halloweenart #halloweenfun #elementaryart #homeschoolart #homeschool #homeschoolfun #capturingparenthood
I decided that these six little pumpkins needed a I decided that these six little pumpkins needed a permanent place on our feed...because WE GREW THEM OURSELVES!!! πŸŽƒ
That's right...first-time pumpkin-growers over here...and it was all actually a bit of a surprise. πŸ˜ƒ
...
You see, when we went to prep our garden beds this spring, we noticed a plant that had already started growing. We assumed it was a cucumber plant, since it was in the same place we had cucumbers last year.
We left it alone and planted a couple of other cucumber plants nearby. πŸ₯’
At first, the leaves on our mystery plant looked very similar to the leaves on our other cucumber plants.
But a couple of weeks later the plant had grown A LOT bigger. It was now obvious that it was not a cucumber plant. But what was it? πŸ€·β€β™€οΈ
...
And that's when it suddenly dawned on these exhausted parents, that our daughter had spontaneously tossed seeds from her pumpkin (last Halloween), into the garden bed. πŸ€¦β€β™€οΈ The mystery was finally solved...and by the looks of the large golden flowers that were emerging all over the vines...we figured we might have a few pumpkins come fall! πŸ™ŒπŸŽƒπŸ™Œ
...
It was so much fun to watch the pumpkin plant grow! 🀩 We had to cut down the wire on one side of our garden bed to let the vines out...and they ended up growing 6-10 feet long in both directions! 😳 It was crazy!
They put out the most gorgeous flowers...that the bees absolutely loved! 🧑 And soon enough, we spotted a few round gourds growing at the base of some of the flowers. They grew quickly...and then turned a beautiful shade of orange! 😍
...
Needless to say, we are now officially pumpkin-growing people! πŸ˜‚ My husband can't wait to plant more next year...and he's already looking in to different varieties - hoping to grow some larger jack-o-lantern style ones next season! πŸŽƒ
…
#pumpkins #growingpumpkins #ourpumpkinpatch #homegrownpumpkins #homegrown #homegarden #pumpkingrowing #gardening #fallharvest #happyhalloween #timetocarvesomepumpkins #gardensurprises #gardenfun #capturingparenthood
Free the Frankensteins from the Frozen Rainbow Bra Free the Frankensteins from the Frozen Rainbow Brain! 😬🌈🧠
…
Yesterday, we shared how we made this colorful, frozen rainbow brain - full of Frankenstein mini erasers…and today we wanted to show you what became of our beautiful brain! πŸ˜ƒ
…
We popped it out onto a tray, grabbed a shaker of salt, a bottle of warm water (colored red for added effect), and some tongs.
And then it was time to Free the Frankensteins (our daughter coined the phrase)! πŸ˜‰
…
This spooky activity provides chilly sensory play, motor skills practice, and scientific exploration (salt and warm water speed-up the melting process)! πŸ™ŒπŸ™ŒπŸ™Œ
As an added bonus…you also get some color-mixing! And the addition of the salt makes it extra sparkly too! 😍🀩😍
…
Eventually, all you’re left with is some mini erasers floating in a pool of colorful water…and a happy kid! ❀️❀️❀️
…
#frozenbrain #rainbowbrain #frozenrainbowbrain #brains #freethefrankensteins #halloween #happyhalloween #halloweenactivities #halloweenactivitiesforkids #halloweensensoryplay #sensoryplay #sensoryexploration #motorskills #motorskillsdevelopment #scienceforkids #kidscience #funactivities #funactivitiesforkids #halloweenfun #capturingparenthood
We are definitely getting into the fall and Hallow We are definitely getting into the fall and Halloween spirit...so during a recent homeschool art session, we decided to make some air-dry clay pumpkins and jack-o-lanterns! πŸŽƒπŸŽƒπŸŽƒ
...
Back in 2019, Lauralee @2art.chambers shared several colorful, air-dry clay pumpkins that her students made...and after rediscovering the saved post, I decided that it would be a perfect October art lesson for us too! 🧑
...
We used various colors of air-dry clay, and rolled each color into whatever pumpkin shape we wanted...and then we added our lines/indentations using the side of a credit card. πŸ’³ The stems are just small, broken pieces of old crayons (another genius idea from Lauralee). πŸ– And we topped our stems with pieces of pipe cleaner, to create the little curly cues. 😍
...
Once we had our pumpkins...we decided to change things up a bit, and grabbed our stash of googly eyes. πŸ‘€ (Most of) our fall pumpkins then transformed into Halloween jack-o-lanterns! πŸŽƒ
We pressed the googly eyes into the clay, and we used a few small tools (that came with our box of air-dry clay) to add their mouths. πŸ˜ƒ
...
And now we have a cute and colorful crew of clay pumpkins adorning our mantle! πŸŽƒπŸ§‘πŸŽƒ
...
#pumpkins #jackolanterns #claypumpkins #airdryclay #airdryclaycreation #airdryclayart #airdryclaypumpkins #elementaryart #fallartprojects #fallartprojectsforkids #halloweenart #halloweenartprojects #halloweenartprojectsforkids #homeschool #homeschoolart #homeschoolfun #halloween #happyhalloween #capturingparenthood
Andrew from @elementaryarts shared a patterned, bl Andrew from @elementaryarts shared a patterned, block letter name project a couple of weeks ago (I'll share the post in stories today), and I immediately added it to our list of art projects to do this year! 😍
But we decided to switch things up a little bit! Instead of using our names, we each picked a color that we like...wrote the name of the color in block letters on our paper...and created our color patterns using at least two different shades of our chosen color. πŸ–
...
This colorful project ended up being a lot of fun, and also very relaxing...as we all quietly focused, and zoned in on adding the color patterns around all of our letters. It was actually a bit hypnotizing! 🀩
...
Needless to say, we are really happy with the way our block letter color project turned out! πŸ™Œ We even had a special guest who wanted to join in on this art project! ❀️
...
P.S. We also used Andrew’s free TPT handout on how to make block letters! The bundle includes bubble letters, cursive letters, graffiti letters, and more! πŸ‘
…
#blockletters #blocklettering #colors #color #colorful #artproject #artforkids #kidart #elementaryart #artactivity #artactivities #artactivitiesforkids #colorfun #homeschool #homeschoolart #homeschoolfun #capturingparenthood
We created self-portraits for our first art projec We created self-portraits for our first art project of our homeschool year...and we are pretty obsessed with them! 🀩✏️🀩
...
I love the idea of doing a self-portrait project at the beginning of the year, and then again at the end of the year...so that we can see how much we've grown and changed.
...
We used Kaitlyn's @artwithmrs.e Simple Self-Portrait Drawing Guide and it was so incredibly helpful (especially for this new homeschool teacher who wouldn't necessarily list drawing as one of her stronger suits). πŸ˜‰
We actually purchased her entire Guided Drawing Bundle (over on Teachers Pay Teachers) and we highly recommend it! πŸ™ŒπŸ™ŒπŸ™Œ
...
We looked through the self-portrait drawing guide to get different ideas for our eyes, nose, mouth, and hair. πŸ‘€πŸ‘ƒπŸ‘„
...
Now...if you caught our stories earlier this week, you know that our daughter recently made a pretty big change to her hair (that included a partial side-shave and bob-length cut - she also dyed it blue). πŸ’‡β€β™€οΈ
She was used to drawing pictures of herself with her long, blonde locks...and her new hairstyle proved rather difficult. But she persevered, and ended up with a self-portrait that she was truly proud of! πŸ₯°
...
When we were finished drawing our likenesses, we decided to cut them out and create a special background to glue them onto. I went with random black and white designs...and our nugget decided to draw various things that she loves (her family, winter, candy, books, dolphins...and more)! ❀️
...
It was such a fun project...and I can't wait to see what our self-portraits look like at the end of our school year! πŸ˜ƒ
...
#selfportrait #selfportraits #homeschool #homeschoolart #elementaryart #artactivities #artactivitiesforkids #artforkids #kidart #homeschoolfun #capturingparenthood
Follow on Instagram

Copyright © 2025 · glam theme by Restored 316

  • Policies + Disclosure
  • Contact