We finished decorating our Christmas tree last week, and I cannot stop staring at it! One of my favorite things to do during dark holiday evenings, is to turn on the Christmas tree lights…turn off the living room lights…and gaze at our beautiful tree (while snuggled beneath a warm, cozy blanket). It’s incredibly relaxing, mesmerizing…and oddly soothing. I love the sparkle of the lights, and how they reflect off of various ornaments. I love looking at the handcrafted ornaments that my husband and I made during our very first Christmas together. But my favorite ornaments are the ones that we’ve created with our little nugget over the past few years. We love having an assortment of homemade Christmas ornaments hanging from our tree – we try to craft a new one every year. And this year, these Paint-Marbled Christmas Ornaments are going to add the perfect pop of color!
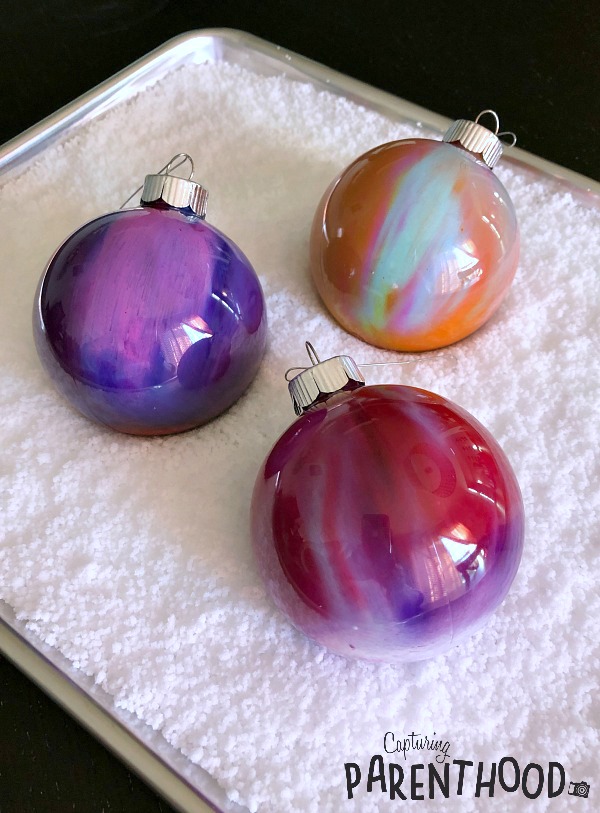
Your kiddos will love this ornament craft! Not only do they get to use a variety of vibrant colors…they also get to watch the colors spin and swirl…as they shake their ornament up and down, and round and round. Every ornament will look completely unique – it’s like ornament process art! And the clear plastic orbs are kid-friendly, so there’s no need to worry if an ornament gets dropped.
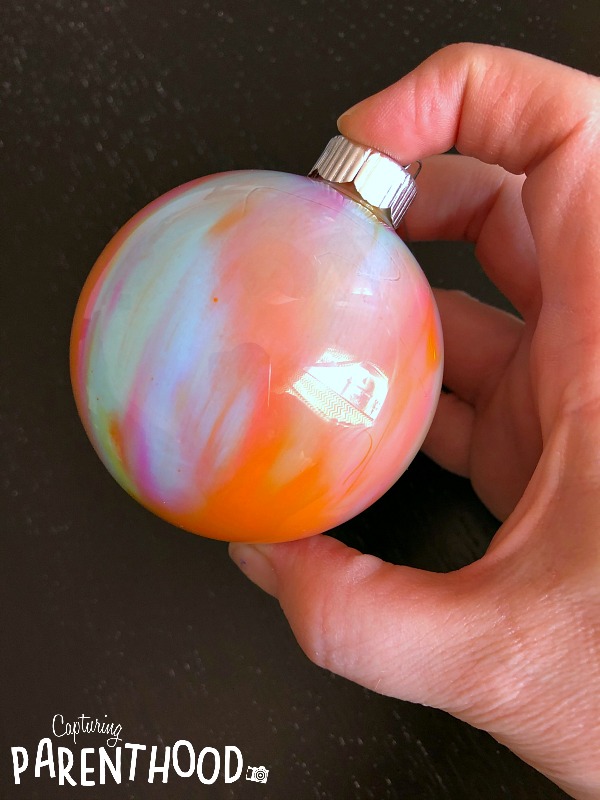
These colorful baubles will brighten up any Christmas tree, but they also make wonderful holiday gifts! I don’t know about you…but I find that homemade gifts from little ones are always the most treasured. I mean, I have yet to meet a grandparent who didn’t love receiving a handmade craft from their grandchild. 🙂
Paint-Marbled Christmas Ornaments
Supplies:
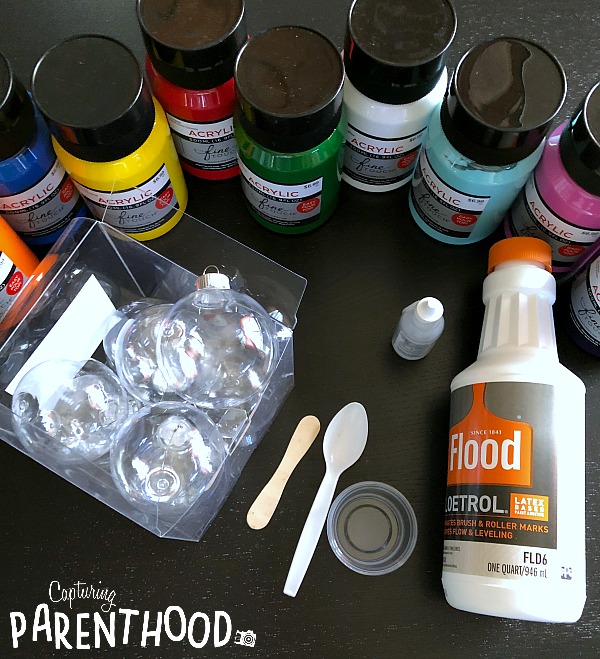
- Acrylic Paint (in the colors of your choosing)
- Clear Plastic Ornaments with Removable Tops (we found ours at Hobby Lobby)
- Flood Floetrol Paint Additive (you can also use water)
- Silicone Lubricant (optional)
- Small Plastic Cups
- Small Wooden Craft Sticks or Plastic Spoons
- Tape
- Paper Towels
- Ornament Hooks (or ribbon)
Instructions:
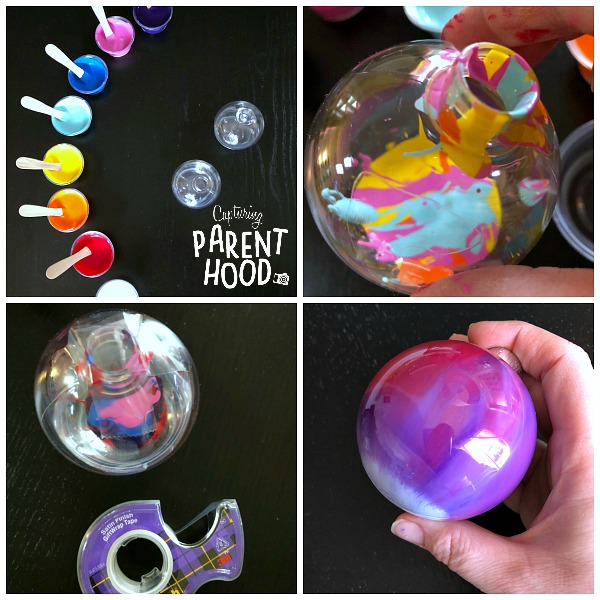
- Remove the metal caps from the plastic ornaments, and set aside.
- Set out a small plastic cup (and small wooden craft stick, or plastic spoon) for each color of acrylic paint that you plan to use. Squirt a single color of paint into each cup.
- Next, you will need to thin the paint, so that it can move more freely around the inside of the ornament. We used a paint additive called Floetrol (that I’ve used for acrylic pour paintings). I usually start by adding a couple of squirts of the additive to a paint-filled cup, and then mix it together with a small wooden craft stick. If the paint mixture looks runny enough, I move on. If is still seems too thick…I’ll add a couple more squirts of additive. Note: If you do not want to purchase a paint additive, you can also use water.
- Repeat the above step for each color of paint that you plan to use.
- At this point, I also place one drop of silicone lubricant into each paint cup. This is another ingredient that I typically use for acrylic paint pours. Silicone can create beautiful cells within the paint. This is a completely optional step…and if I’m being honest, I’m not even sure it really affected the results of the ornaments all that much. 🙂
- Once you have all of your paints ready to go…grab a plastic ornament. Select 3-4 colors of paint that you would like to use (per ornament). I recommend using four (or fewer) paint colors at a time…you do not want to end up with brown ornaments.
- Carefully pour a bit of each paint color into the opening of the ornament. Cover the opening with a piece of tape.
- Now, it’s time for the fun part. Shake! Shake! Shake!
- Once the interior of the ornament is coated in paint, and you are satisfied with how it looks, go ahead and remove the tape from the ornament’s opening. Carefully balance the ornament (opening side down) on a sheet of paper towels…so that any residual paint can drain out.
- Once the residual paint has drained, set the ornament aside (with the opening facing up) to dry. We left ours to dry overnight.
- Once the paint has completely dried, pop the metal caps back on the ornaments. Attach an ornament hook, or a piece of festive ribbon, to each cap.
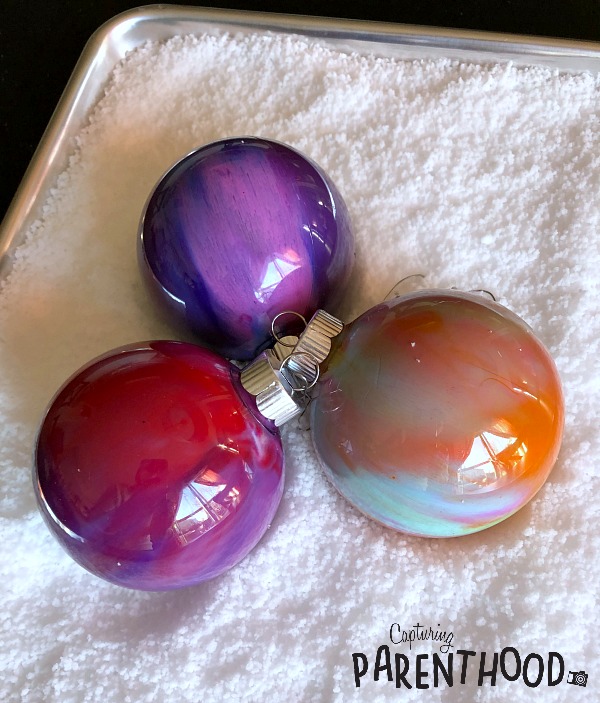
- Hang your new, beautiful, paint-marbled ornaments on the Christmas tree…or gift them to friends and family!
♫ Shake…shake…shake. Shake…shake…shake. Shake those ornaments! Shake those ornaments! ♫ Sorry…just having a brief KC and the Sunshine Band moment. 🙂
I first stumbled across this brilliant ornament idea, over on the @friendsartlab Instagram feed! Kristian is always sharing the most marvelous ideas…so make sure to go and give her a follow!
And if you’re looking for more homemade ornament crafts, make sure to check out our Nail Polish Marbled Christmas Ornaments; our Pom Photo Ornaments; our Simple Snowman Ornaments; and our Pipe Cleaner Candy Canes!
HAPPY HOLIDAYS!
