I’ve loved going camping for as long as I can remember. Most of my summer vacations as a child involved camping…usually on one of the beautiful sandy beaches of Lake Powell. Luckily, I married someone with the same love for spending time outdoors. Our simple car camping trips progressed into longer backpacking adventures over the years. We’ve been lucky enough to camp in some pretty remote, yet spectacular places. We would like to instill the same love and appreciation that we have for camping and the outdoors, in our little nugget. And one of the fun ways that we’ve found to celebrate the world of camping with her, is by creating some fantastic Camping Crafts for Kids!
We introduced our daughter to the wonders of sleeping under the stars last summer…with a couple of backyard camping trips. She didn’t last through the entire night in the tent, so we gave it another shot this summer. We pitched our tent, and tossed in our sleeping bags and pillows (along with a few bedtime stories and stuffed animals). We sat by the crackling fire in our fire pit, roasted marshmallows, and devoured s’mores. And when it was well past our daughter’s normal bedtime, we crawled in the tent to go to sleep. We survived the night, and our little nugget has been begging to camp out every single night since. 🙂
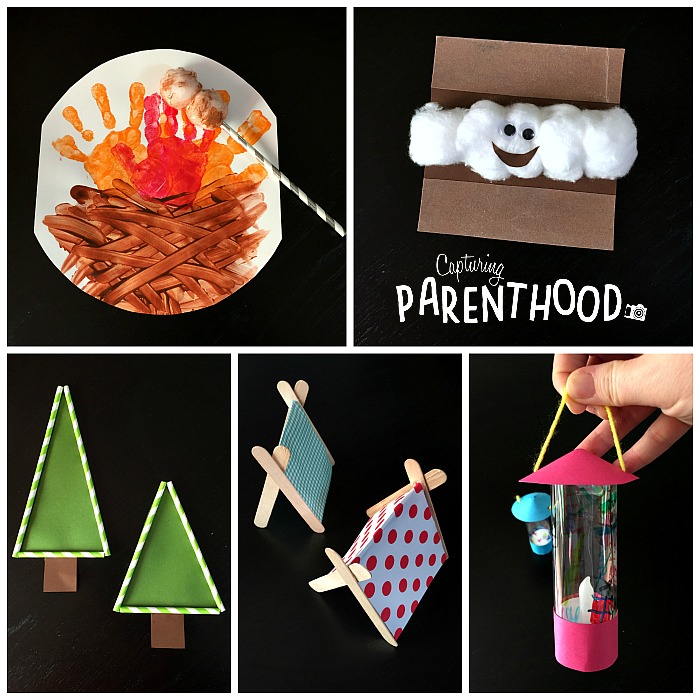
To tide her over, we decided to have a camping craft session, where she made her very own campfire with roasted marshmallows, a smiley s’more, evergreen trees, tents for her dinosaurs to enjoy, and her very own (functioning) camping lantern!
Handprint Campfire
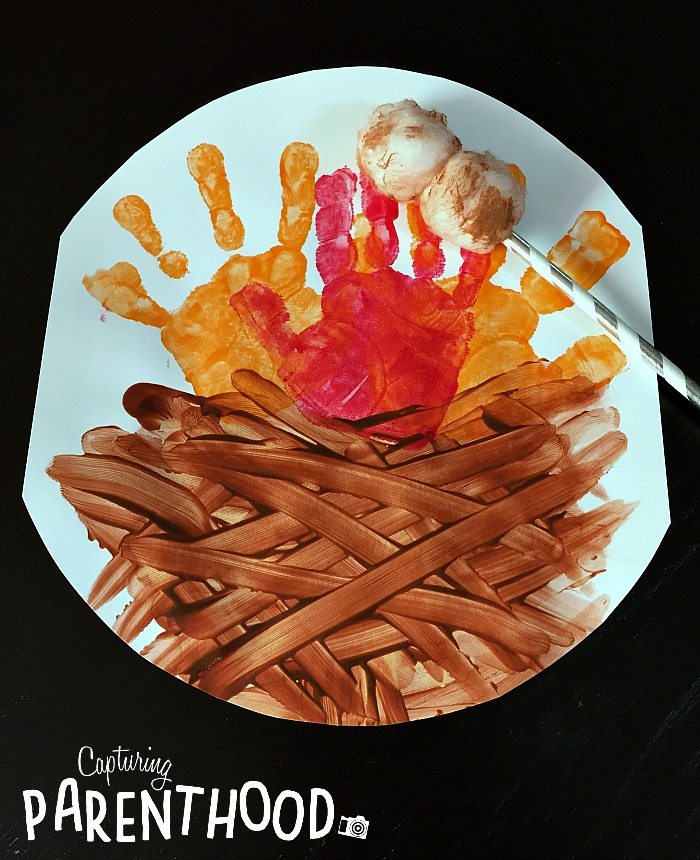
Our little nugget is all about handprint and finger-painting art, so when I stumbled across this fun Handprint Campfire idea, over on the Glued to My Crafts blog, I knew it would be a hit!
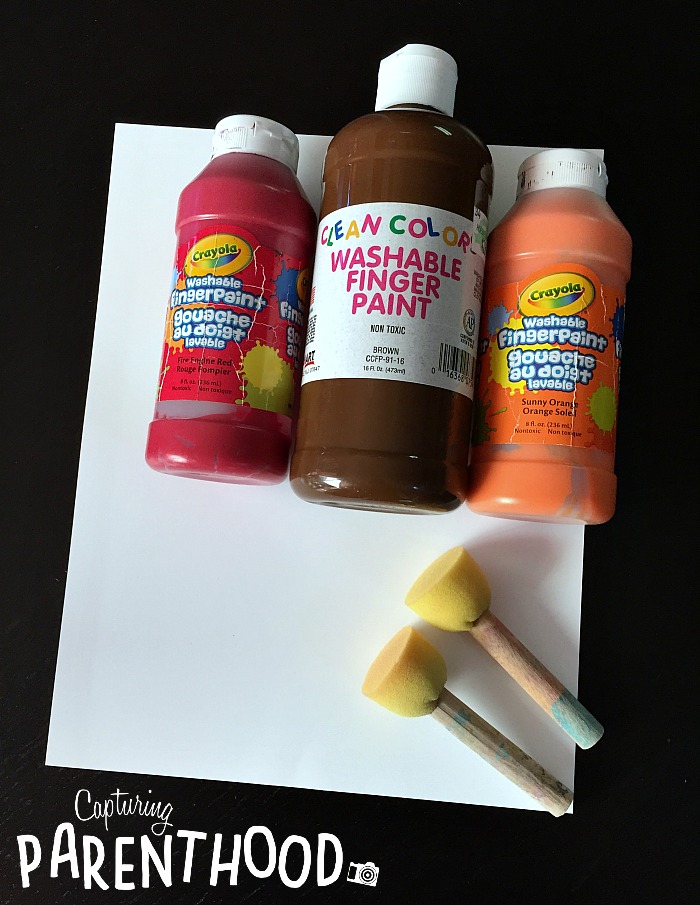
To create your very own handprint campfire, you will need the following supplies: white paper or card stock, paint (red, orange, and brown), and a sponge applicator (or paintbrush). We find that sponge applicators work the best for us when we’re doing handprint painting. If you would also like to add some roasted marshmallows (because, what’s a campfire without marshmallows), grab a paper straw and a couple of cotton balls as well.
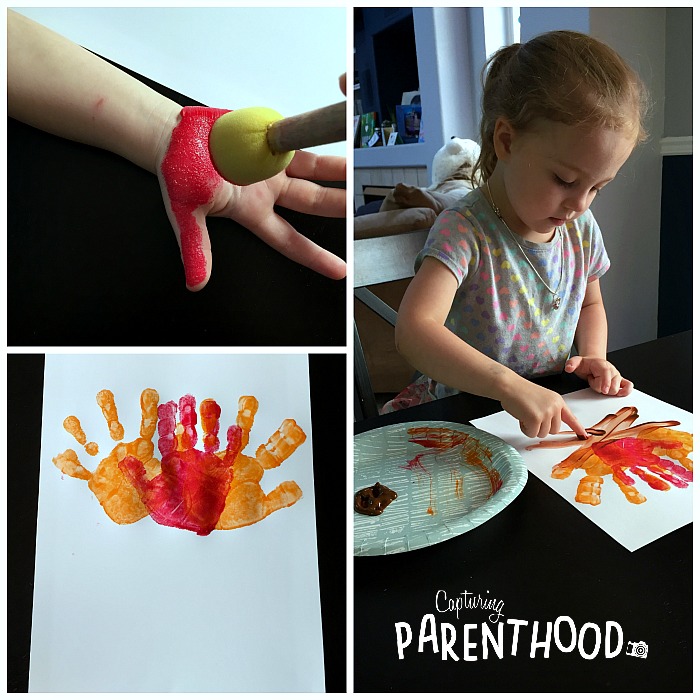
Start by applying orange paint to one of your child’s hands. Place it down on the paper, toward the left-hand side, and press firmly to create the handprint. Apply another coat of orange paint to the same hand and make another handprint toward the right-hand side of the paper. Apply red paint to your child’s other hand, and create one final handprint in the center of the two orange prints. Now you have fire! Wash the paint from your child’s hands. Once their hands are clean, grab some brown paint to use to create the logs of the campfire. Our daughter created the logs by moving her paint-covered finger in a large “x” shape below the flames. We wanted our marshmallows to look like they were actually roasting in the fire, so I gently dabbed them in some of our extra brown paint and then blotted them on a dry paper towel. Once the paint had dried completely, we glued our cotton balls to our paper straw, and then glued our marshmallow stick on top of our campfire.
If you’re roasting marshmallows in a campfire, odds are you’re getting ready to create some s’mores…the notoriously delicious and messy camping treat! Roasted marshmallows on their own are pretty tasty…but, you’ve got to have at least one s’more, am I right? 🙂
Smiley S’more
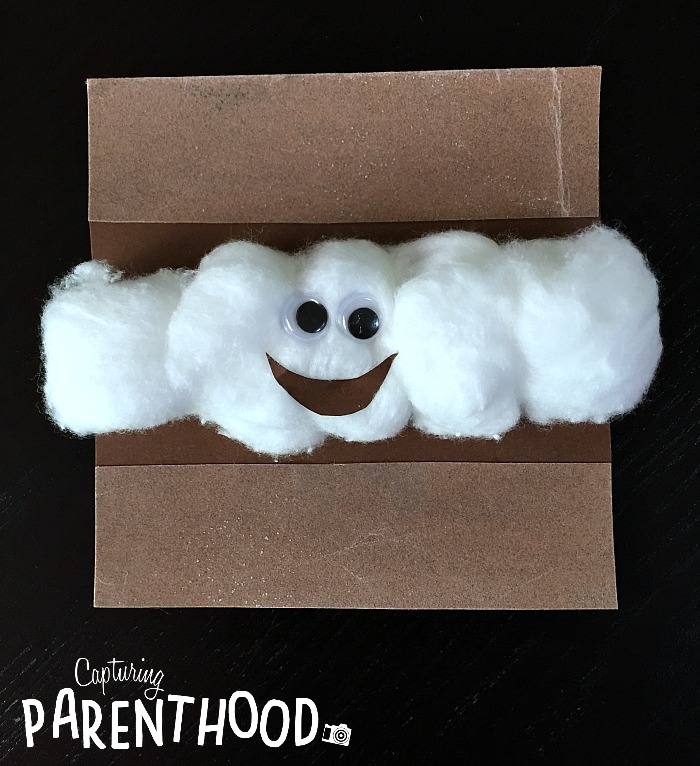
So, while I was admiring Stacey’s handprint campfire craft (over on the Glued to My Crafts blog), I happened to spy a picture of her Paper Plate S’mores craft, as well. That single photo inspired us to create our very own smiley s’more!
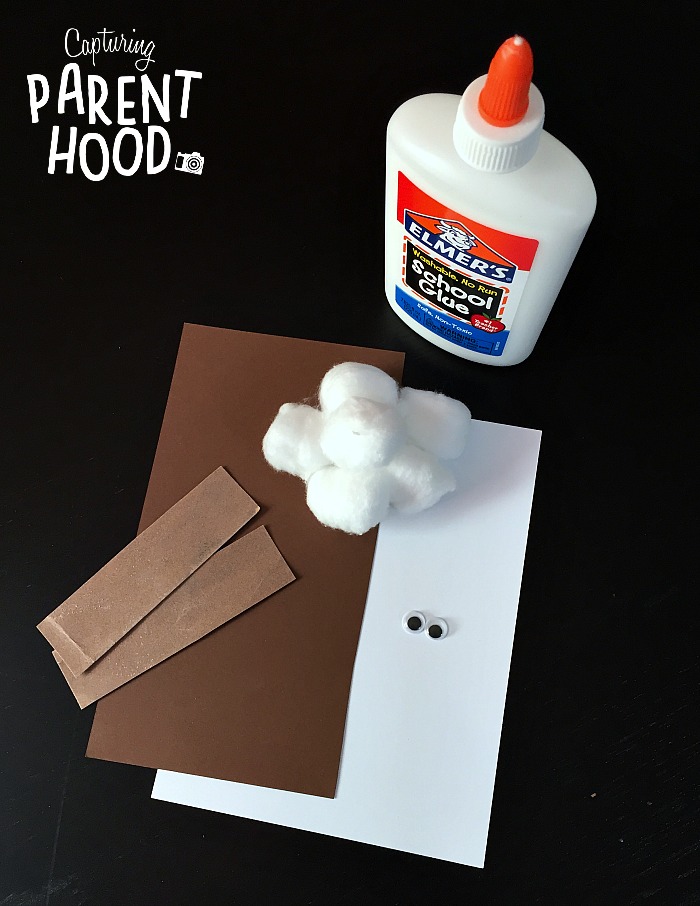
We were all set to use different shades of brown paper for our graham crackers and chocolate, when I decided that it would be more exciting to use some sandpaper for our graham crackers…to add a fun textural element! Therefore, the supplies that we used to create this adorable smiling s’more are as follows: paper or card stock, sandpaper, dark brown construction paper, cotton balls, two googly eyes, and glue.
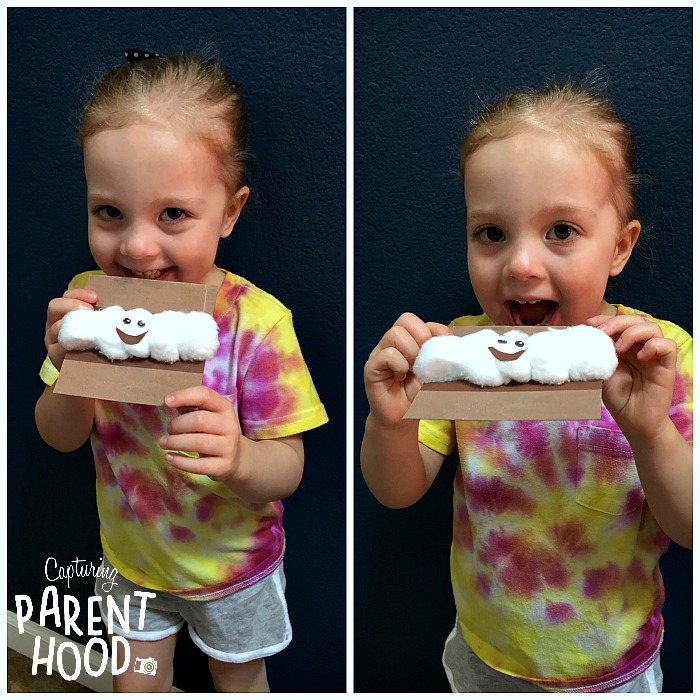
We cut a square of white card stock, in the overall size that we wanted our s’more to be…we just needed a piece of paper, as a background, to adhere everything else to. We glued a square of dark brown construction paper (chocolate) in the middle. Next, we glued a strip of sandpaper (graham cracker) to the top and bottom of our card stock, covering the edges of our brown paper. We glued our cotton balls (marshmallows) across the center of our s’more, making sure not to completely cover the chocolate layers. Once the cotton balls were adhered, we carefully glued two googly eyes and a brown paper smile, in the middle of the cotton balls. Bon appetite! Just kidding…please don’t eat this s’more! 🙂
Paper Straw Trees
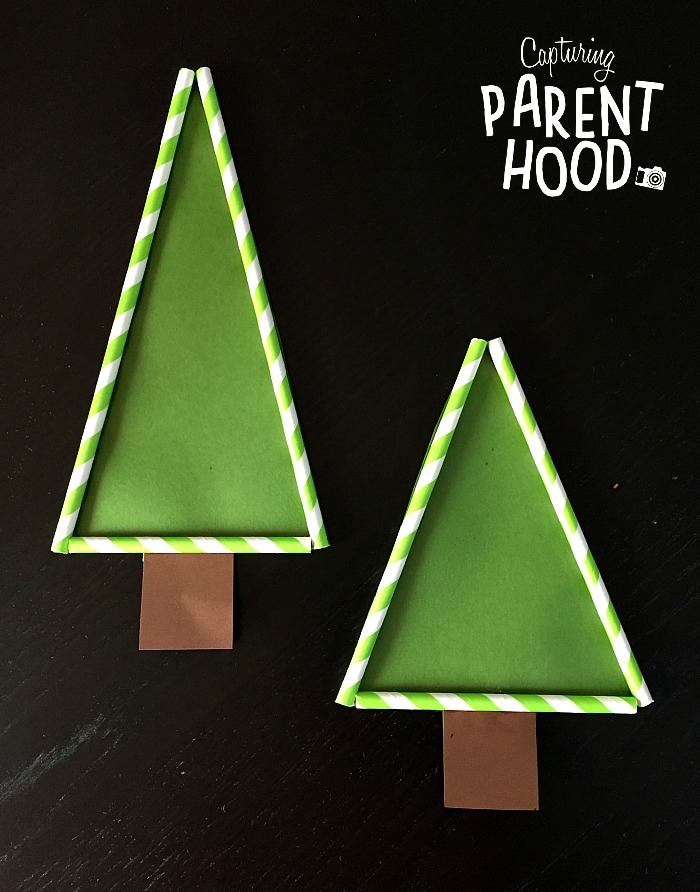
It just wouldn’t be camping if there were no trees. Luckily, we have a lot of lush green trees in our backyard. 🙂 One of my favorite things to do while camping is to watch aspen leaves blowing in the wind on a sunny day…it’s magical and hypnotizing. In Colorado, we also have a lot of pine trees, so I figured it would be fun to create some simple evergreen trees using some green and white paper straws.
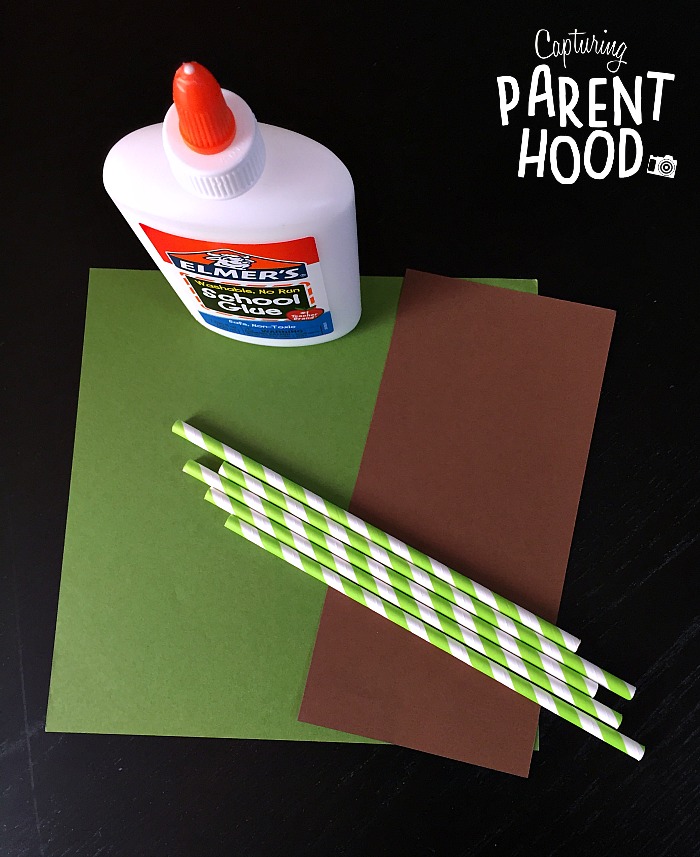
We also utilized some green and brown construction paper, glue and a pair of scissors. We piped a strip of glue on the back side of two straws and adhered them to the green paper, in a triangular shape. I cut another straw to fit as the base of our tree. We made a second, shorter tree the same way. Once the glue had dried completely, we cut around the trees, along the outside edge of the straws. To complete the look, we glued a brown rectangular trunk onto the bottom of each tree. Easy peasy! I love how they add the much-needed natural element to all of our camping crafts.
Popsicle Stick Tents
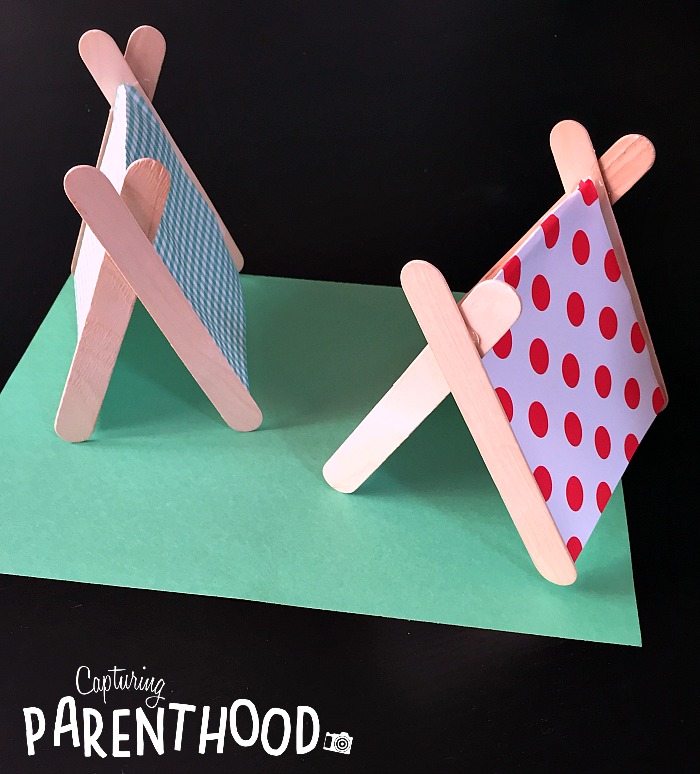
We almost always sleep in a tent when we go camping, so we absolutely needed to craft one (or two). I noticed that Stacey (Glued to My Crafts) had an adorable one-dimensional popsicle stick tent craft featured on her blog, but we wanted our tents to be three-dimensional. And that’s when I happened upon a photo of this cute little Camping Set Craft, utilizing sticks and paper, over on Artsy Craftsy Mom.
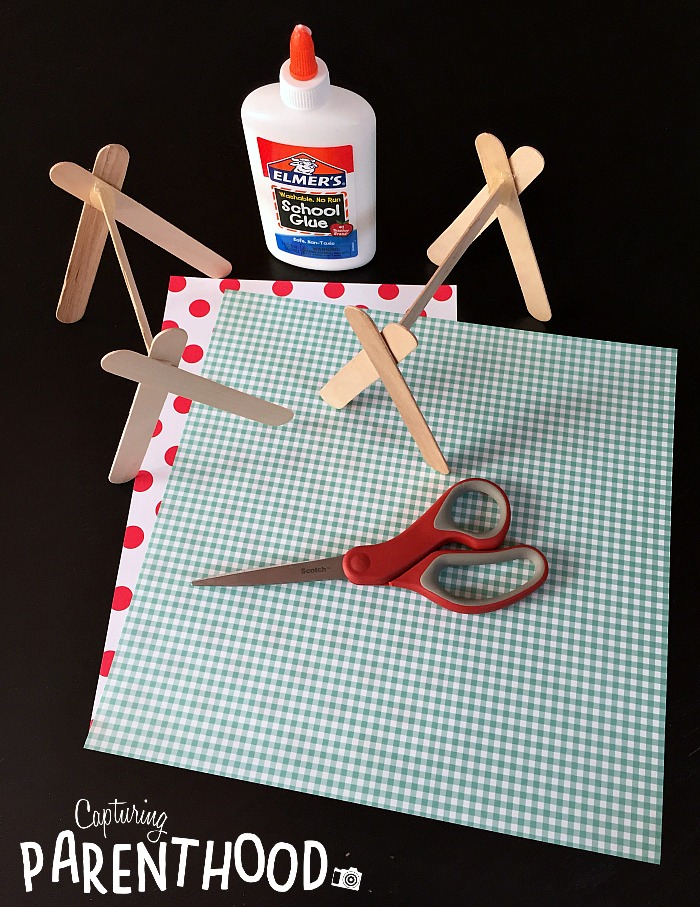
To create your own popsicle stick tents, you will need the following supplies: popsicle sticks (we used the larger size), hot glue gun, Elmer’s glue, colorful paper (we used some printed scrapbook paper), and a pair of scissors.
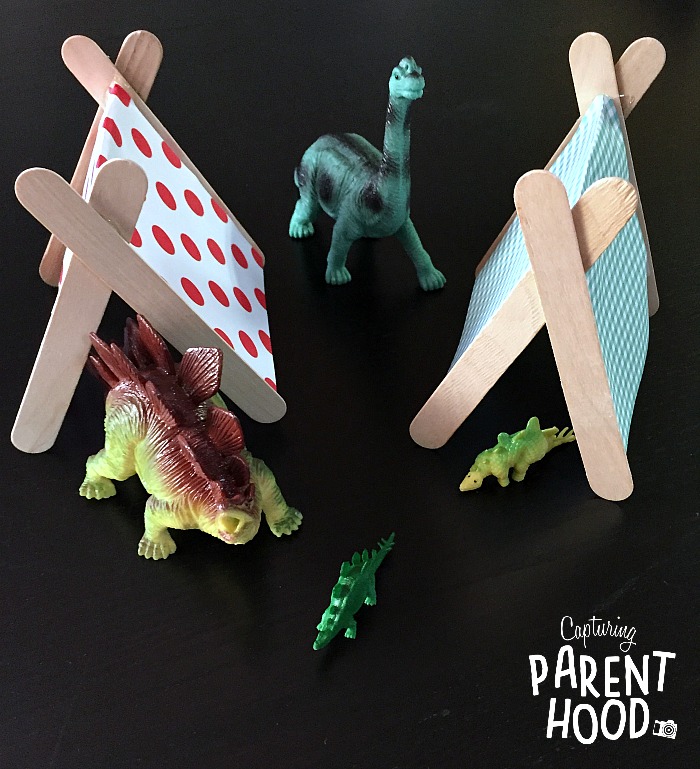
Start by hot-gluing two popsicle sticks together (creating an “x” toward the top of the sticks). Glue together another pair. You now have the end pieces to make one tent. Next, you want to carefully hot glue one more popsicle stick in between the two ends (“x” marks the spot). I did this by gluing the middle stick to one end at a time, and holding it in place for several minutes…until the glue hardened. Once the structure is glued together, and the glue has dried completely, cut a piece of scrapbook paper to fit within the two ends of the tent. You want the paper to be long enough to bend over the middle stick and go all the way down the sides of the tent. Once you have your paper measured and cut, pipe a thin line of Elmer’s glue on top of the middle popsicle stick. Place the folded paper on top, pressing gently to adhere. Let the glue dry completely and then gather all of your small dinosaurs or figurines, and set up a small camping expedition! 🙂
Mini Tealight Lanterns
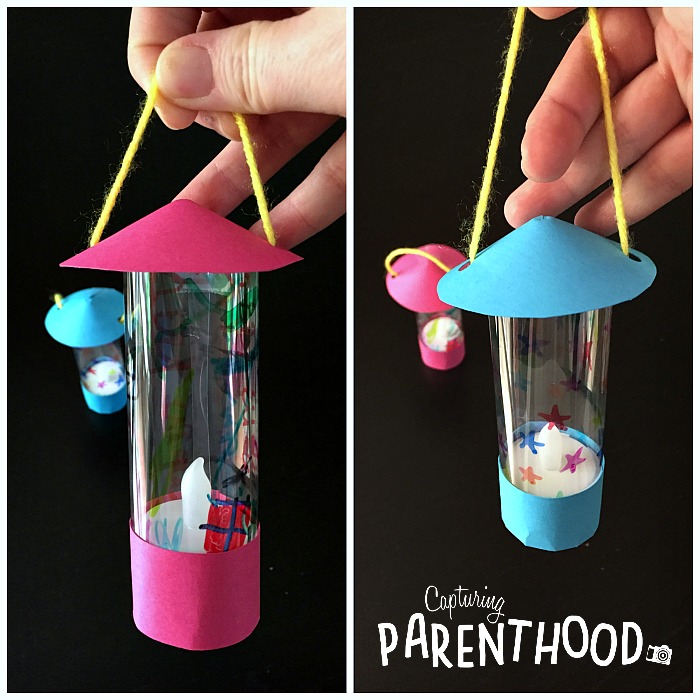
These mini tealight lanterns are hands-down the family favorite of all of our camping crafts! It’s likely because they are completely functional…and cute to boot! I was extremely excited when I stumbled upon this amazing LED Tealight Lanterns idea, over on Atomic Shrimp. I was actually giddy!
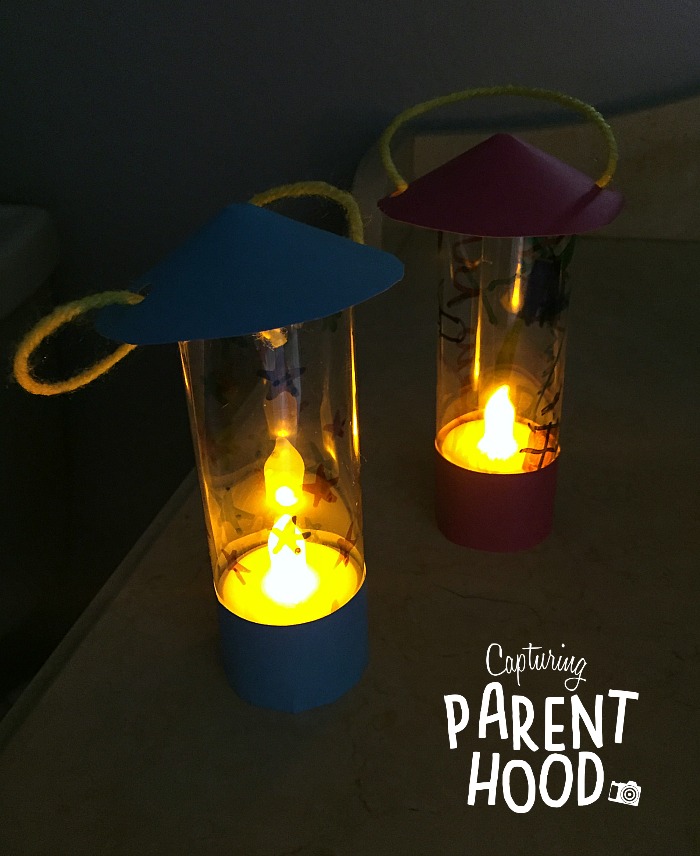
I mean…just look at them! I’m still giddy! We have them hanging amongst our camping crafts on our dining room art wall, and I love that we can flip them on at night to create a little ambiance. We just might have to try them out on our next backyard camping adventure!
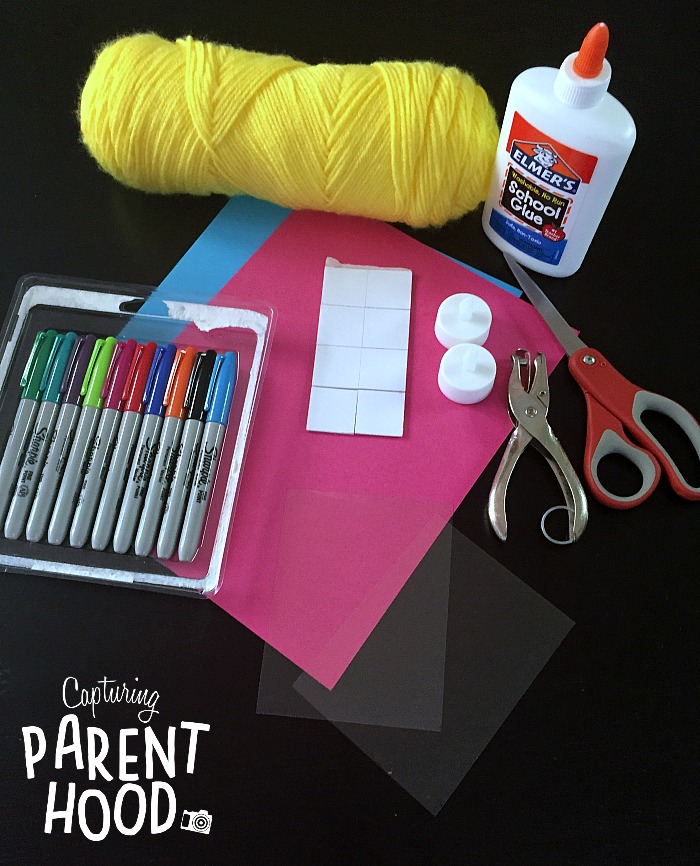
To make your own mini tealight lantern you will need the following supplies: a sheet of projector film or a similar sheet of plastic (we actually utilized the plastic from the front of an old cheap picture frame), scissors, permanent markers, tealight candle, double-sided tape, colored paper or card stock, hole punch, yarn or string, and Elmer’s glue (you don’t want to use hot glue, it will melt the plastic film).
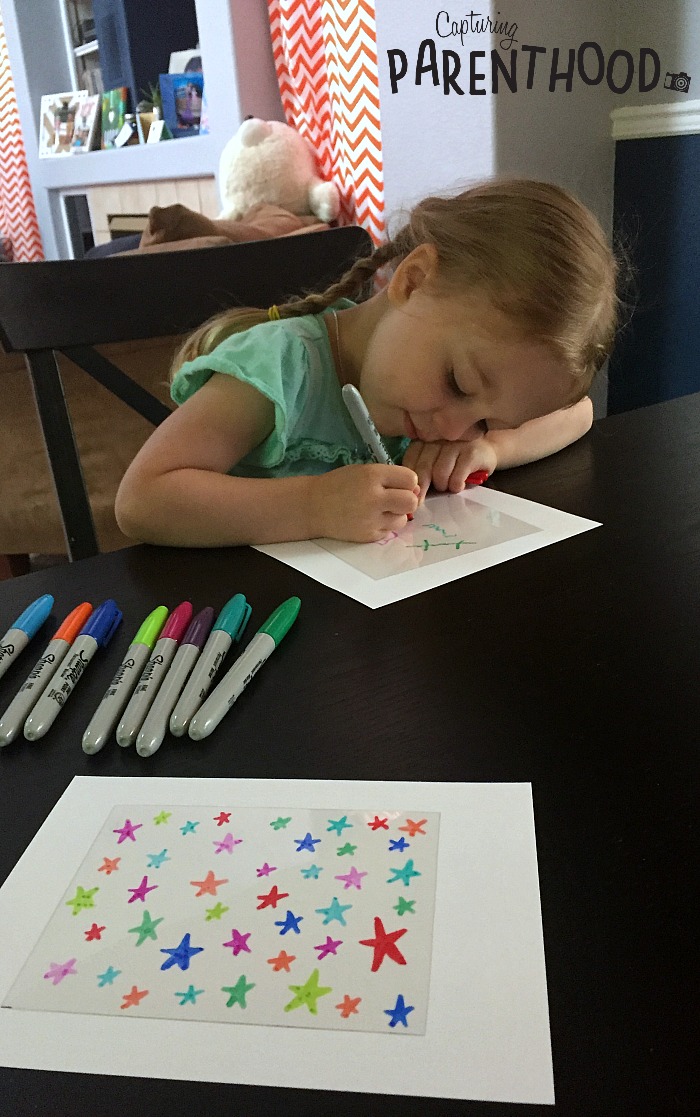
Start by cutting the plastic film to size. You want it wide enough to wrap all the way around your tealight candle, plus a bit extra (approximately 14 cm). Cut the length to approximately 8 cm tall. Using the permanent markers, decorate the plastic any way you choose. I love the stained glass effect that they used on Atomic Shrimp, but I didn’t have the patience for that kind of design. 🙂 Once the decorating is complete, it’s time to assemble the lantern.
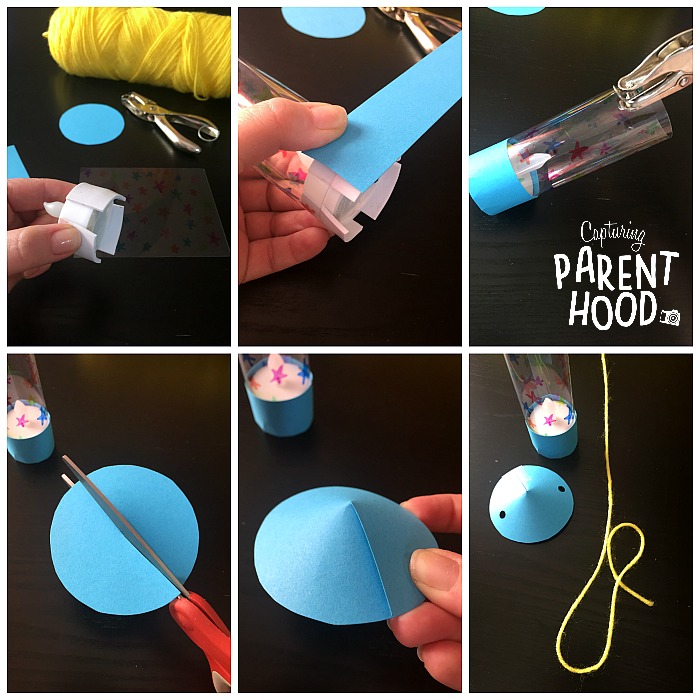
Place some double-sided tape on the sides of the tealight candle. Cut a strip of colored paper to wrap around the base of the lantern (approximately 3 cm by 14 cm). Remove the backing of the double-sided tape and wrap the bottom of the plastic film around the candle (making sure the marker-side is facing inward). Adhere the strip of paper to the remaining (exposed) double-sided tape, to form the base of the lantern. You can also utilize a small piece of clear tape, if necessary. Using the hole punch, punch two holes in the top of the plastic, on opposite sides of the lantern. Next, cut a small circle from the same colored paper (I traced the rim of a small drinking glass). Cut from one edge of the paper to the center of the circle. Glue or tape the cut pieces of the circle together, to create the cone-shape of the lantern top. Punch two holes in the paper circle, on opposite sides, to match the two holes in the top of the plastic. Cut a small piece of yarn and feed it down through the two holes in the paper circle, then through the two holes in the top of the plastic film (from the outside in). Tie it in a knot. Pipe a thin layer of Elmer’s glue around the top of the plastic film and press the paper top down firmly to adhere. Pull up on the slack in the yarn to create the lantern handle. Ta Da!
This craft can be a little bit tricky. Atomic Shrimp provides step-by-step instructions, as well as a detailed video…so feel free to visit their site for more information.
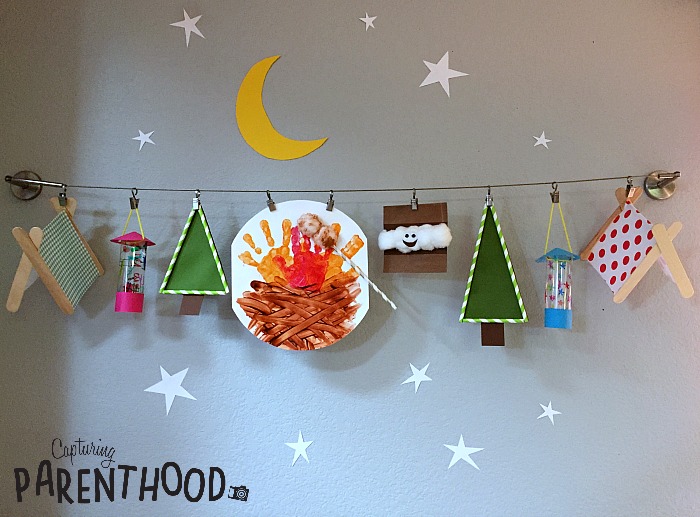
I am in love with our camping crafts! After hanging them on display in our dining room, we decided to add a crescent moon, and a handful of stars, to really round out the whole camping theme. Star-gazing is another one of our favorite camping activities, and we love the magical night skies that we find when we get out of the city. I can’t wait until we take our little nugget on a real camping adventure, where she can look up and see more than just a few stars shining down. We just might have to bite the bullet and head out into the wilderness in the next few weeks!
In the meantime, we will resort to star-gazing with our Starry Nights Sensory Bottle!
