If you’ve been following along with us for the past couple of months, you already know about our recent sensory bin obsession. It all started when we purchased a February Wolfpack Sensory Bin, from Katy @prekwolfpack. Our little nugget had the absolute best time exploring, scooping, and getting creative with all of the Valentine-themed sensory bin fillers. We even shared a Wolfpack Sensory Bin Review & Wrap-Up as a way to showcase the numerous activities that we did with just one sensory bin. Needless to say, we were hooked! We ordered one of Katy’s March bins (which was equally as magical) and then we decided to take a leap and create a sensory bin of our very own – our Rainbow Pasta Sensory Bin. And our obsession continues to grow…this month we are playing with one of Katy’s Earth Day sensory bins…as well as our very own Easter Sensory Bin with Dyed Garbanzo Beans!
Dyed Garbanzo Beans?!? Who thinks of these things? Well, as a matter of fact…Katy does! She is seriously a sensory bin wizard! Her tutorial for dyed garbanzo beans (otherwise known as chickpeas) took Instagram by storm back in February. In fact, the sensory bin fillers that she makes for her preschool classroom consistently go viral every month! I’m still drooling over her rainbow rock salt bin from March. Needless to say, when I was brainstorming our Easter sensory bin, it was clear that we needed to hop on the garbanzo bean bandwagon. 🙂 And the dyeing process is seriously so simple – setting up this bin was a total breeze!
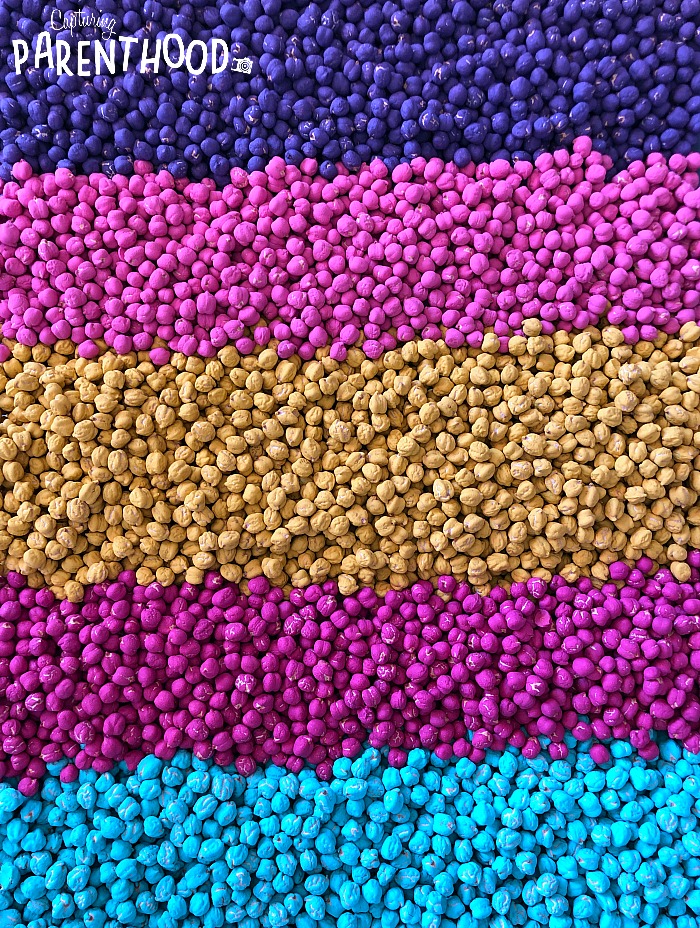
Now I should point something out…since there was a lot of confusion when Katy first debuted her colored garbanzo bean sensory bin. These are dried garbanzo beans, folks – not the canned garbanzo beans we are all familiar with. You can find them bagged alongside all of the other dried beans (black beans, pinto beans, great northern beans, etc.) at the grocery store. So…if you are going to color some garbanzo beans…do not use the fresh/canned variety. They are wet and squishy…and while they may provide a great sensory experience, I doubt that they would take color as easily, and it’s probably not very sanitary to play with them on more than one occasion. 🙂
Our little nugget was a bit stumped by the colored garbanzo beans. We eat the canned variety once every couple of weeks and she loves them…but she had a hard time seeing the resemblance between the ones that she eats regularly, and the colorful ones in her new sensory bin. Her confusion dissipated rather quickly when she realized how much fun they are to play with!
Easter Sensory Bin with Dyed Garbanzo Beans
Step One – Dyeing Garbanzo Beans
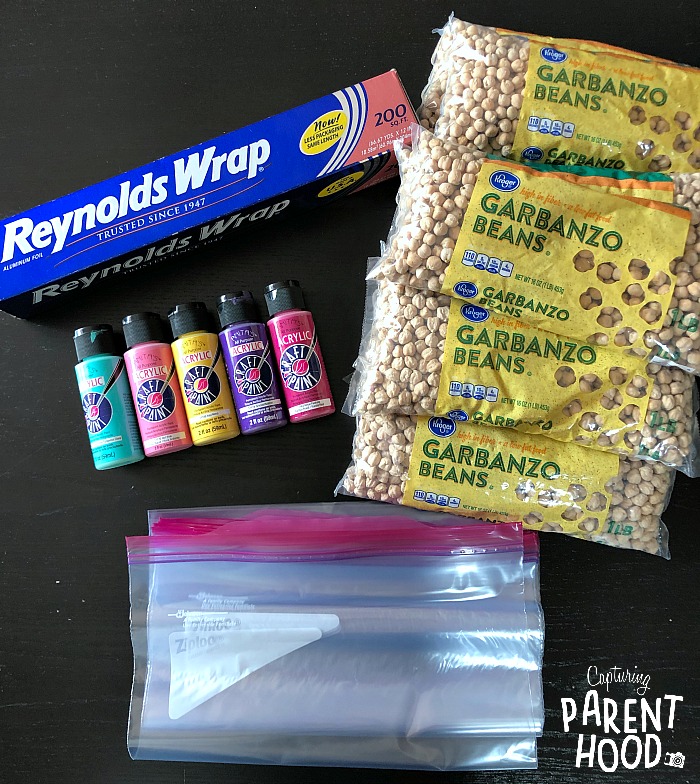
Supplies:
- Dried Garbanzo Beans/Chickpeas (we found ours at King Soopers) **Note: Dried garbanzo beans come in a bag…not a can.**
- Acrylic Paint in Easter/Spring Colors (we used Anita’s Acrylic Craft Paint, but any brand of acrylic paint works)
- If you’re interested, the specific colors of paint that we used for this bin are as follows:
- #292448 Light Turquoise
- #11170 Hot Pink
- #11189 Hay
- #11174 Crocus
- #11143 Royal Fuchsia
- If you’re interested, the specific colors of paint that we used for this bin are as follows:
- Ziploc Storage Bags (one per each color of paint)
- Aluminum Foil/Wax Paper
Instructions:
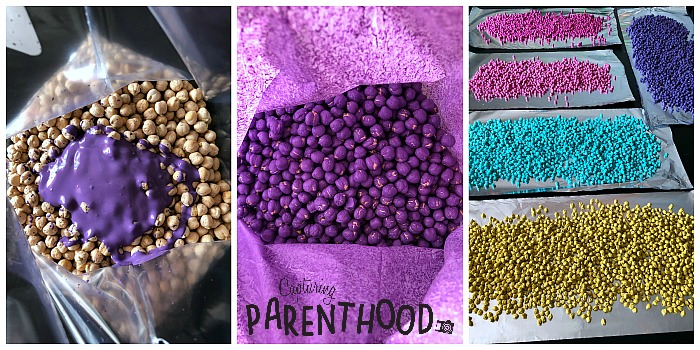
- Cover a flat surface with several sheets of aluminum foil or wax paper – this is where you will dry the dyed garbanzo beans.
- Pour the garbanzo beans into the Ziploc storage bags. We started with a total of 8 lbs. of dried garbanzo beans. We used them as follows: 2 lbs. each for the yellow, teal, and purple…and 1 lb. each for the light pink and dark pink.
- Once your beans are separated out into the Ziploc bags, it’s time to add some color! Working with one Ziploc at a time, squirt some acrylic paint (in the color of your choosing) into the bag. Seal the bag and start shaking. Shake until all of the garbanzo beans are thoroughly coated with paint. If you need more paint coverage, feel free to add a few more squirts of paint at a time…shaking as you go. Keep in mind that the more paint you add, the longer the dry time. 🙂
- Once you are satisfied with your first batch of colored garbanzo beans, open the Ziploc bag and pour them out onto one of your prepared sheets of aluminum foil – spreading them out into an even layer so that they all dry at the same rate.
- Repeat the above steps for each color of paint that you would like to use.
- Let the dyed garbanzo beans sit out to dry for a couple of hours, or until completely dry to the touch.
- Once the beans are dry, it’s time to setup the sensory bin!
Step Two – Putting Together A Dyed Garbanzo Bean Easter Sensory Bin
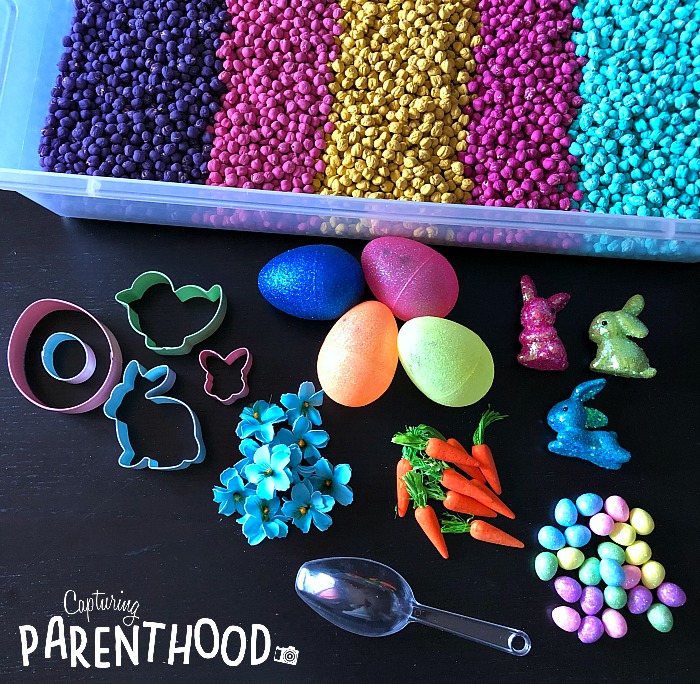
Supplies:
- Under-Bed Plastic Storage Tub with Lid
- Dyed Garbanzo Beans (from Step One)
- Sensory Bin Fillers (ours are a combination of finds from both Target and Hobby Lobby)
- Easter-Themed Cookie Cutters
- Glittery Plastic Easter Eggs (make sure you have some eggs that open)
- Spring-Colored Flower Stems
- Mini Styrofoam Carrots
- Easter Bunnies
- Mini Sparkly Easter Eggs
- Plastic Scoop
Instructions:
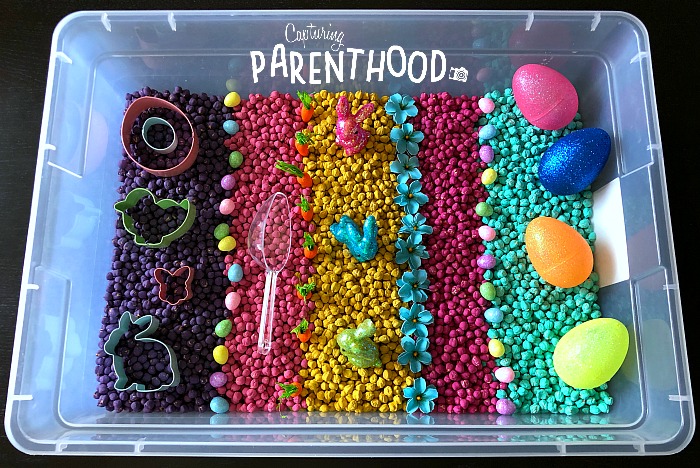
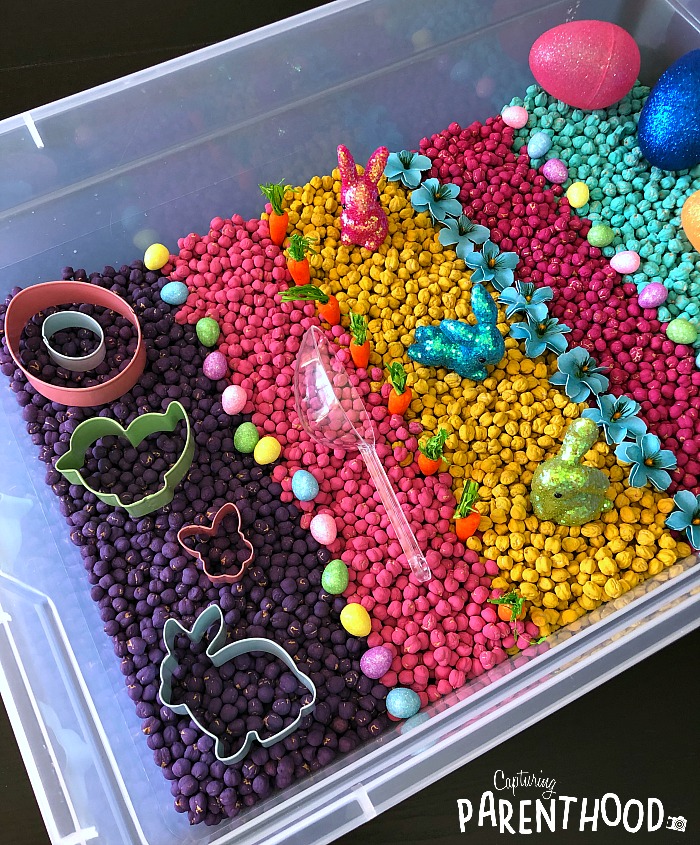
You can literally setup your Easter sensory bin any way your heart desires. I’m partial to Katy’s (@prekwolfpack) style of setting up sensory bins in a linear manner. Laying everything out in a nice clean way tends to result in more creativity and imaginative play from the kiddos – because they can see absolutely everything that they can use, and it’s not just piled into one big jumbled mess. So with that in mind, I started laying down different lines of colored garbanzo beans, until the bottom of the bin was completely covered. Then it was time to add all of the Easter accessories! I placed the mini sparkly Easter eggs in a line between the purple and light pink beans, and then again between the dark pink and teal beans. I planted the carrots in between the light pink and yellow beans, and then I placed the little bunnies on top of the yellow beans…so that they would be nice and close to their food source. 🙂 The beautiful blue flower stems were then planted between the yellow and dark pink beans. I stacked the Easter cookie cutters on top of the purple garbanzo beans, and placed the large, glittery plastic Easter eggs on top of the teal. Last but not least…the all-important plastic scoop was placed on top of the light pink beans.
Once your beautiful sensory bin is complete, take a step back to admire it. Or better yet, take a couple of photos for the memory books. Why, you ask? Because it will last mere seconds once your little ones get their hands in it. 🙂 And that’s OK! Sensory bins are for playing, exploring, and creating. They are meant to end up messy (the mess ultimately means that the bin was well-loved).
I mentioned in our Rainbow Pasta Sensory Bin post that my absolute favorite element was the sound that the dry noodles made when they were dropped back into the bin – like the sound of rain falling. The dried garbanzo beans provide a very similar effect in this Easter bin. And if you fill some of the large plastic eggs with garbanzo beans, they magically turn into little maracas! We just love when sensory bins include a sound element!
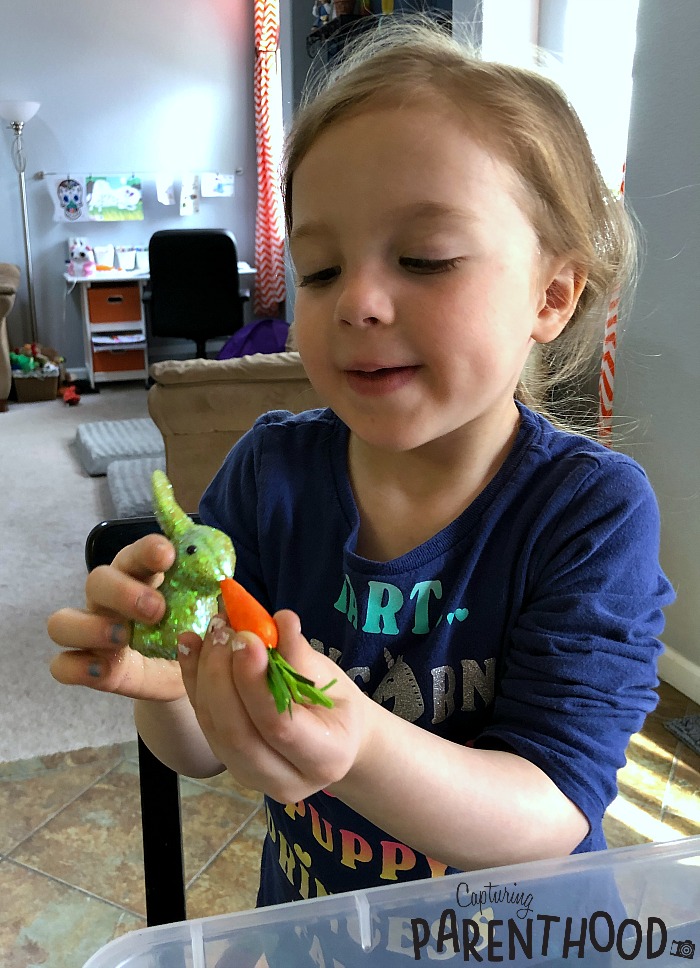
That being said, I think our daughter’s favorite part is getting to feed the baby bunnies some carrots! 🙂 Sensory Play + Learning To Care For Animals = A Perfect Day!
HAPPY EASTER!
