Father’s Day is this coming Sunday (June 16th)! Are you and your kiddos ready?!? Over the past few years, we’ve found that the best and most sentimental gifts are those that are handmade with love. Our little nugget thoroughly enjoys creating special pictures and crafts for all of the important people in her life. And since we are right in the middle of our month-long outer space adventure, it seemed more than appropriate to create this fun Father’s Day Space Craft!
I came across this Easy Rocket Ship Father’s Day Craft Idea, over on I Heart Crafty Things, and immediately knew that it would be the perfect starting point for our stellar space craft! You see…a few weeks ago…we shared a super cool Clay & Wikki Stix Spring Scene craft (over on our Instagram feed) that we completely fell in love with. We had such a great time creating a colorful picture using air-dry clay and Wikki Stix – I just knew that we needed to find another way to incorporate both elements into another project! And after seeing Rachel’s “I love you to the moon and back!” craft and template…everything fell right into place. 🙂
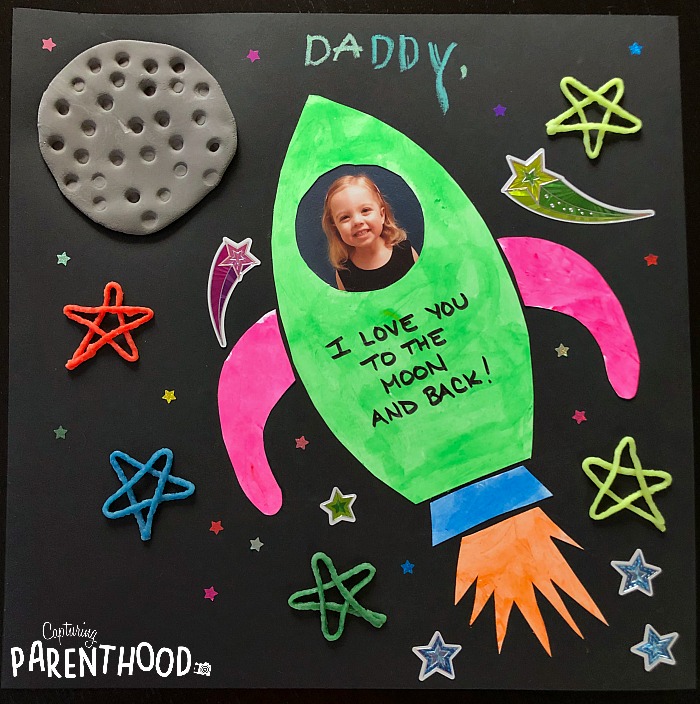
Father’s Day Space Craft
Supplies:
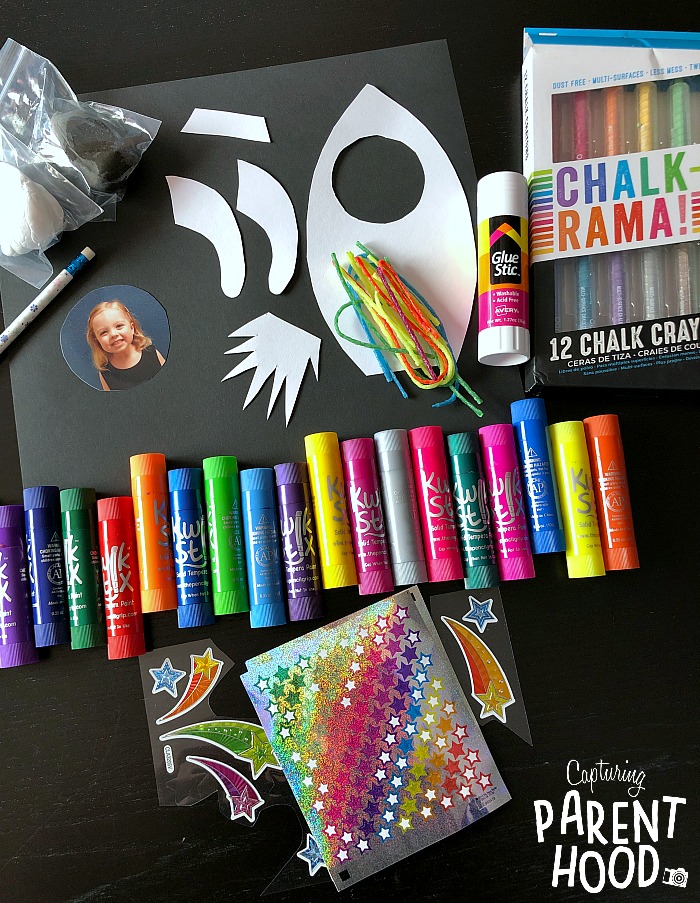
- Card Stock (black and white)
- Kwik Stix Tempera Paint Sticks
- Glue Stick
- Air Dry Clay (black and white)
- Pencil
- Wikki Stix
- Chalk Crayons or Oil Pastels (we used OOLY Chalk-O-Rama Chalk Crayons)
- Star Stickers
- Photo of Your Child
- Scissors
- Black Marker
- Scotch Tape (optional)
- Elmer’s Glue (optional)
Step One: Cut & Color the Rocket Ship
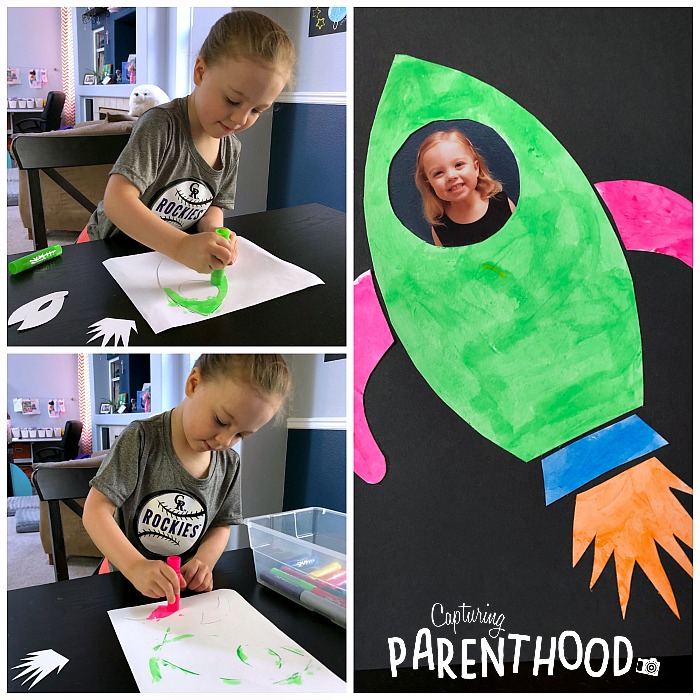
- Start by drawing all of the necessary rocket ship components on a white sheet of card stock. Carefully cut out each element.
- Cut a circular window into the upper section of your rocket ship. Cut a photo of your child into a circle as well, making sure to cut the photo circle a bit bigger than the rocket ship circle. Set the photo aside.
- Grab your Kwik Stix paint sticks and start decorating the pieces of your rocket ship.
- Once your rocket ship components are complete, it’s time to assemble! Start by gluing (or taping) your child’s photo into the window of the rocket ship. We chose to tape our photo onto the back of our space vessel.
- Next, glue your rocket ship down onto a sheet of black card stock, making sure to save room for the moon.
- Using a black marker, write the following message on the body of your rocket ship: I love you to the moon and back! Feel free to also add a Happy Father’s Day! And don’t forget to add the year.
- Set your rocket ship aside…it’s time to create the moon!
Step Two: Making the Moon
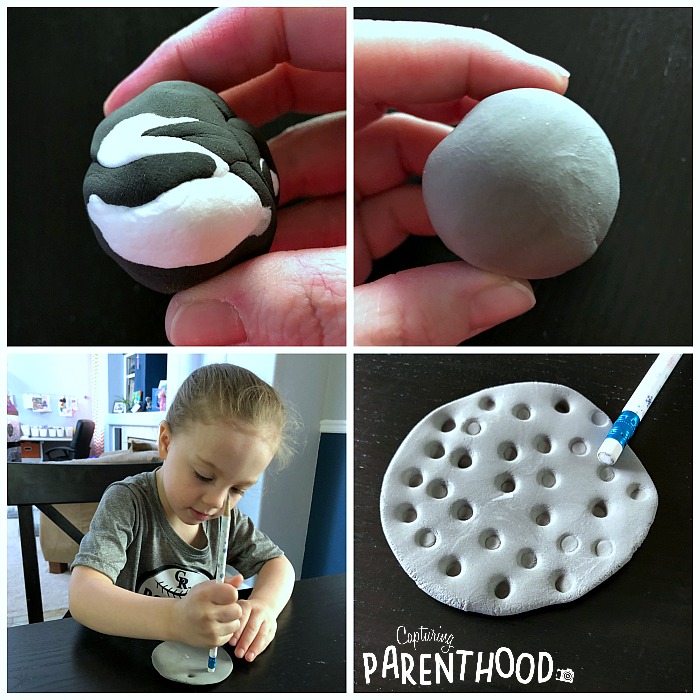
- I have yet to find a set of air-dry clay that includes the color gray…but it’s an easy color to make…all you need is some white clay and some black clay! Grab a small chunk of black air-dry clay, as well as a larger chunk of white air-dry clay.
- Twist and knead the two colors together, until you create a nice light gray color. Roll the gray clay into a ball.
- Place the ball of clay on a flat surface and gently press it down with the palm of your hand, to create a flattened circle.
- Hand your little one a pencil (pointing eraser-side down) and have them start making little craters all over the moon.
- Once the craters have been added, it’s time to attach the moon to your black card stock (next to your colorful rocket ship)! To do this, you can gently (but firmly) press the clay onto the card stock. I didn’t want to ruin any of our little nugget’s moon craters by pressing down too hard, so I decided to squirt a bit of Elmer’s glue on the back of the moon, before sticking it down on the paper.
Step Three: Wikki Stix Stars & Finishing Touches
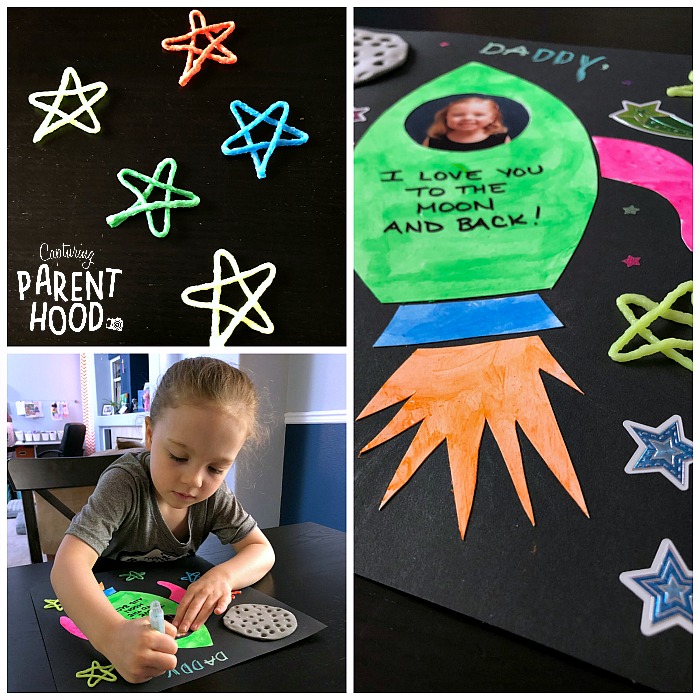
- With the main components (rocket ship and moon) of this special space craft complete, all that’s left to do is add a few finishing touches! To make the Wikki Stix stars, we started by drawing a star on a piece of leftover white card stock. Our little nugget used the star drawing to shape and mold each piece of Wikki Stix into a handful of colorful stars.
- Once your Wikki Stix stars are complete, you can add them to your black card stock by pressing them firmly onto the paper. Wikki Stix are coated in a waxy material, making them nice and sticky…so there is no need to glue them down.
- Grab some chalk crayons or oil pastels, and have your child write Daddy, Dad, Papa, Pops, etc. toward the top of the paper. Then have them sign their own name toward the bottom.
- For the final flourish…have your kiddo place star stickers all over the black card stock – in any place that looks like it could use a pop of color!
- Prepare your rocket ship for launch on Father’s Day!
I love how this cute Father’s Day Space Craft turned out! Our daughter had the best time making it…and I know that my husband will be thrilled to receive it! And the good news is that this hand-crafted gift only takes mere minutes to make (thanks to those fast-drying Kwik Stix paint sticks). So, your little ones still have plenty of time to create a special space craft for their dad too! 🙂
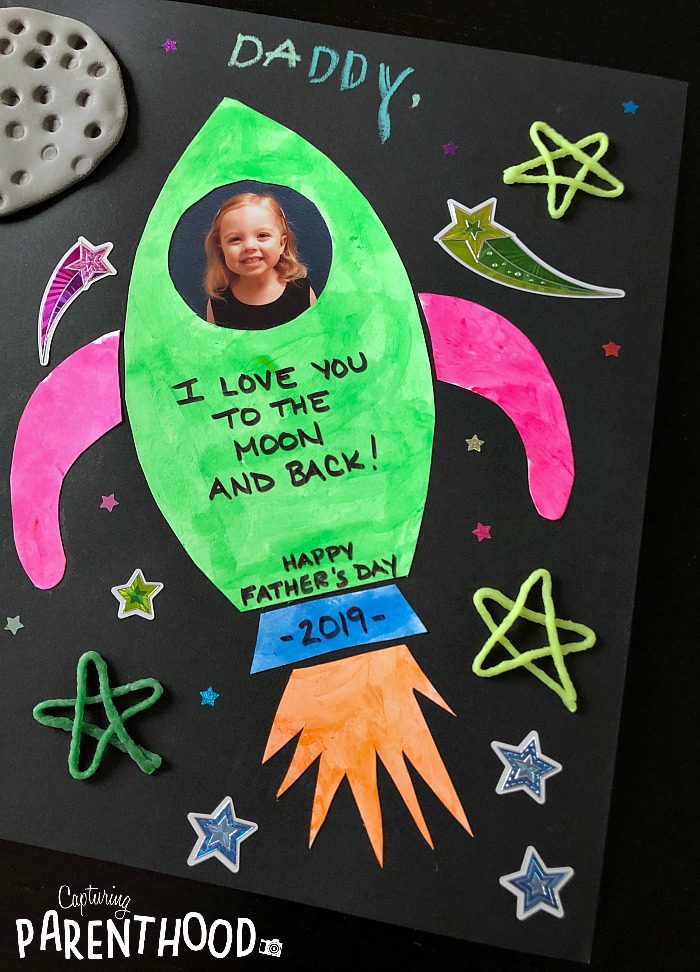
If you’re looking for more fun Father’s Day gift ideas, make sure to also check out this Heartfelt Father’s Day Craft!