Groundhog Day is this Saturday! Every year, people eagerly wait for Punxsutawney Phil to emerge from his little burrow, to tell us how much longer we can expect winter to last. If he emerges on a clear, sunny day and sees his shadow, it signals six more weeks of winter (thus the groundhog quickly returns to his burrow to wait out the remainder of the cold-weather season). If he emerges on a cloudy day and fails to see his shadow, it’s a sign that spring will come early. I don’t know about you, but I’m always hoping for an early spring arrival. 🙂 This annual tradition, that is celebrated in both the United States and Canada (on February 2nd) stems from a Pennsylvania Dutch superstition. The very first mention of Groundhog Day is stated to have occurred in 1840 – when James L. Morris, of Morgantown, Pennsylvania, first mentioned it in his diary.
In all honesty, I’ve never been a big fan of the annual holiday. When I was a little girl, I would get excited to see the ever-famous groundhog come out to make his yearly prediction…that is until I started to realize that his prediction never applied to the length of the winter season where I lived. Winter in the Colorado mountains seems to last forever sometimes. It even snowed on the Fourth of July, on more than one occasion, during my childhood. Talk about a real summertime buzzkill. And then there’s the awful Groundhog Day movie that debuted in 1993 – my apologies if it happens to be one of your favorites (I know many people who love it), but I never could wrap my head around wasting two hours watching the same exact thing happen over and over and over again. It’s causing me anxiety just thinking about it now.
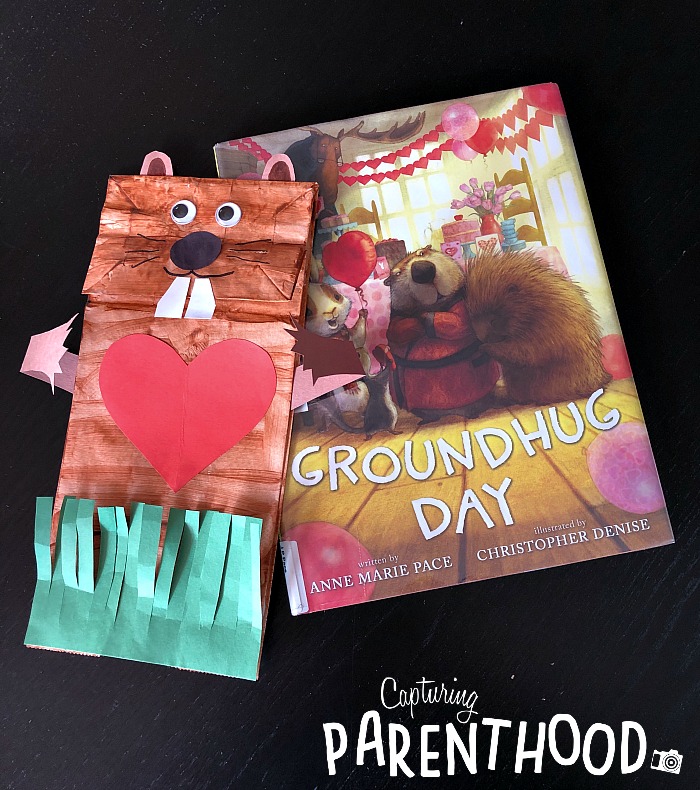
Needless to say, I’ve let this holiday pass me by (going completely unnoticed) for more years than I can count. But this year, something happened. This year, we discovered a wonderful children’s book, titled Groundhug Day, written by Anne Marie Pace and beautifully illustrated by Christopher Denise.
In the story, Moose is hastily planning his big Valentine’s Day party (that is just two weeks away) and he’s excited to have all of his friends join in on the fun. There’s just one problem. Tomorrow is Groundhog Day, and if Groundhog sees his shadow, he’ll go back into his hole for six more weeks – he’d be asleep on February 14th. Moose, and his non-hibernating friends, devise numerous plans to keep Groundhog from seeing his shadow, but before they can put any of them into action…Groundhog emerges, glimpses his shadow, and returns to his warm and cozy abode. Will the group of friends find a way to get Groundhog to the Valentine’s Day party? Or will they have to wait – and celebrate on St. Patrick’s Day?
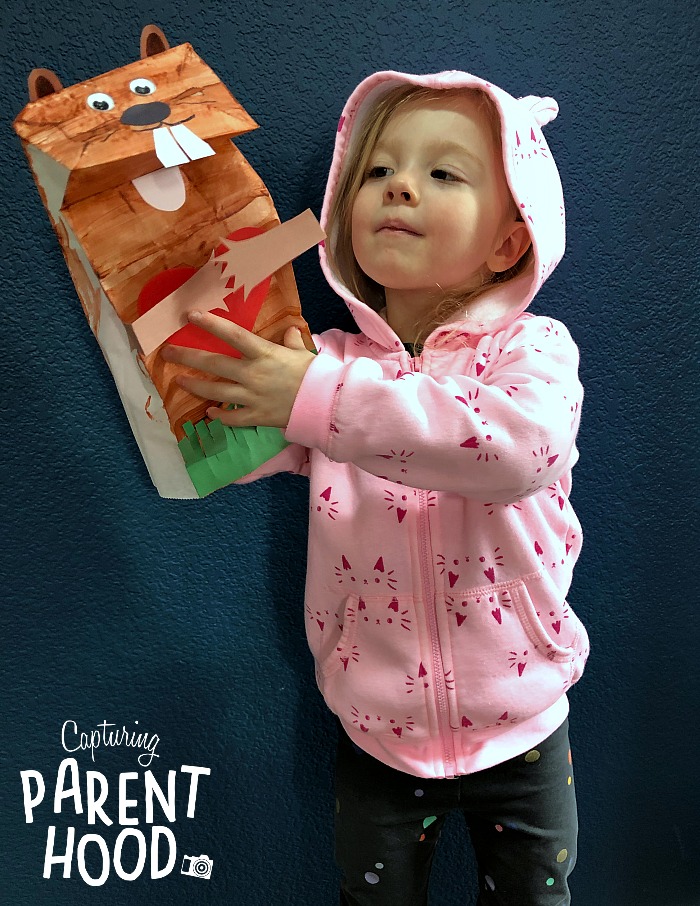
This story’s sweet celebration of Groundhog Day (and Valentine’s Day) has renewed my love for the quirky, weather-predicting holiday…and has also sparked the inspiration for our cute Groundhug Day Puppet Craft!
Groundhug Day Puppet Craft
Supplies:
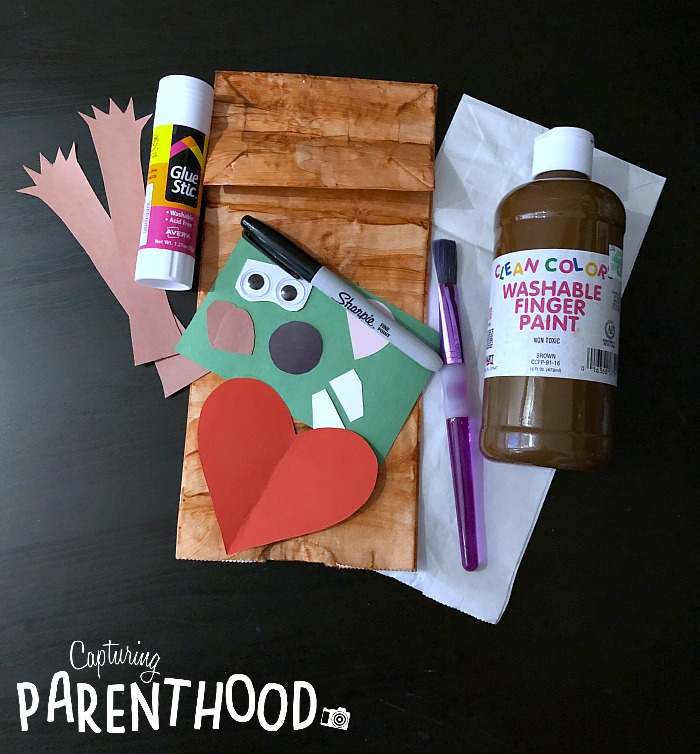
- Lunch-Size Paper Bag (brown is perfect, but if you happen to have a white paper bag, like we did, you can simply paint the bag brown)
- Brown Paint (if your paper bag is not already brown, as mentioned above)
- Construction Paper (brown, green, white, black, red, and pink)
- Googly Eyes
- Glue Stick or Elmer’s Glue
- Black Marker
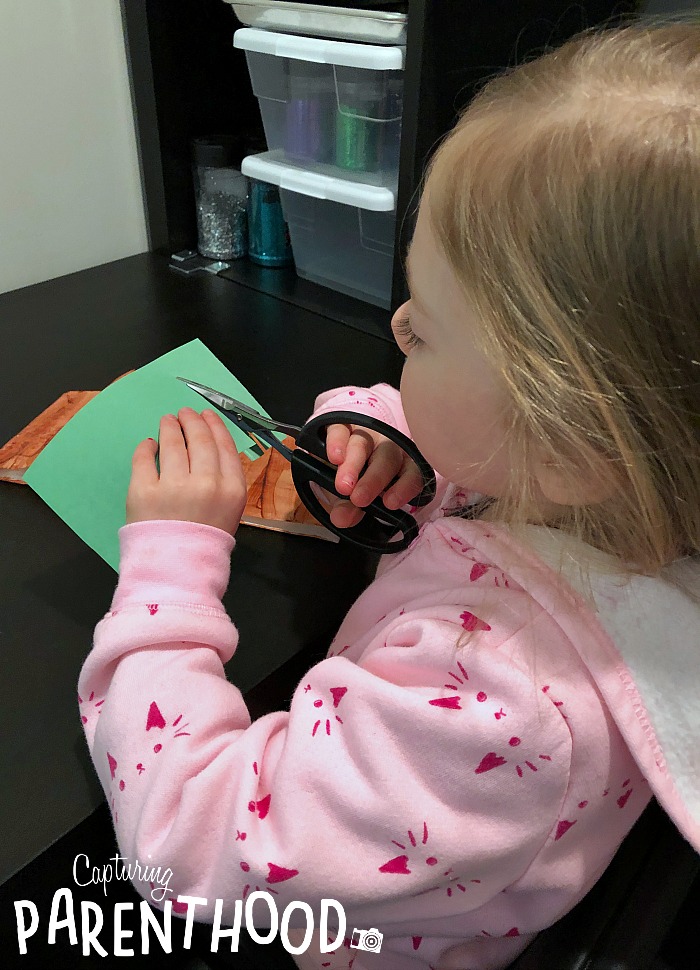
- Scissors
- A Copy of Groundhug Day by Anne Marie Pace (optional)
Instructions:
- If the paper bag that you’re using is not already brown, start by painting your paper bag with brown paint. Once painted, set the bag aside to dry completely. If your paper bag is already brown, move on to step #2.
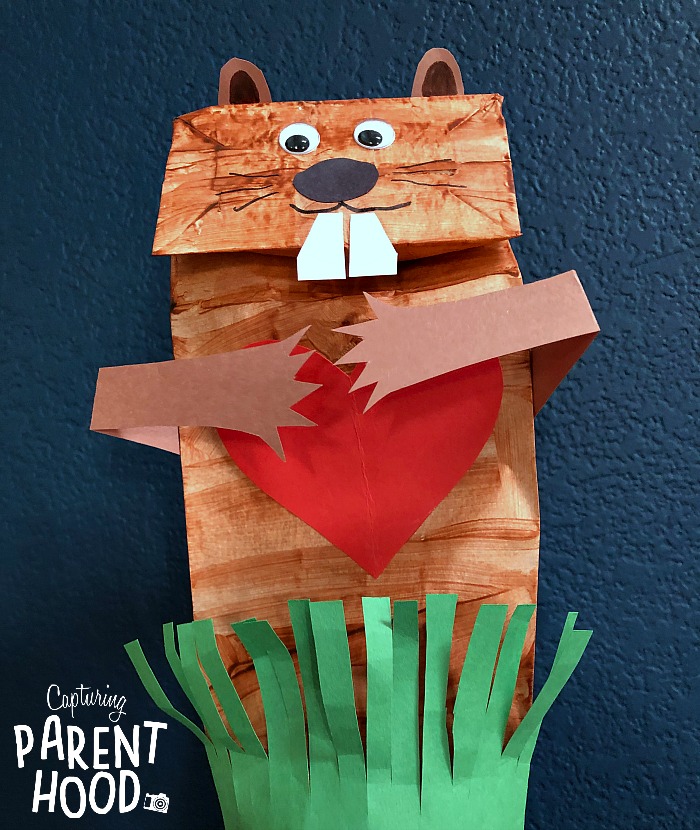
- Cut out all of your construction paper components. You will need two brown ears and two brown arms. Cut one black circle for the nose. Cut two teeth from the white construction paper, as well as one pink tongue. Next, you will need to cut out a red heart. And lastly, cut a rectangle out of the green construction paper (that is the same width as your paper bag). Using a pair of scissors, cut small strips into the green rectangle (making sure not to cut all the way through to the other side). Once the strips are cut, ruffle them up a bit to make them look like grass.
- Now it’s time to bring your groundhog to life! Start by gluing the little brown ears to the top (back-side) of the paper bag.
- Add your googly eyes, and then glue the black circle nose just below the eyes.
- Open up the little mouth flap and glue the pink tongue to the inner crease inside the mouth.
- Glue the groundhog’s two buck-teeth just above the outer lip of the mouth (so that the teeth stick out past the flap).
- Using a black marker, draw a few whiskers on each side of the nose, and then add a little mouth coming down from the bottom of the nose (just above the teeth).
- Glue the green grass to the very bottom of your paper bag puppet (making sure that the slits of grass point upward).
- Give your groundhog some love, and glue the red heart to his chest.
- Lastly, glue the two brown arms into the inner side creases of the bag (one on each side). Bend the arms forward (around the midway point) so that your groundhog can dole out warm and fuzzy ground-hugs all day long!
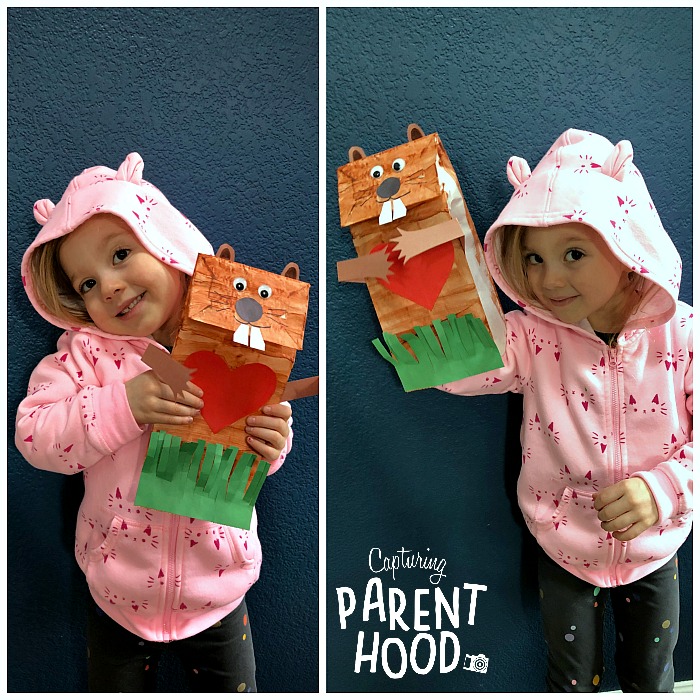
- Place your hand into the bag/puppet and start spreading some groundhog love!
We can’t wait to take our Groundhug Day Puppet outside on Saturday morning! Will he see his shadow? Or will we be destined for an early spring? Whichever way it goes, we can only hope that his weather prediction is accurate this year. 🙂
Do you and your little ones enjoy celebrating Groundhog Day? If so, what are some of your annual traditions? Do you read special stories, or create special crafts? I would love to hear all about it in the comments below.
HAPPY GROUNDHOG DAY!