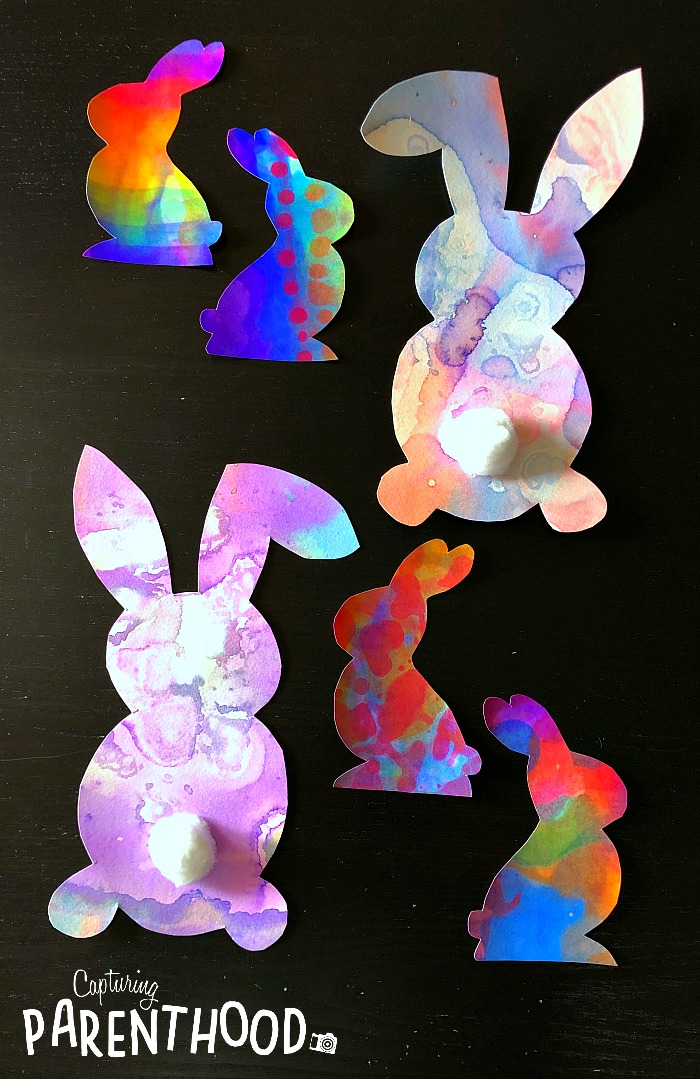
It’s still March for a few more days, but it’s totally cool if we start sharing Easter ideas…right?!? Good! Because we just can’t hide these adorable Liquid Watercolor + Rubbing Alcohol Easter Bunnies any longer! They are just too cute…too magnificent…and too magical not to share.
I came across this fabulous process art activity from none other than Kristian, over @friendsartlab. Yep…like I’ve said time and time again…she shares the most fantastic ideas! And if you’re not following her on Instagram, you are seriously missing out. In fact, if you caught our Glue-Resist Batik post on Tuesday…that project was also inspired by Kristian. I guess you could say that this week’s blog posts are an ode to one of the best teachers we know (but have yet to actually meet in person). 🙂
I mean, who knew that combining liquid watercolors with rubbing alcohol would produce such sensational results? It’s seriously the most addicting process art activity that we’ve ever done, and I can guarantee that you and your little ones will love it too!
Liquid Watercolors + Rubbing Alcohol Easter Bunnies on Photo Paper
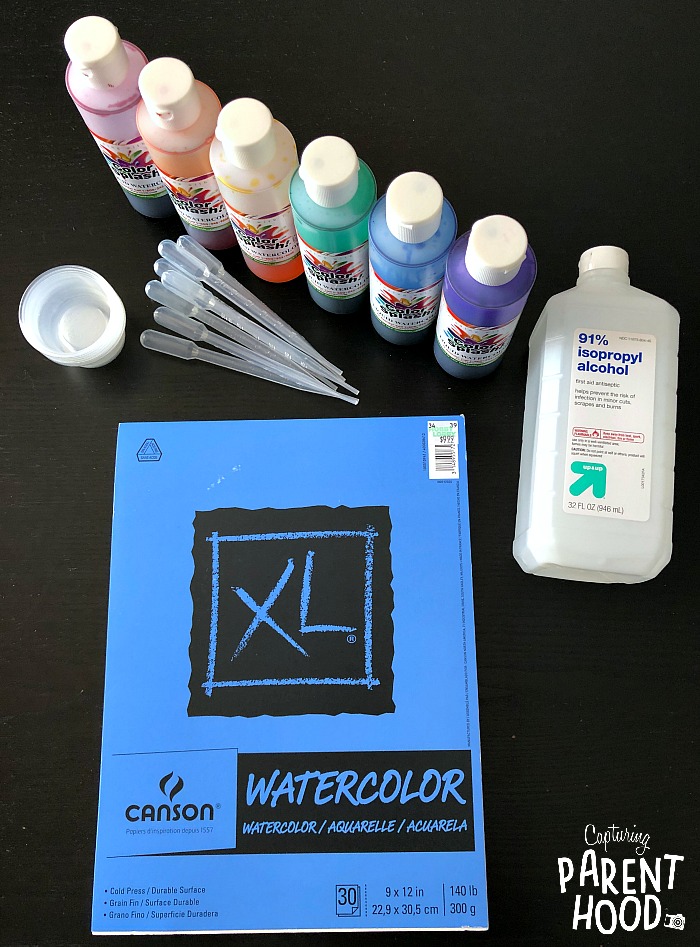
Supplies:
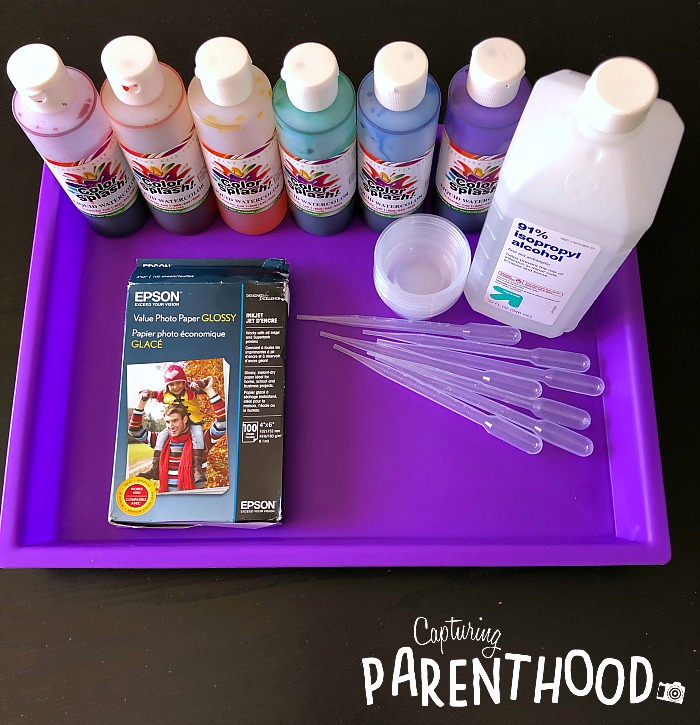
- Liquid Watercolor Paint (in a variety of colors)
- Rubbing/Isopropyl Alcohol
- Photo Paper
- Pipettes
- Small Plastic Cups/Empty Ice Cube Tray
- Rimmed Tray/Cookie Sheet
Instructions:
- Prepare your liquid watercolors by squirting a few drops of each color into a small plastic cup or section of an empty ice cube tray (one color per cup). Fill the rest of the cup with water.
- Fill a small plastic cup (or one empty section of an ice cube tray) with rubbing alcohol.
- Place one sheet of photo paper down on your rimmed tray or cookie sheet.
- Grab your paint, rubbing alcohol, and pipettes. We like to use one pipette for each color of liquid watercolor, though this is not necessary. I would, however, recommend using a separate pipette for the rubbing alcohol.
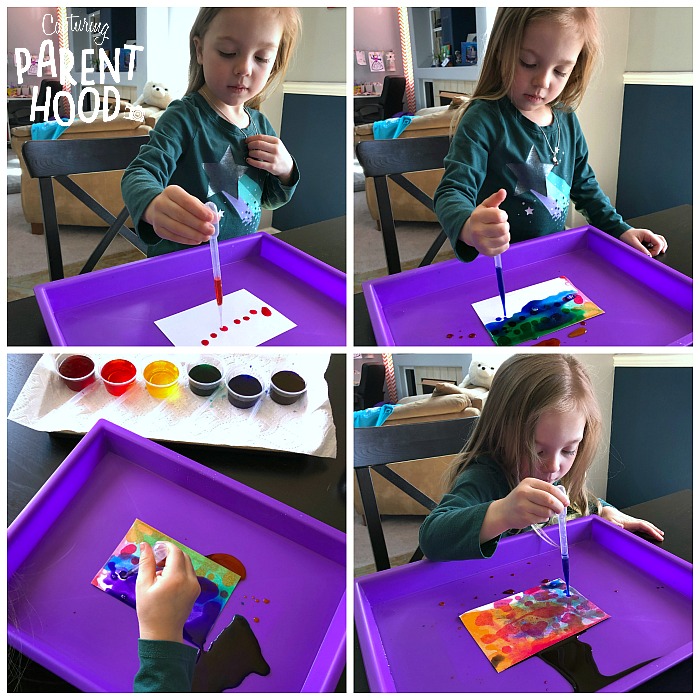
- Drip the liquid watercolors onto the photo paper in whatever design your heart desires. We made sure to cover our entire sheet of photo paper with liquid watercolors, before moving on to the rubbing alcohol.
- Once you’re satisfied with your photo paper painting, it’s time to drip on some rubbing alcohol and watch the magical interaction!
After you’ve added rubbing alcohol to your painting, lift up one corner of the photo paper and let any excess liquid slide off onto the tray. Transfer the wet photo paper onto a dry paper towel, to dry completely. You can repeat the above process as many times as you would like…or at least until you run out of photo paper. 🙂 We let our creativity run wild. We just couldn’t get enough of this fantastically fun painting project!
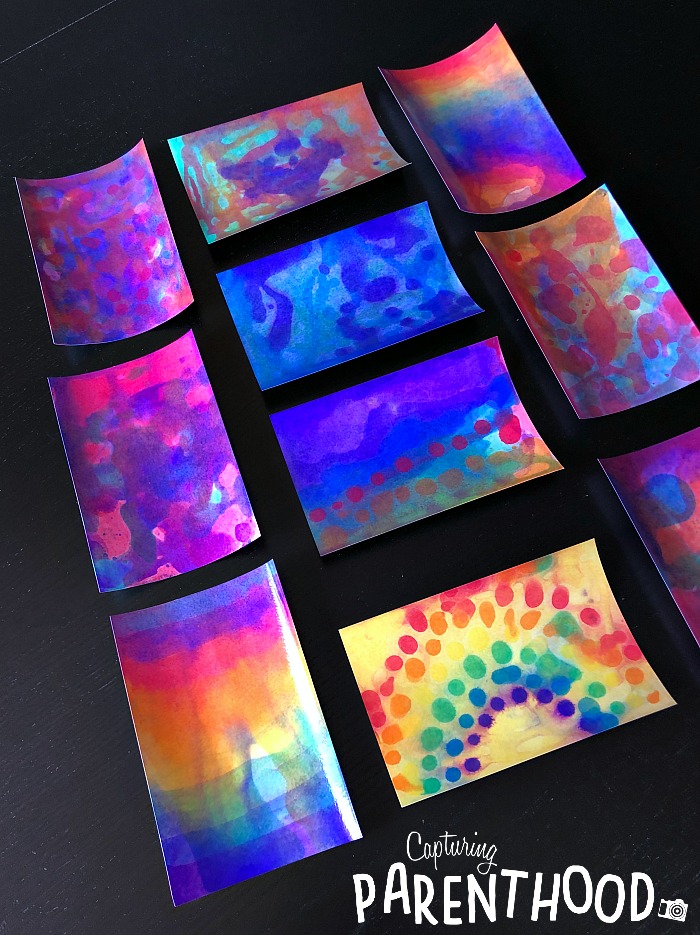
Photo paper has a tendency to curl up once it has been exposed to any type of moisture. Ours curled quite a bit during the drying process. So, once our photo paper paintings had dried completely, we stacked them all together and placed them under a pile of heavy books for a few days.
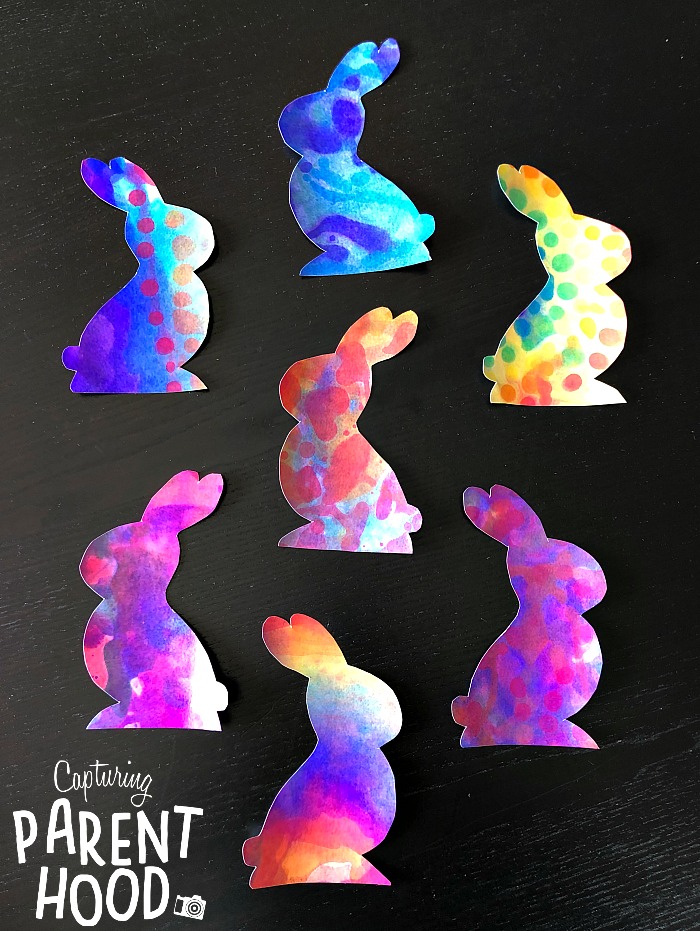
Once our beautiful photo paper had flattened back out, I drew a bunny silhouette onto a piece of card stock, to use as a template. We traced the bunny template onto the backside of the photo paper paintings. We made sure to reverse the template every so often, so that we ended up with bunnies facing both directions, once they were all cut out. These vibrant and colorful little bunnies turned out better than we could have ever imagined. And we wanted to make sure that each and every one got their chance to shine during the Easter season, so we created a little bunny banner to hang up in our dining room!
Liquid Watercolors + Rubbing Alcohol Easter Bunnies on Watercolor Paper
Supplies:
- Liquid Watercolor Paint (in a variety of colors)
- Rubbing/Isopropyl Alcohol
- Watercolor Paper
- Paintbrush
- Pipettes
- Small Plastic Cups/Empty Ice Cube Tray
- Rimmed Tray/Cookie Sheet
- Cotton Balls (optional)
- Elmer’s Glue (optional)
Instructions:
- Prepare your liquid watercolors by squirting a few drops of each color into a small plastic cup or section of an empty ice cube tray (one color per cup). Fill the rest of the cup with water.
- Fill a small plastic cup (or one empty section of an ice cube tray) with rubbing alcohol.
- Place a sheet of watercolor paper onto a rimmed tray or cookie sheet.
- Grab your paint, rubbing alcohol, paintbrush, and pipettes. We like to use one pipette for each color of liquid watercolor, though this is not necessary. I would, however, recommend using a separate pipette for the rubbing alcohol.
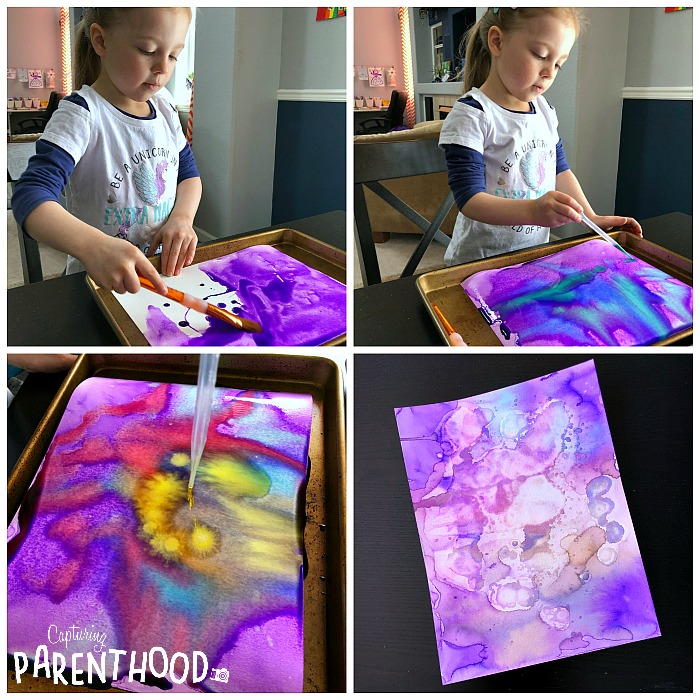
- We found that we had the best results if we picked one color of liquid watercolor paint to start with, and used our paintbrush to color the entire sheet of watercolor paper that particular color.
- Then we dripped other colors of paint on top, using our pipettes.
- Once you’re satisfied with your painting, it’s time to drip on some rubbing alcohol and watch the stunning interaction!
The magical reaction between the liquid watercolors and the rubbing alcohol is much more noticeable when it’s applied to watercolor paper. And our little nugget was blown away! Every time she placed a drop of rubbing alcohol onto her painting, she declared that she was creating beautiful fireworks. 🙂
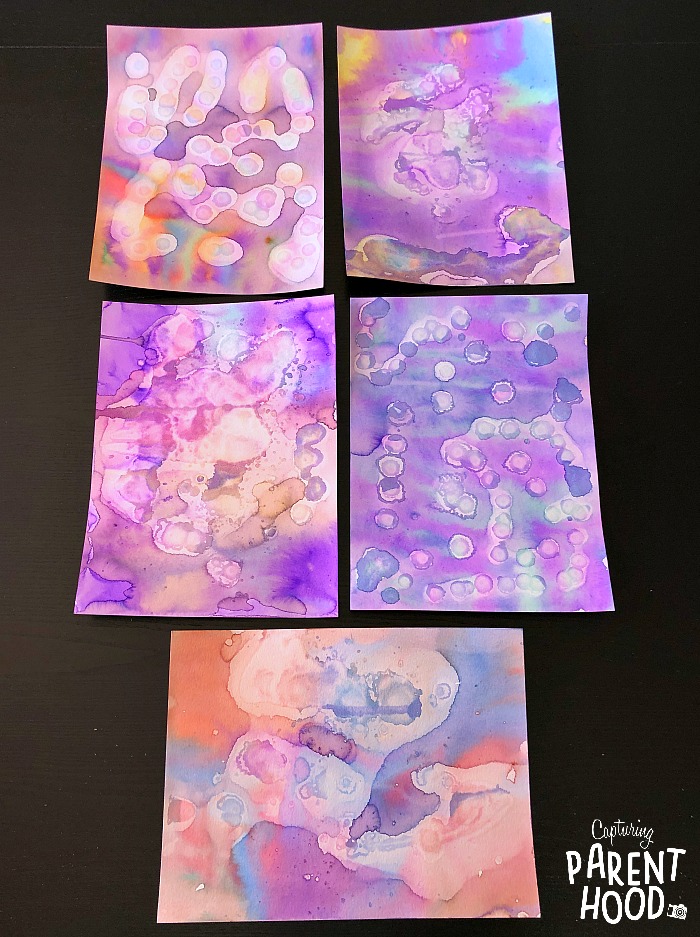
Needless to say, every single step of this spectacular painting process was highly addicting. We could not stop ourselves…and I’ll bet that you and your kiddos will feel the same. So grab some more sheets of watercolor paper and let the fun continue! Just make sure to transfer each completed masterpiece onto a dry paper towel, to dry completely.

Once the beautiful works of art are dry, it’s time to get hoppin’ and create some more Easter bunnies! I decided to use the same bunny template that I created for our Squeegee-Painted Bunnies from last Easter. We traced our bunnies onto the backside of our watercolor paper and then carefully cut them out. And for the finishing touch…we added a fluffy cotton ball tail to each rabbit, using a small dot of Elmer’s glue!
If you couldn’t tell…we are 100% OBSESSED with these Liquid Watercolor + Rubbing Alcohol Easter Bunnies! I have a sneaking suspicion that there will be plenty more liquid watercolor + rubbing alcohol exploration and art in our future!
In the meantime, if you’re looking for some more fun Easter craft ideas, make sure to check out our Easter Crafts for Kids post from last year, as well as our Easy Easter Crafts post from 2017.
HAPPY EASTER!