HAPPY VALENTINE’S DAY! We want to wish you all a wonderful, heartwarming holiday! One activity that always fills my heart on Valentine’s Day, is creating an extra special treat with my little nugget. It’s a time where we can come together in the kitchen, be a little silly, have a lot of fun, and make some love-filled goodies! And these Love Bug – Valentine’s Day Oreo Cookies are the absolute perfect recipe for such an occasion. They are super easy and fun to put together…and delicious to boot!

My husband loves Oreo cookies! Well, really…who doesn’t? But I’ve never met someone who could extinguish an entire package of Oreos so quickly. 🙂 Needless to say, when I kept seeing little Oreo Love Bugs popping up all over Pinterest, I knew they would make a superb gift for our daughter to give to her daddy on Valentine’s Day! So…if you have an Oreo-lover at home, go grab the handful of necessary ingredients (if you don’t already have them in a kitchen cupboard), whip up a batch of these cuties, and surprise that special someone with a delicious homemade treat!
Love Bug – Valentine’s Day Oreo Cookies
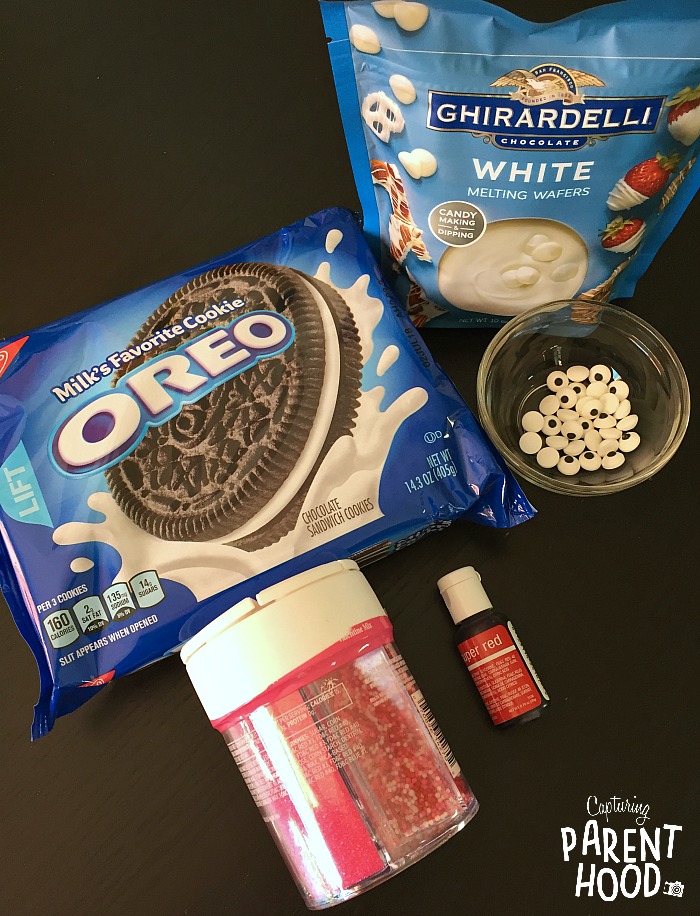
Ingredients:

- Oreo Cookies
- White Chocolate Melting Wafers (white chocolate chips work too)
- Food Coloring (red, pink, or purple)
- Candy Eyeballs
- Valentine’s Day Sprinkles
Instructions:

- Line a baking sheet with parchment paper, and set aside.
- Setup a double-boiler to melt the white chocolate. I just place a heat-safe mixing bowl on top of a medium-sized pot, filled with a couple of inches of water. Just make sure that the bowl does not come into contact with the water in the pot.
- Place the white chocolate wafers/chips into the bowl (I typically melt at least 1 cup at a time). Place the double-boiler over a stove-top burner on the lowest heat setting possible. If you heat white chocolate at a higher temperature, it will seize, and become completely unusable.
- As it heats, stir the white chocolate occasionally. When it begins to melt, stir it more frequently.
- Once your white chocolate is completely melted, add a couple of drops of food coloring, and stir until thoroughly combined. If the addition of food coloring causes your white chocolate to thicken up too much, you can stir in the tiniest bit of vegetable oil to thin it back out.
- Have your Oreo cookies and sprinkles at the ready.
- Working with one Oreo at a time, dip 1/2-to-3/4 of each Oreo into the melted chocolate – shake off any excess. Place the dipped Oreo onto the parchment-lined baking sheet and immediately decorate with sprinkles (before the chocolate hardens).
- Once all of your Oreo cookies have been dipped and sprinkled, it’s time to add the candy eyeballs! To do this, you just need to add two small dots of melted chocolate to the non-chocolate covered portion of each cookie, and place one candy eyeball on top of each dot of chocolate. You can accomplish this by adding some melted chocolate to a Ziploc bag and piping the dots onto the cookies. Again, make sure to add the candy eyeballs before the chocolate hardens.
- Let the cookies sit, until the chocolate has hardened completely.
- Enjoy!
*Note: These love bug cookies will last several days, if stored in an airtight bag or container.
Our little nugget loved bringing these Oreo Love Bugs to life! And I loved that we managed to fit some educational opportunities into the process. While making these adorable cookies, our daughter practiced her counting skills (cookies and candy eyeballs). She also carefully paired the eyeballs together, and made sure to match the exact quantity that we needed for our cookies. Plus…placing those candy eyeballs onto the little dots of melted chocolate requires some serious fine motor skills. Learning can be creative and fun!

We just can’t get over the overflowing cuteness that these little Love Bug Oreo Cookies exude. But as cute as they may be…they didn’t last long in our household of three. 🙂


