This past October we tried marbling little white pumpkins with nail polish – an activity I had seen on numerous Instagram accounts over the past couple of years. It took a couple of test pumpkins before we really got the hang of it, but by the third one, we were in complete awe over this clever marbling technique. My husband came home from work and marveled at our creations, before brilliantly pondering whether the same technique would work on Christmas ornaments. He’s full of great ideas – it’s why we keep him around. 🙂 Needless to say, I made my way over to the craft store to purchase some plastic ball ornaments (I always try to stick with plastic when crafting with my 4-year-old) and we set out to create an array of beautiful Nail Polish Marbled Christmas Ornaments!
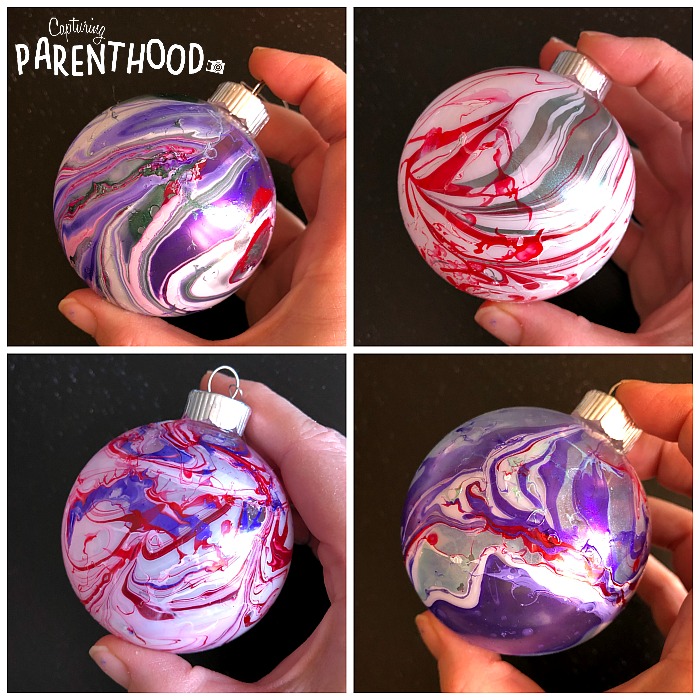
After dipping our very first ornament, we knew our quest would be successful. We were practically drooling over the stunning swirls of holiday color! Our little nugget was fully engaged with this craft…continuously selecting new color combinations for us to try…and happily dunking each ornament into a sea of swirled nail polish. If we had not run out of ornaments, we would likely still be marbling to this day.
You are definitely going to want to try this simple craft this holiday season (and maybe every holiday season from here on out – I know I will). With very little effort you can create a mass of mesmerizing baubles for your Christmas tree!

While this craft is fairly easy to complete, I would like to share two important tips with you before you begin. (1) Make sure your water is at room temperature. (2) Work quickly! It doesn’t take long for the nail polish to dry. That being said, if you find that the nail polish is sticking to your toothpick when you swirl the colors together, you are better off cleaning the nail polish out of the tub with a cotton swab and starting anew.
Nail Polish Marbled Christmas Ornaments
Supplies:
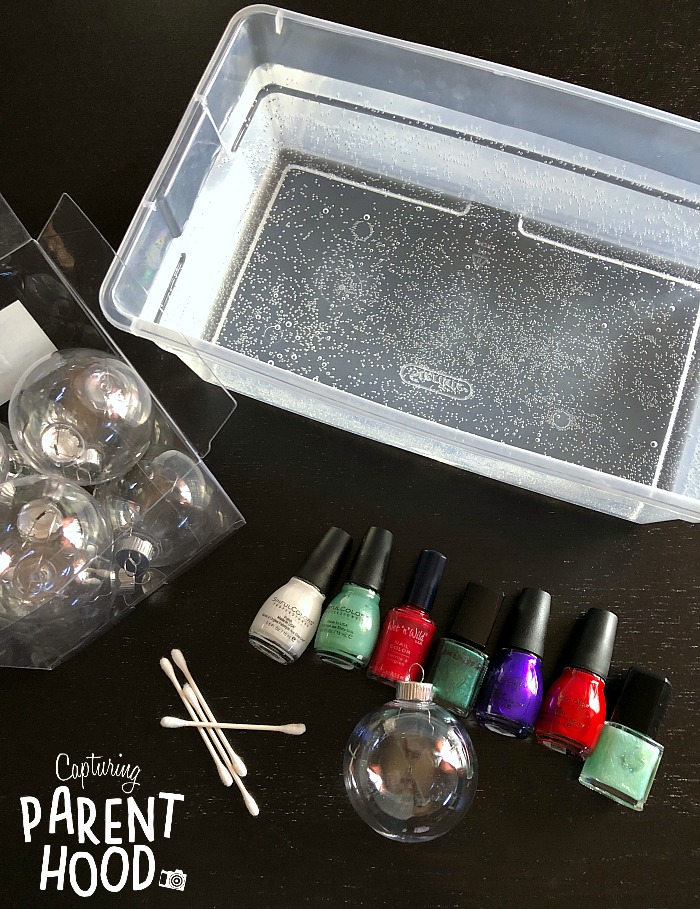
- Clear Plastic/Glass Ball Ornaments
- Tub of Water (at room temperature and deep enough to submerge the ornaments up to their neck)
- Finger Nail Polish (we had the best luck with the Sinful Colors brand)
- Toothpicks
- Cotton Swabs
Instructions:
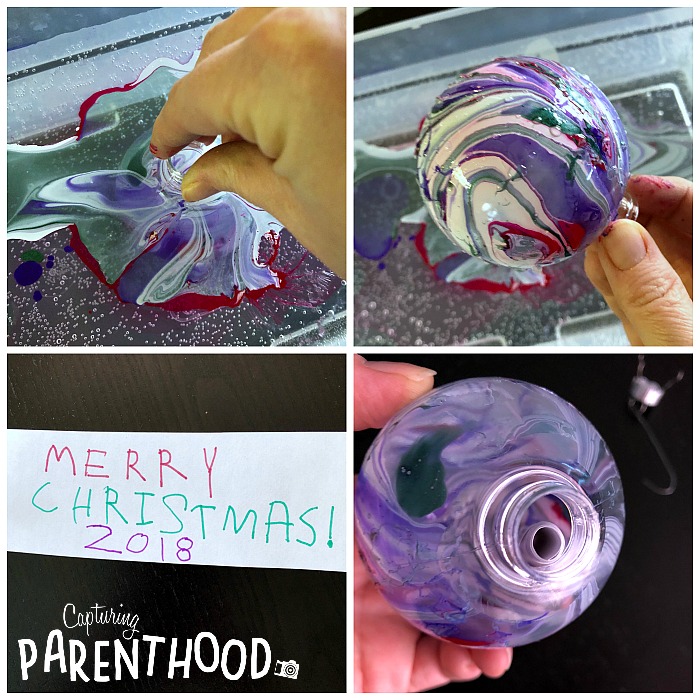
- Remove the metal tops from the ornaments and set aside. Get all of your other supplies together – you want everything to be within arms reach, because you have to work quickly. It’s also important for your water to be at room temperature. I fill my tub up the night before I plan to use it…just to make sure.
- Shake your nail polish up and unscrew all of the lids – if you have to unscrew each one as you add it to the tub of water, the nail polish will dry and set before you ever get your ornament dipped.
- Select 3-4 colors of nail polish. Working as quickly as possible, drip the nail polish into the center of the tub, as close to the water’s surface as you can. You want the polish to float on top, not drop to the bottom of the tub. Once you have all of your colors in the tub, grab a toothpick and swirl the colors around to create a marbled effect.
- Quickly grab your ball ornament and dunk it into the nail polish and water (submerging it all the way up to the neck of the ornament). Feel free to twist/spin it around a bit.
- Remove from the water and carefully balance the neck of the ornament on a paper towel or sheet of wax paper, so that the ornament can dry completely.
- To clean the nail polish from the water’s surface, simply run a cotton swab through the water. The nail polish will magically adhere to the cotton swab, leaving you with a clean tub of water to create more marbled ornaments.
- Repeat the above steps for each ornament that you would like to create. Try mixing different color combinations…or swirling the nail polish in various ways!
- When the ornaments are completely dry (we let ours sit out overnight) you can pop the metal tops back on. Since our ornaments became grandparent gifts, we decided to have our little nugget write a special Christmas message on a little scroll of paper, that we rolled up and placed inside each one!
- Fasten a hook through the metal loop on top of each ornament and hang them from the tree for everyone to see…or wrap them up with a bow and give them to all those you know. 🙂
This truly is such a fun and festive craft to do with your kiddos during the holidays. They will absolutely love the dazzling creations that they pull from the water (and you will too)! Not to mention, these marbled ornaments make the perfect teacher and/or grandparent gifts!
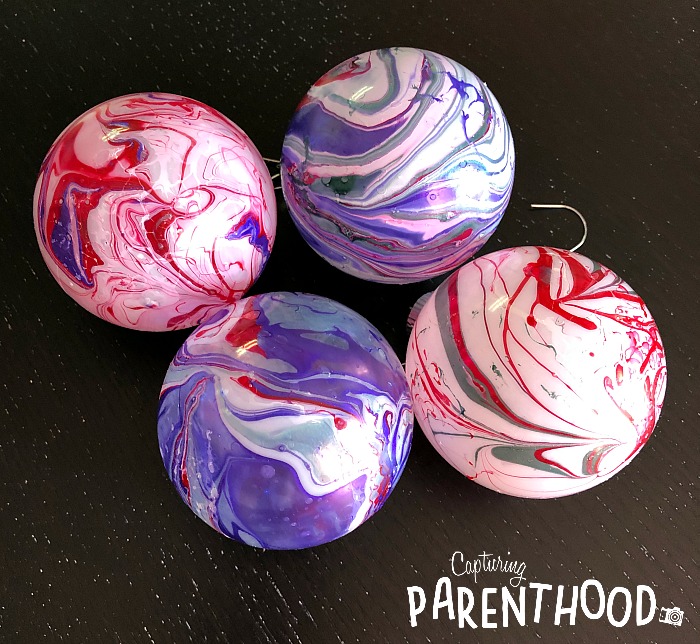
I can’t wait to marble more ornaments next year! But in the meantime, I’ll be thinking of all the other holiday decorations that we can marble with nail polish – some hearts for Valentine’s Day, perhaps? 🙂
And if you’re in need of more crafty Christmas ornament ideas, make sure to check out our Pom Photo Ornaments and our Simple Snowman Ornaments!
HAPPY HOLIDAYS!
