• Home
  • About
  • Kid Zone
    • Activities
    • Arts + Crafts
    • Books Books Books
  • Food
    • Family-Friendly
    • Kids
    • Sweets
    • Dog-Friendly
  • Life + Motherhood
    • Pregnancy
    • Parenting
    • House + Home
  • Let’s Party
    • Birthdays
    • Holidays
    • Instagram
    • Pinterest

Capturing Parenthood

Paper Flowers for Spring

in Arts + Crafts, Toddler Zone on April 24, 2018

“I glanced out the window at the signs of spring. The sky was almost blue, the trees were almost budding, the sun was almost bright.”

– Millard Kaufman

While Spring officially started back in March…in Colorado, Spring typically arrives sometime in late April to early May. And it appears that this year (with all of the wacky weather lately) that Spring was late to arrive pretty much everywhere. I’m sure, by now, we are all ready to welcome Spring with open arms. I know that I am more than ready to watch the trees and flowers bloom, and to feel the rejuvenation that this season always seems to bring. To celebrate Spring’s arrival, as well as Earth Day this past weekend, we decided to utilize a recyclable material and create these beautiful Paper Flowers for Spring!

Paper Flowers for Spring Β© Capturing Parenthood

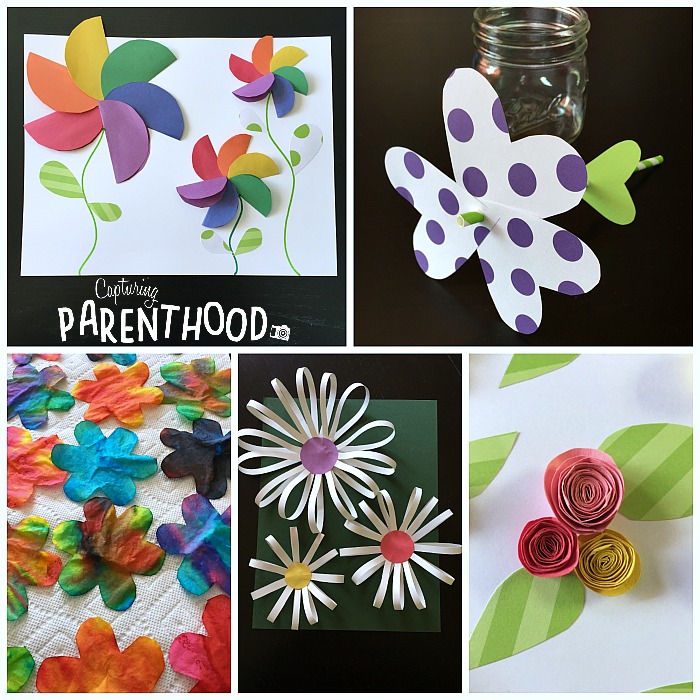
The vibrant and cheerful colors have really livened up our house. And our little nugget was thrilled to learn the variety of ways that paper can be transformed into a stunning floral display. If you’re ready to create some magnificent paper flowers with your little ones, keep scrolling to find all of the tutorials below.


Rainbow Paper Flowers

Paper Flowers for Spring Β© Capturing Parenthood

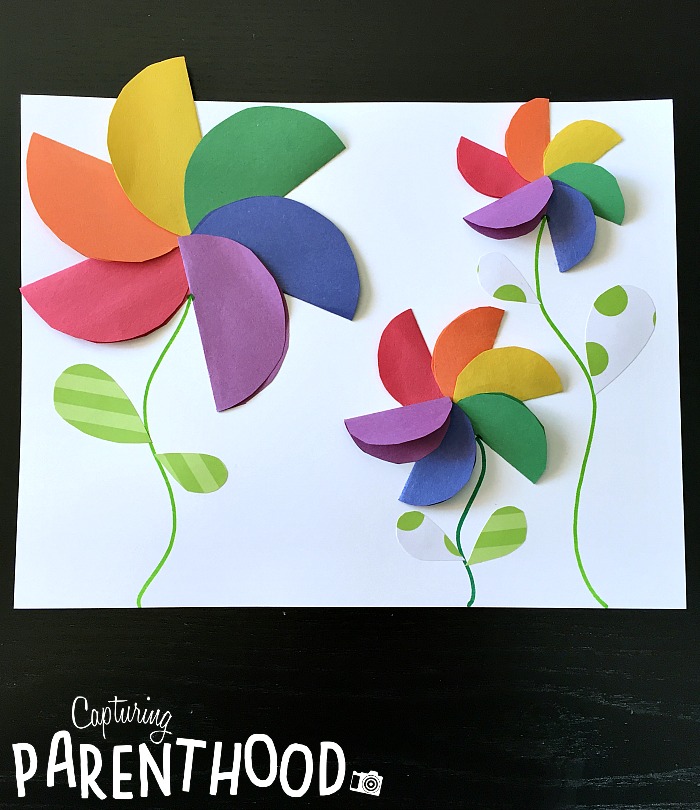
If you’ve been following along with us for awhile now, you know we have a deep love for rainbows…our St. Patrick’s Day Rainbow Arts + Crafts were definitely a highlight this year. So, when I came across this Rainbow Paper Flowers post, over on Twitchetts, I just knew we had to make a few of our own!

Paper Flowers for Spring Β© Capturing Parenthood

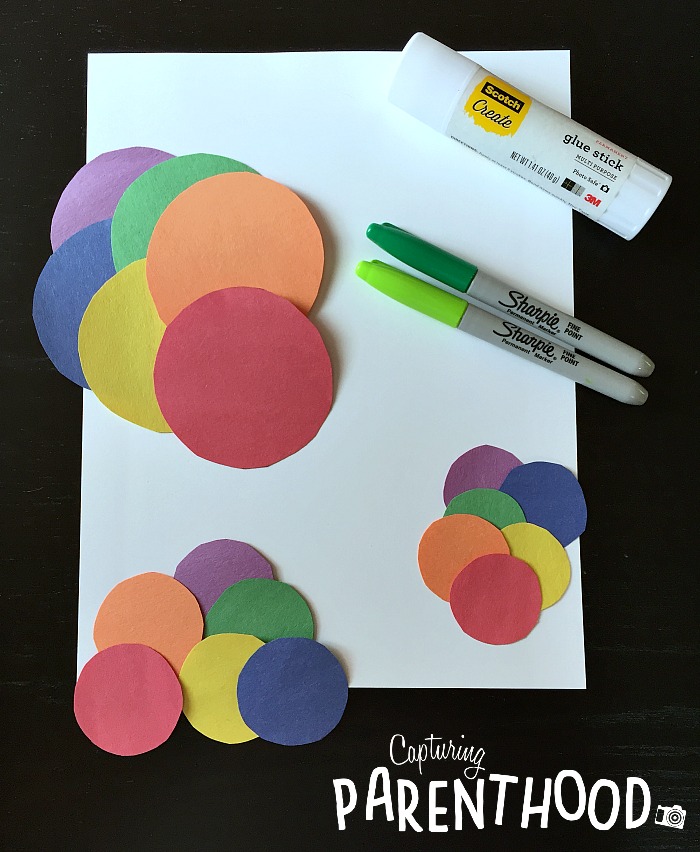
The supplies that you will need, for this simple paper flower craft, are as follows: construction paper (in every color of the rainbow), a sheet of white paper or card stock, a glue stick, a green marker, and some green scrapbook paper for the leaves (optional).

Paper Flowers for Spring Β© Capturing Parenthood

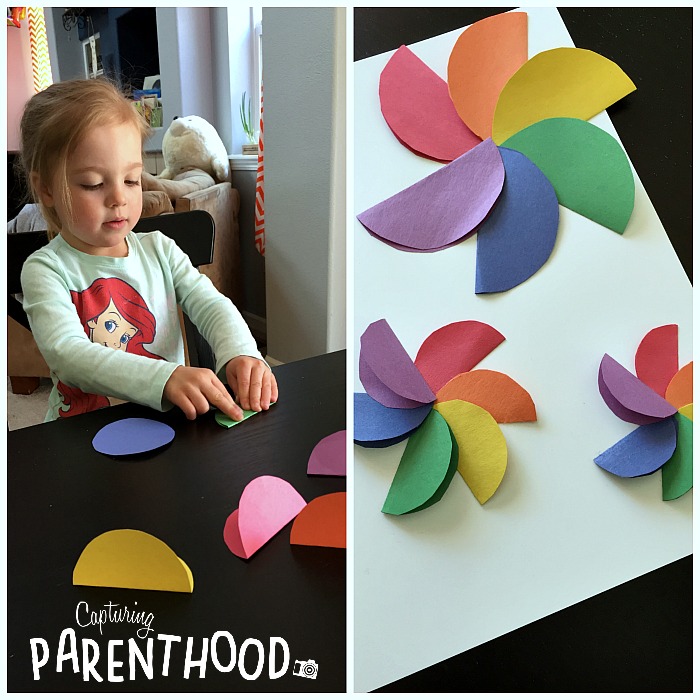
Start by cutting circles out of each color of construction paper. We made three circles of varying sizes, so we cut a large, medium, and small circle from each color of construction paper. Next, fold all of the circles in half. Our little nugget loved having this responsibility, and she did an excellent job! Once your circles are all folded, it’s time to glue them on to the white card stock. Make sure to keep the varying sizes grouped together. Start by gluing a red semi-circle down onto the paper, then glue down an orange semi-circle next to the red. Continue gluing the remaining colors onto the paper, in the shape of a circle. Repeat this process for the remaining flowers.

Paper Flowers for Spring Β© Capturing Parenthood

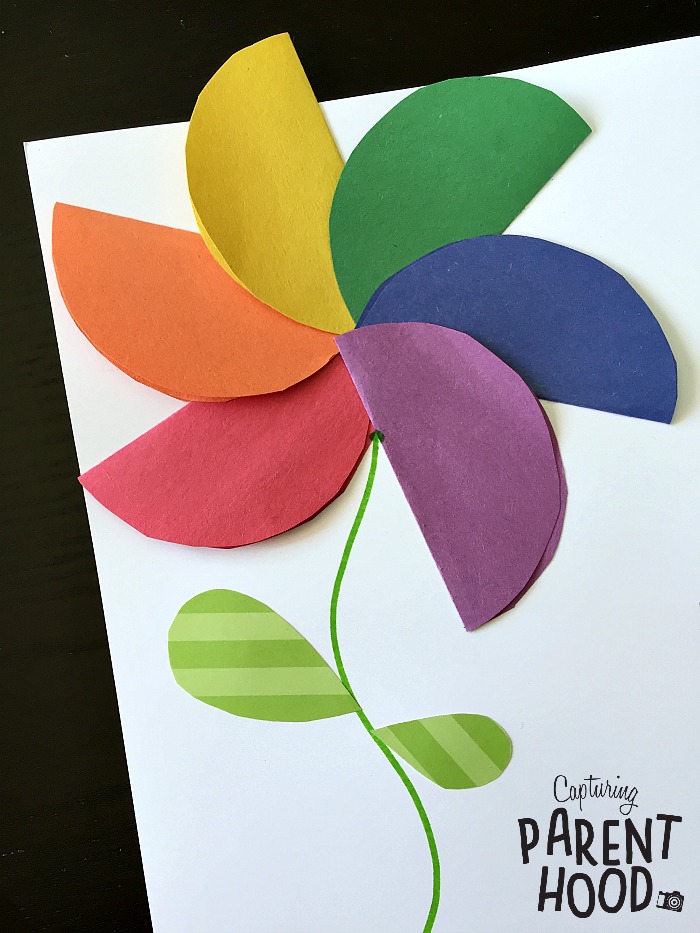
To add the finishing touches, draw on the stems of each flower with the green marker. Feel free to use the marker to draw leaves on the stems as well. We chose to use a few green scrapbook paper leaves, that we had made for another one of our paper flower crafts below. πŸ™‚

Paper Heart Flower Bouquet

Paper Flowers for Spring Β© Capturing Parenthood

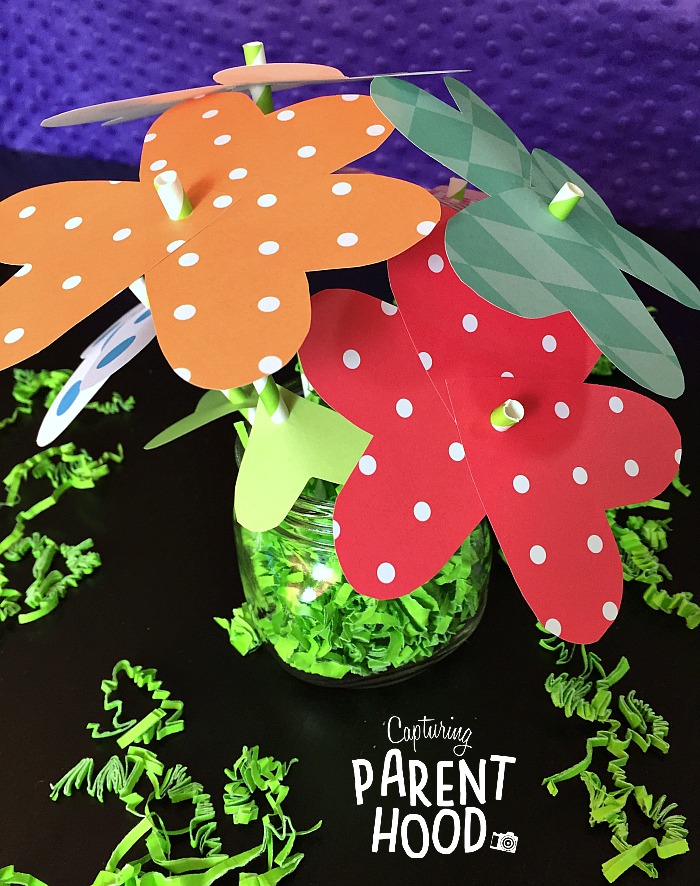
This marvelous bouquet of paper heart flowers has become our Spring centerpiece for our dining room table. Now we enjoy our meals while admiring the bright and colorful arrangement. And the best part…this bouquet will last the entire season without wilting, and these flowers never need to be watered! I just adore this creative idea that we found over on Fireflies + Mud Pies.

Paper Flowers for Spring Β© Capturing Parenthood

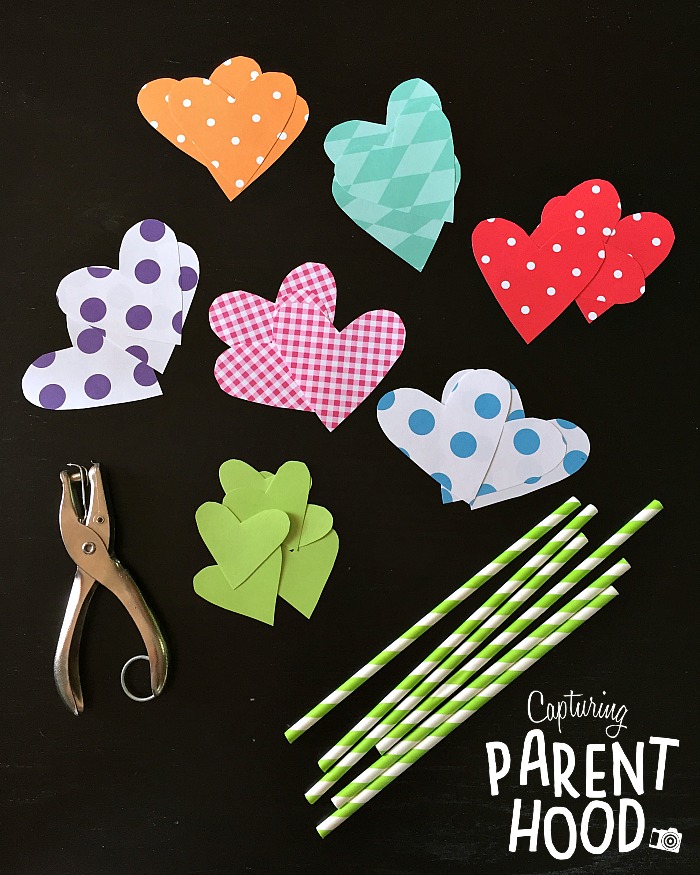
To make a beautiful, and heart-filled, paper flower bouquet of your own, you will need the following supplies: a variety of colors of scrapbook paper (including green for the stem leaves), green paper straws, a hole punch, and (possibly) some glue.

Begin by cutting out one small(ish) green heart for each of your flowers. Punch a hole just above the bottom point of each green heart. Place a green paper straw through the hole of each small green heart (one heart per straw), and slide the green heart toward the middle of the straw. If it seems like the heart won’t stay in place on its own, place a small circle of glue on the underside of each heart (gluing around the straw), and set aside for the glue to dry. Repeat this process for each straw.

Paper Flowers for Spring Β© Capturing Parenthood

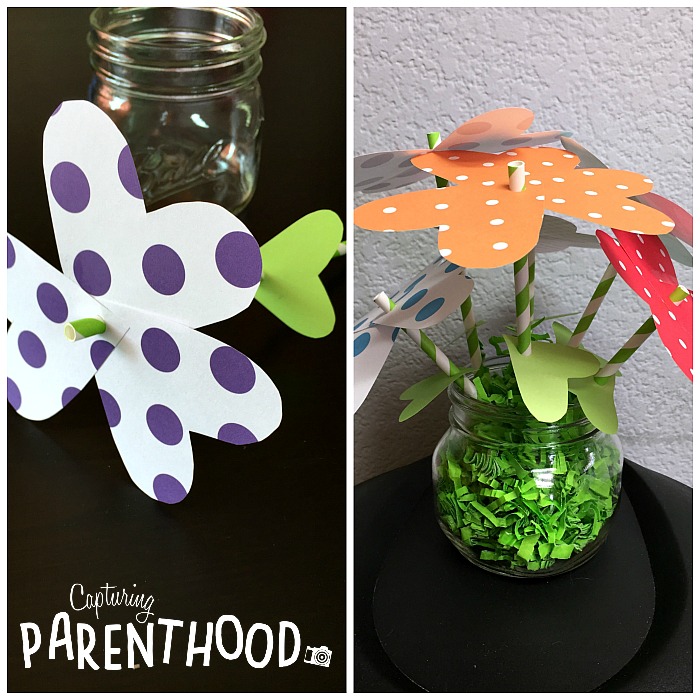
Next, cut three larger hearts from each of the pieces of colored scrapbook paper. Using the hole punch, punch one hole just above the bottom point of each heart. Now you are ready to assemble your flowers! It might be easier to line up the holes of the three hearts of each color and glue them together, prior to placing them on top of the paper straws. That being said, if your heart flower petals fit snug on the paper straws, this may be unnecessary. Place the paper heart flower petals on a green paper straw, allowing the straw to poke up out of the middle of each flower just a little bit. Again, if it seems like the flowers won’t stay in place on the straws, pipe a small circle of glue on the underside of each flower (gluing around the straw), and set aside for the glue to dry completely. To put these on display, I simply filled a shallow, wide-mouthed mason jar with green Easter grass, and placed each of the flowers down into the jar, to create the lovely bouquet.

Coffee Filter Flowers

Paper Flowers for Spring Β© Capturing Parenthood

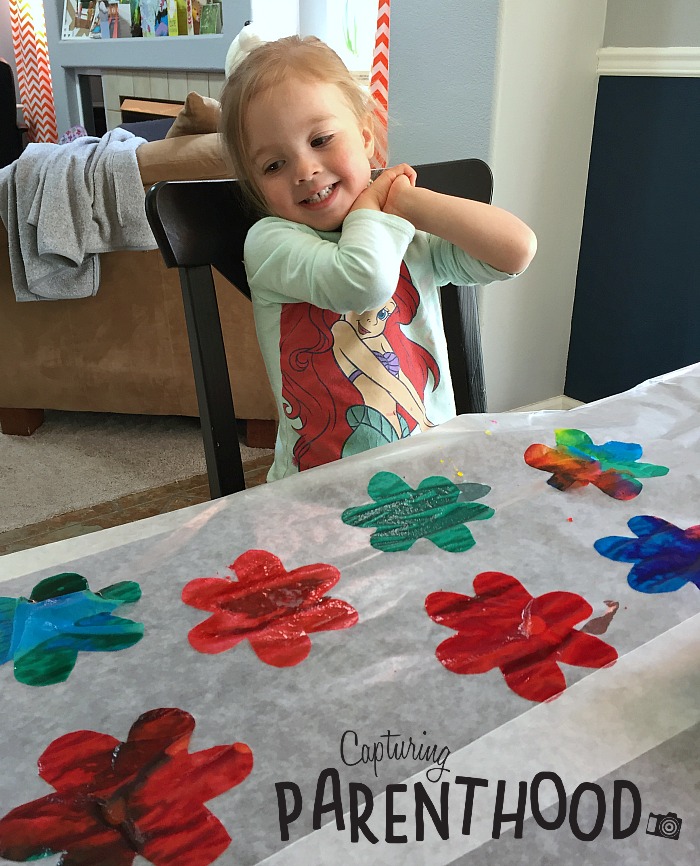
These magnificent coffee filter flowers were our absolute favorite paper flowers to create! Our little nugget sat at the dining room table for over an hour, dripping a variety of watercolors onto the paper flowers. The process was never boring. She loved watching all of the colors simply melt on to the coffee filters…coming together to create brand new colors! And I loved watching her creativity and imagination at work. πŸ™‚ We created upwards of 25 flowers…that’s how much we enjoyed this colorful activity!

Paper Flowers for Spring Β© Capturing Parenthood

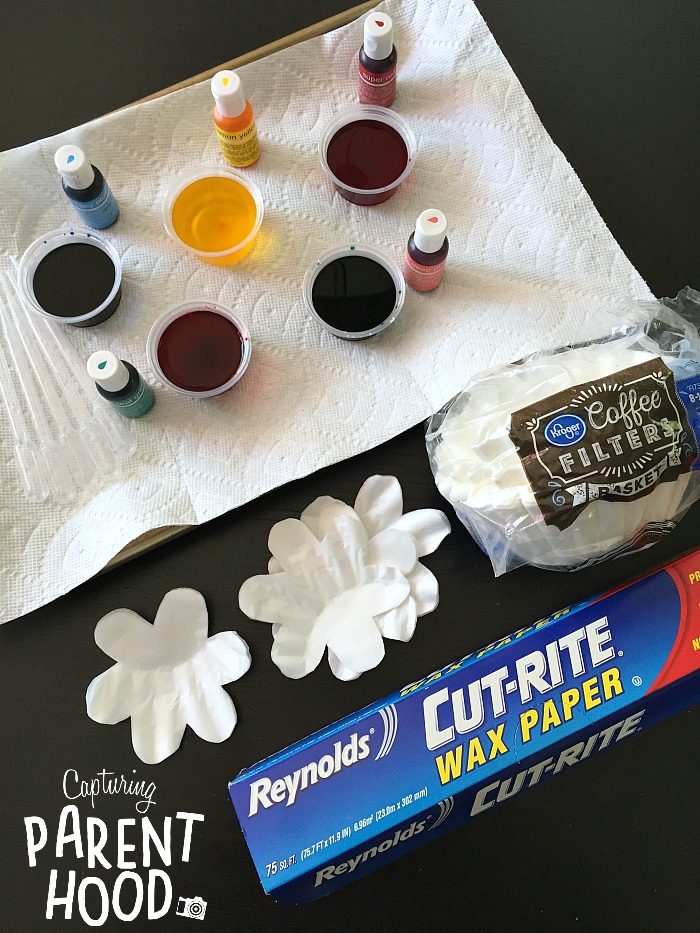
You will need the following supplies to make these unique flowers: coffee filters, wax paper, liquid watercolors (we made our own using gel food coloring), and pipettes or eye-droppers.

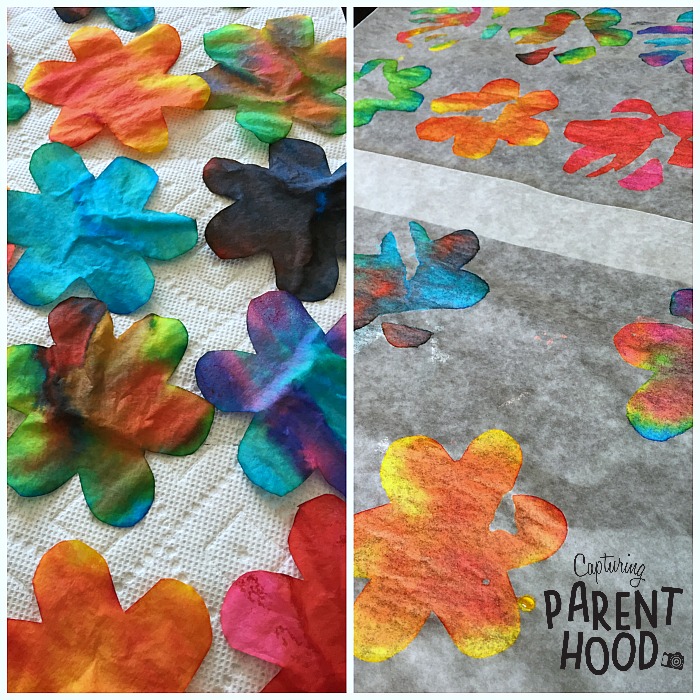
Start by cutting the flowers out of the coffee filters. If you have a die-cut machine this is a lot easier. We do not, so I simply cut a flower template from a piece of card stock and used that as my cutting pattern on the coffee filters. The nice thing about coffee filters is that they are so thin, you can cut several of them at the same time!

Paper Flowers for Spring Β© Capturing Parenthood

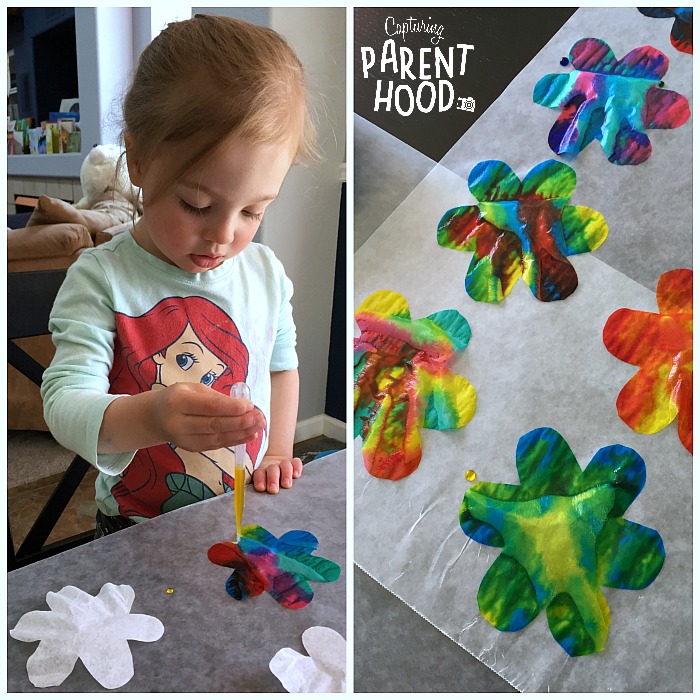
Next, lay sheets of wax paper on a flat work surface. The wax paper helps to contain any excess watercolors (and also creates a magical surprise of its own, when all is said and done). Place a handful of coffee filter flowers (in a single layer) on the wax paper. Grab your liquid watercolors and pipettes, and let the creativity begin!

Paper Flowers for Spring Β© Capturing Parenthood

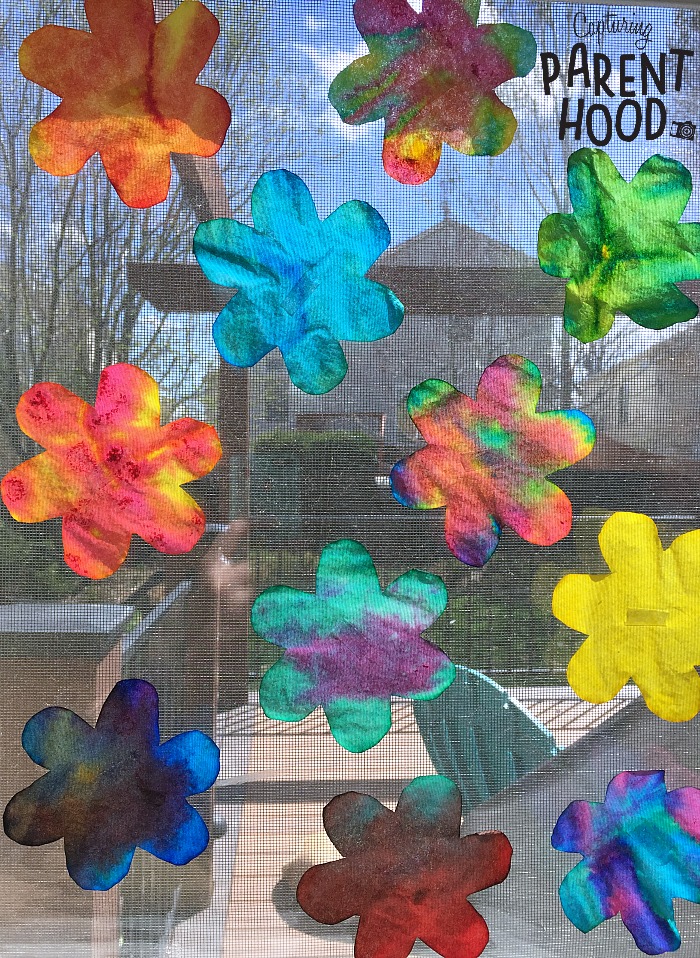
Once all of your coffee filters have been dyed, let them sit on the wax paper to dry slightly. Once they are no longer soaking wet, feel free to transfer them to a paper towel, to dry completely. When you remove the flowers from the wax paper, you will immediately notice the surprise I mentioned before. Not only will you have a beautifully-colored coffee filter flower, but you will find that you’ve created the same vibrant flower on the wax paper as well! We were absolutely thrilled with this discovery!

Paper Flowers for Spring Β© Capturing Parenthood

Once all of the coffee filters have dried completely, hang them up on display. We chose to add a piece of tape to the back of each flower, and tape them to our living room windows. The sunlight shining through the colorful arrangement is simply breathtaking!

I stumbled upon this brilliant coffee filter art idea, over on Fun-A-Day!
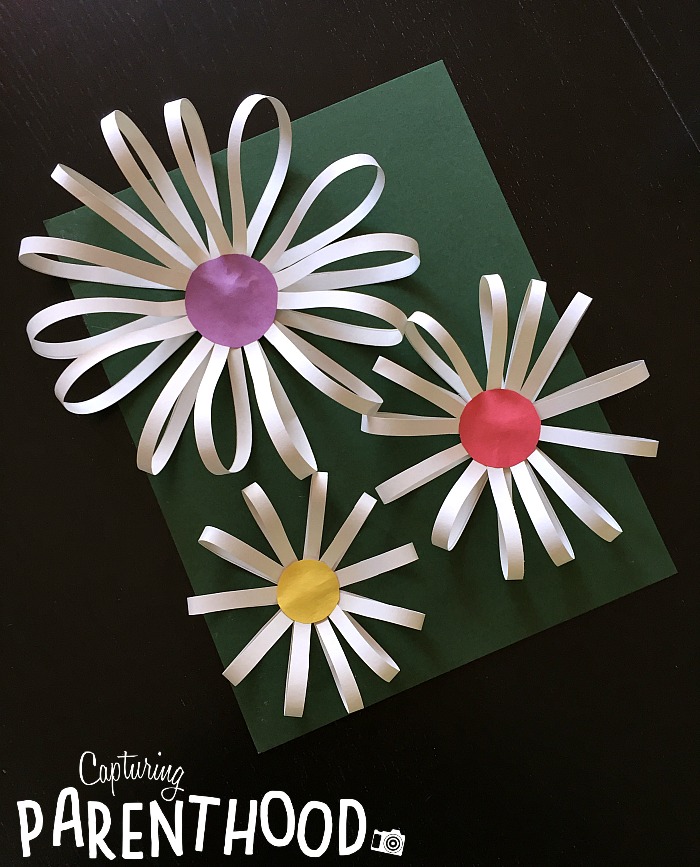
3D Paper Daisies

Paper Flowers for Spring Β© Capturing Parenthood

Before we started our paper flower crafts, our daughter had declared that daisies were her favorite flower! So, I would’ve been remiss if we didn’t make a few paper daisies. πŸ™‚ I came across a photo (with no attached link) of this paper daisies idea, over on Pinterest. We gathered the necessary information from the photo, and got to work.

Paper Flowers for Spring Β© Capturing Parenthood

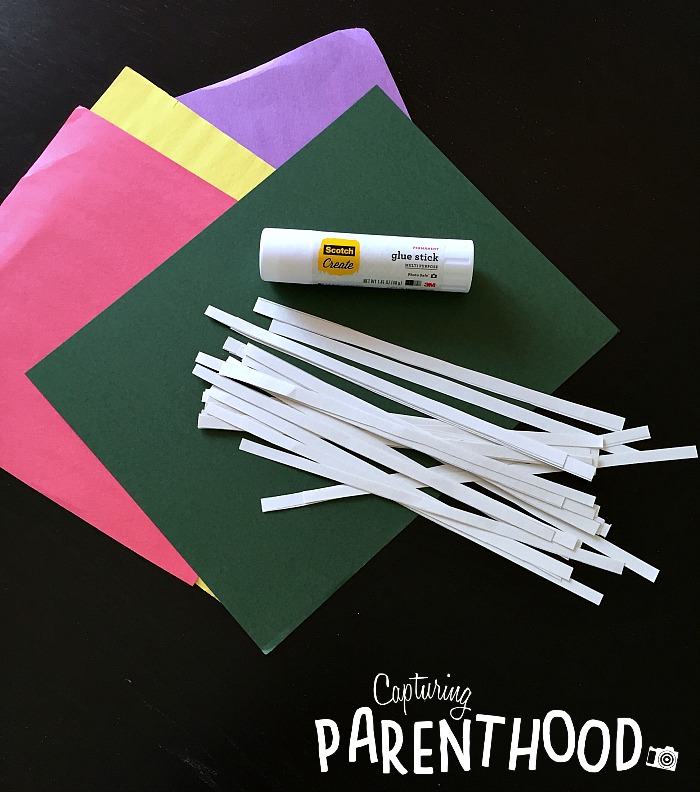
This 3D Paper Daisies craft requires the following supplies: a sheet of paper or card stock for the background (we went with green), a piece of white printer (or construction) paper, yellow construction paper for the center of the daisies (we decided to give each of our daisies a different colored center, so feel free to do the same), scissors, and glue/glue stick.

Paper Flowers for Spring Β© Capturing Parenthood

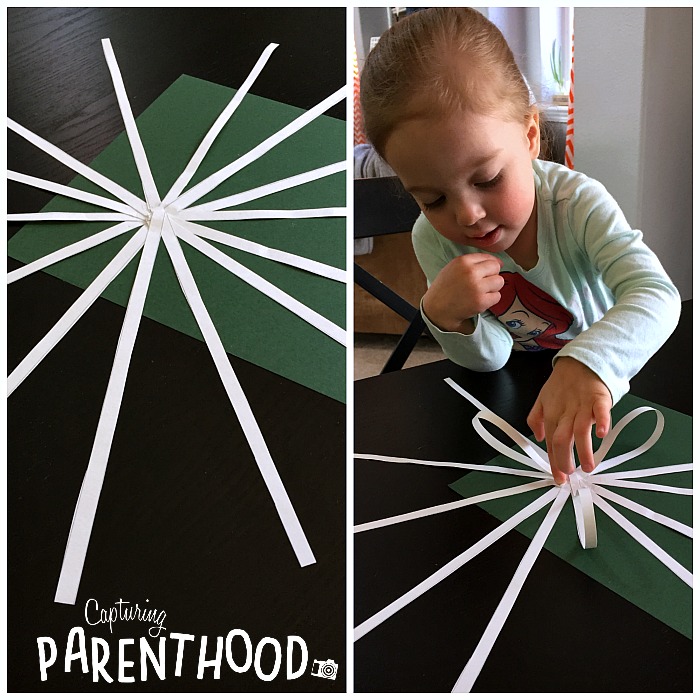
Start by cutting thin strips from the white piece of paper (we cut our paper horizontally). Place a circular dab of glue on the background paper (where you would like the center of your first/largest flower to be). Place the end of one strip of paper into the glue. Place another next to the first, and continue to glue down one end of the strips, in a circular pattern, until the circle is complete. Again, place a dab of glue in the center of the flower (this time on top of the white strips of paper). Gently glue the other end of each white strip to the center of the flower. This will create a loop for each flower petal. Glue down the rest of the white strips in the same manner, until all of the petals are complete. Lastly, cut a small circle from the colored construction paper, and glue it in the center of the flower (hiding all of the ends of the paper strips underneath). Ta Da!

Repeat this process for any additional daisies that you wish to make. If you would like to make them varying sizes, simply cut down the white strips of paper, before gluing down each smaller flower. πŸ™‚

Rolled Paper Roses

Paper Flowers for Spring Β© Capturing Parenthood

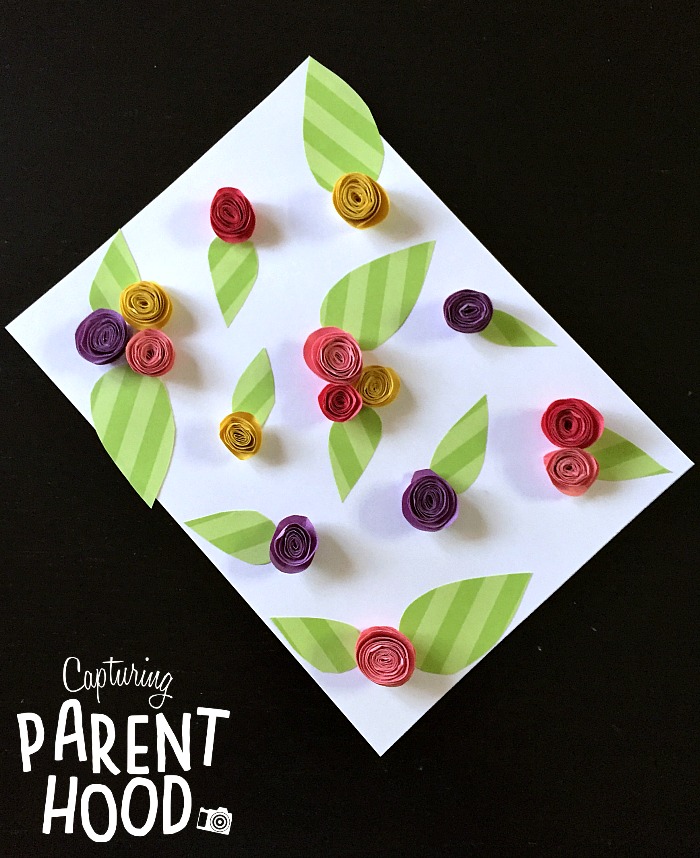
When I came across Andreja’s DIY Rolled Paper Roses Valentine’s Day CardΒ idea, over on Easy Peasy and Fun, I decided that a handful of paper roses would make a wonderful contribution to our Spring decor! But instead of a greeting card, with a basket full of handmade paper roses, we chose to create a colorful little rose garden on a piece of white card stock.

Paper Flowers for Spring Β© Capturing Parenthood

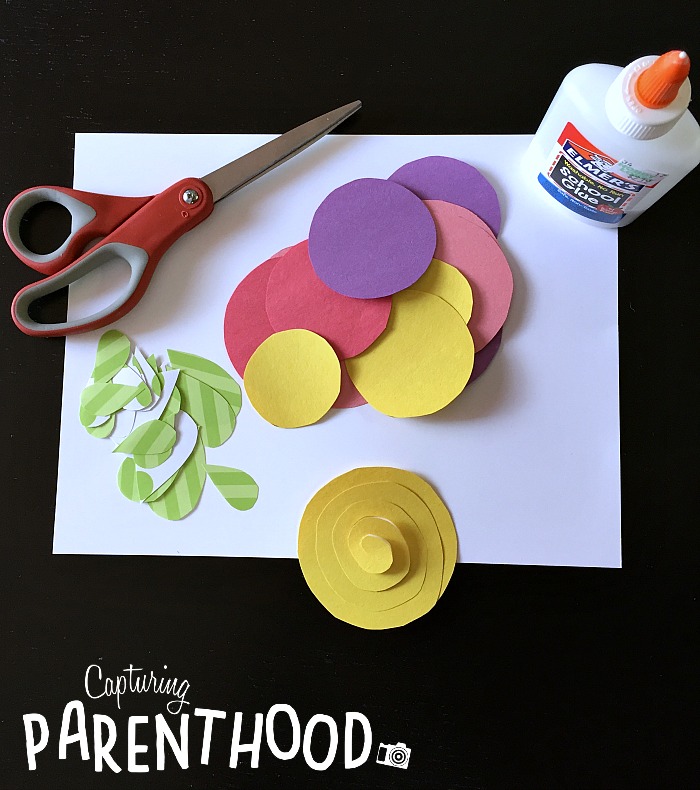
If you would like to create your very own paper rose garden, you will need the following supplies: a piece of white card stock, various colors of construction paper, green scrapbook paper for the leaves (you can use green construction paper as well, we just wanted to add a bit more interest by using a patterned paper), scissors, and glue.

Paper Flowers for Spring Β© Capturing Parenthood

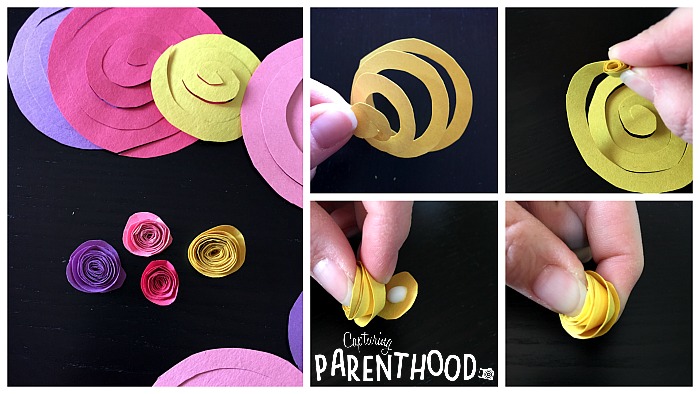
To make the rolled roses, start by cutting out circles from the colored construction paper, in a variety of different sizes. Then, you will cut each of the circles into a spiral. Working with one paper spiral at a time, start rolling the spiral from the outer end. Continue rolling until you are almost all the way to the center. Place a small dab of glue on the center circle, and press it firmly to the underside of the rolled rose. Hold together for several minutes, allowing the glue to dry. Repeat this process for the remaining spirals.

Paper Flowers for Spring Β© Capturing Parenthood

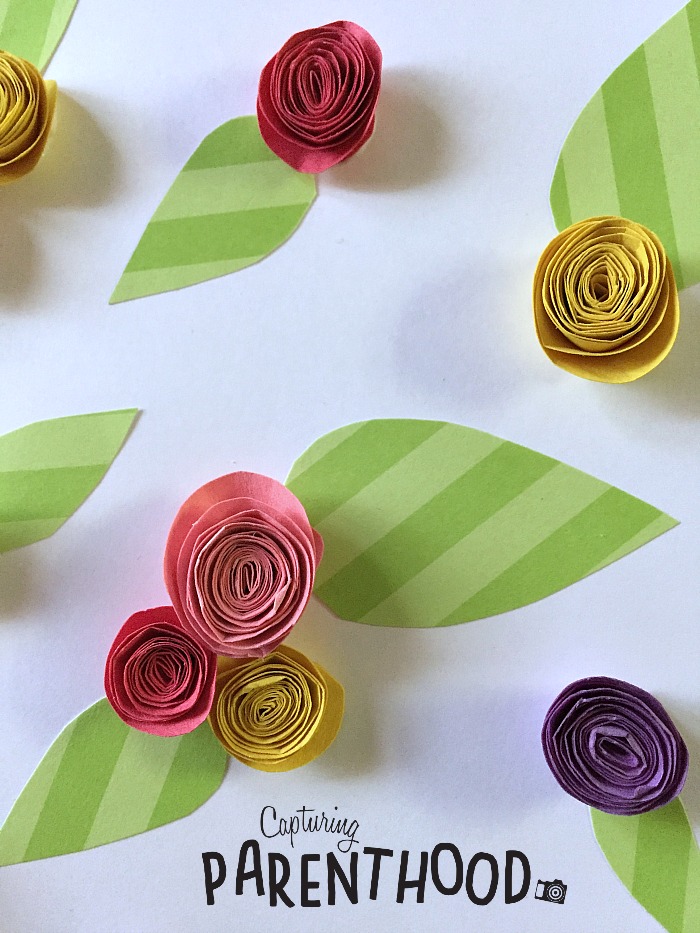
Once all of your rolled roses are complete, adhere them (with a drop of glue) to the white card stock, in whatever pattern or fashion you choose. Glue on a variety of small green leaves, for the final flourish!

In full disclosure, I made this paper rose craft by myself. I think our little nugget would have struggled a bit with the small size of the roses. That being said, she was more than complimentary, when I showed her the finished product. “They’re beautiful, Mommy!” πŸ™‚ While this craft may be tricky for the littlest hands, older children should have no problem completing this beautiful craft.


And there you have it…our Paper Flowers for Spring! Just looking at all of these vibrant flowers around our house, makes my heart happy.

If you are looking for more fun Spring craft ideas for your little ones, make sure to check out our Springtime Toddler Crafts post, from last year!

HAPPY SPRING!

START SPREADING THE NEWS!

Related Posts

  • Spooktacular Halloween CookiesSpooktacular Halloween Cookies
  • Yogurt Pretzel Snowman Jars – Teacher GiftsYogurt Pretzel Snowman Jars – Teacher Gifts
  • Air-Dry Clay BugsAir-Dry Clay Bugs
  • Blue Glitter Glue Sensory BottleBlue Glitter Glue Sensory Bottle
« DIY Bird Feeder – Kids Craft
Flower Pudding Tarts »

Hello! Nice to meet you!

Welcome to the Capturing Parenthood blog! I'm Stacey...wife and first-time parent, former full-time working mom, turned stay-at-home mom. Join me as I capture and share my thoughts and experiences on this crazy adventure we call parenthood! Click here to learn more about me!

Search Capturing Parenthood

Instagram

Ok...@artwithmrs.e Haunted House project is hands- Ok...@artwithmrs.e Haunted House project is hands-down the best Halloween-themed art project out there! πŸ™ŒπŸ™ŒπŸ™Œ
We had a blast creating haunted houses for homeschool art this month! 🧑
...
We followed Kaitlyn's extremely helpful Haunted House Drawing Guide (you can find it over on her Teachers Pay Teachers account) and completed the project over the course of 3 lessons.
...
During our first lesson, we sketched our houses in pencil, and added some eerie exterior landscaping. πŸͺ¦πŸ¦‡
We popped in a few spooky characters (ghosts, spiders, pumpkins, and a vampire). πŸ‘»πŸ•·πŸŽƒπŸ§›
And then we traced over our pencil lines with black Sharpie.
...
During our next lesson, we used a coloring technique that we learned from Kristian @friendsartlab ❀️ We colored our pictures with oil pastels...and then painted over the top of the oil pastels with baby oil...it causes the oil pastels to bleed and blend together! 🀩
...
During our final lesson...we added more spooky characters to the inside of our house...that can peek out behind the doors and windows. πŸ’€πŸ§™β€β™€οΈπŸ‘»
To do this...I used an X-acto knife and carefully cut around the outside edges of the doors/windows (leaving the hinge sides intact so that they could fold open and closed).
We placed yellow construction paper in the background...and added witches, ghosts, skeletons, a mummy, and a Frankenstein! 😍
This step made our haunted houses really come to life...and we just can't thank Kaitlyn @artwithmrs.e enough for sharing this awesome lesson and drawing guide! THE ABSOLUTE BEST! ❀️❀️❀️
...
It was very evident how much our daughter loved this project...as we worked through each step...but the thing that solidified just how much she enjoyed it was - one weekend morning I walked downstairs to find her and her dad sitting at the table - and she was very excitedly teaching him how to draw his own haunted house - while she drew a few more herself (scroll to the last picture in the carousel)! πŸ₯°
...
#hauntedhouse #hauntedhouses #hauntedhousedrawing #directeddrawing #spookyart #halloween #happyhalloween #halloweenart #halloweenfun #elementaryart #homeschoolart #homeschool #homeschoolfun #capturingparenthood
I decided that these six little pumpkins needed a I decided that these six little pumpkins needed a permanent place on our feed...because WE GREW THEM OURSELVES!!! πŸŽƒ
That's right...first-time pumpkin-growers over here...and it was all actually a bit of a surprise. πŸ˜ƒ
...
You see, when we went to prep our garden beds this spring, we noticed a plant that had already started growing. We assumed it was a cucumber plant, since it was in the same place we had cucumbers last year.
We left it alone and planted a couple of other cucumber plants nearby. πŸ₯’
At first, the leaves on our mystery plant looked very similar to the leaves on our other cucumber plants.
But a couple of weeks later the plant had grown A LOT bigger. It was now obvious that it was not a cucumber plant. But what was it? πŸ€·β€β™€οΈ
...
And that's when it suddenly dawned on these exhausted parents, that our daughter had spontaneously tossed seeds from her pumpkin (last Halloween), into the garden bed. πŸ€¦β€β™€οΈ The mystery was finally solved...and by the looks of the large golden flowers that were emerging all over the vines...we figured we might have a few pumpkins come fall! πŸ™ŒπŸŽƒπŸ™Œ
...
It was so much fun to watch the pumpkin plant grow! 🀩 We had to cut down the wire on one side of our garden bed to let the vines out...and they ended up growing 6-10 feet long in both directions! 😳 It was crazy!
They put out the most gorgeous flowers...that the bees absolutely loved! 🧑 And soon enough, we spotted a few round gourds growing at the base of some of the flowers. They grew quickly...and then turned a beautiful shade of orange! 😍
...
Needless to say, we are now officially pumpkin-growing people! πŸ˜‚ My husband can't wait to plant more next year...and he's already looking in to different varieties - hoping to grow some larger jack-o-lantern style ones next season! πŸŽƒ
…
#pumpkins #growingpumpkins #ourpumpkinpatch #homegrownpumpkins #homegrown #homegarden #pumpkingrowing #gardening #fallharvest #happyhalloween #timetocarvesomepumpkins #gardensurprises #gardenfun #capturingparenthood
Free the Frankensteins from the Frozen Rainbow Bra Free the Frankensteins from the Frozen Rainbow Brain! 😬🌈🧠
…
Yesterday, we shared how we made this colorful, frozen rainbow brain - full of Frankenstein mini erasers…and today we wanted to show you what became of our beautiful brain! πŸ˜ƒ
…
We popped it out onto a tray, grabbed a shaker of salt, a bottle of warm water (colored red for added effect), and some tongs.
And then it was time to Free the Frankensteins (our daughter coined the phrase)! πŸ˜‰
…
This spooky activity provides chilly sensory play, motor skills practice, and scientific exploration (salt and warm water speed-up the melting process)! πŸ™ŒπŸ™ŒπŸ™Œ
As an added bonus…you also get some color-mixing! And the addition of the salt makes it extra sparkly too! 😍🀩😍
…
Eventually, all you’re left with is some mini erasers floating in a pool of colorful water…and a happy kid! ❀️❀️❀️
…
#frozenbrain #rainbowbrain #frozenrainbowbrain #brains #freethefrankensteins #halloween #happyhalloween #halloweenactivities #halloweenactivitiesforkids #halloweensensoryplay #sensoryplay #sensoryexploration #motorskills #motorskillsdevelopment #scienceforkids #kidscience #funactivities #funactivitiesforkids #halloweenfun #capturingparenthood
We are definitely getting into the fall and Hallow We are definitely getting into the fall and Halloween spirit...so during a recent homeschool art session, we decided to make some air-dry clay pumpkins and jack-o-lanterns! πŸŽƒπŸŽƒπŸŽƒ
...
Back in 2019, Lauralee @2art.chambers shared several colorful, air-dry clay pumpkins that her students made...and after rediscovering the saved post, I decided that it would be a perfect October art lesson for us too! 🧑
...
We used various colors of air-dry clay, and rolled each color into whatever pumpkin shape we wanted...and then we added our lines/indentations using the side of a credit card. πŸ’³ The stems are just small, broken pieces of old crayons (another genius idea from Lauralee). πŸ– And we topped our stems with pieces of pipe cleaner, to create the little curly cues. 😍
...
Once we had our pumpkins...we decided to change things up a bit, and grabbed our stash of googly eyes. πŸ‘€ (Most of) our fall pumpkins then transformed into Halloween jack-o-lanterns! πŸŽƒ
We pressed the googly eyes into the clay, and we used a few small tools (that came with our box of air-dry clay) to add their mouths. πŸ˜ƒ
...
And now we have a cute and colorful crew of clay pumpkins adorning our mantle! πŸŽƒπŸ§‘πŸŽƒ
...
#pumpkins #jackolanterns #claypumpkins #airdryclay #airdryclaycreation #airdryclayart #airdryclaypumpkins #elementaryart #fallartprojects #fallartprojectsforkids #halloweenart #halloweenartprojects #halloweenartprojectsforkids #homeschool #homeschoolart #homeschoolfun #halloween #happyhalloween #capturingparenthood
Andrew from @elementaryarts shared a patterned, bl Andrew from @elementaryarts shared a patterned, block letter name project a couple of weeks ago (I'll share the post in stories today), and I immediately added it to our list of art projects to do this year! 😍
But we decided to switch things up a little bit! Instead of using our names, we each picked a color that we like...wrote the name of the color in block letters on our paper...and created our color patterns using at least two different shades of our chosen color. πŸ–
...
This colorful project ended up being a lot of fun, and also very relaxing...as we all quietly focused, and zoned in on adding the color patterns around all of our letters. It was actually a bit hypnotizing! 🀩
...
Needless to say, we are really happy with the way our block letter color project turned out! πŸ™Œ We even had a special guest who wanted to join in on this art project! ❀️
...
P.S. We also used Andrew’s free TPT handout on how to make block letters! The bundle includes bubble letters, cursive letters, graffiti letters, and more! πŸ‘
…
#blockletters #blocklettering #colors #color #colorful #artproject #artforkids #kidart #elementaryart #artactivity #artactivities #artactivitiesforkids #colorfun #homeschool #homeschoolart #homeschoolfun #capturingparenthood
We created self-portraits for our first art projec We created self-portraits for our first art project of our homeschool year...and we are pretty obsessed with them! 🀩✏️🀩
...
I love the idea of doing a self-portrait project at the beginning of the year, and then again at the end of the year...so that we can see how much we've grown and changed.
...
We used Kaitlyn's @artwithmrs.e Simple Self-Portrait Drawing Guide and it was so incredibly helpful (especially for this new homeschool teacher who wouldn't necessarily list drawing as one of her stronger suits). πŸ˜‰
We actually purchased her entire Guided Drawing Bundle (over on Teachers Pay Teachers) and we highly recommend it! πŸ™ŒπŸ™ŒπŸ™Œ
...
We looked through the self-portrait drawing guide to get different ideas for our eyes, nose, mouth, and hair. πŸ‘€πŸ‘ƒπŸ‘„
...
Now...if you caught our stories earlier this week, you know that our daughter recently made a pretty big change to her hair (that included a partial side-shave and bob-length cut - she also dyed it blue). πŸ’‡β€β™€οΈ
She was used to drawing pictures of herself with her long, blonde locks...and her new hairstyle proved rather difficult. But she persevered, and ended up with a self-portrait that she was truly proud of! πŸ₯°
...
When we were finished drawing our likenesses, we decided to cut them out and create a special background to glue them onto. I went with random black and white designs...and our nugget decided to draw various things that she loves (her family, winter, candy, books, dolphins...and more)! ❀️
...
It was such a fun project...and I can't wait to see what our self-portraits look like at the end of our school year! πŸ˜ƒ
...
#selfportrait #selfportraits #homeschool #homeschoolart #elementaryart #artactivities #artactivitiesforkids #artforkids #kidart #homeschoolfun #capturingparenthood
Follow on Instagram

Popular Posts

Virtual Spring Break: Day Five - New York City

Virtual Spring Break: Day Five – New York City

Virtual Spring Break: Day Four - Mexico

Virtual Spring Break: Day Four – Mexico

Virtual Spring Break: Day Three - India

Virtual Spring Break: Day Three – India

Join Us on Instagram

Ok...@artwithmrs.e Haunted House project is hands- Ok...@artwithmrs.e Haunted House project is hands-down the best Halloween-themed art project out there! πŸ™ŒπŸ™ŒπŸ™Œ
We had a blast creating haunted houses for homeschool art this month! 🧑
...
We followed Kaitlyn's extremely helpful Haunted House Drawing Guide (you can find it over on her Teachers Pay Teachers account) and completed the project over the course of 3 lessons.
...
During our first lesson, we sketched our houses in pencil, and added some eerie exterior landscaping. πŸͺ¦πŸ¦‡
We popped in a few spooky characters (ghosts, spiders, pumpkins, and a vampire). πŸ‘»πŸ•·πŸŽƒπŸ§›
And then we traced over our pencil lines with black Sharpie.
...
During our next lesson, we used a coloring technique that we learned from Kristian @friendsartlab ❀️ We colored our pictures with oil pastels...and then painted over the top of the oil pastels with baby oil...it causes the oil pastels to bleed and blend together! 🀩
...
During our final lesson...we added more spooky characters to the inside of our house...that can peek out behind the doors and windows. πŸ’€πŸ§™β€β™€οΈπŸ‘»
To do this...I used an X-acto knife and carefully cut around the outside edges of the doors/windows (leaving the hinge sides intact so that they could fold open and closed).
We placed yellow construction paper in the background...and added witches, ghosts, skeletons, a mummy, and a Frankenstein! 😍
This step made our haunted houses really come to life...and we just can't thank Kaitlyn @artwithmrs.e enough for sharing this awesome lesson and drawing guide! THE ABSOLUTE BEST! ❀️❀️❀️
...
It was very evident how much our daughter loved this project...as we worked through each step...but the thing that solidified just how much she enjoyed it was - one weekend morning I walked downstairs to find her and her dad sitting at the table - and she was very excitedly teaching him how to draw his own haunted house - while she drew a few more herself (scroll to the last picture in the carousel)! πŸ₯°
...
#hauntedhouse #hauntedhouses #hauntedhousedrawing #directeddrawing #spookyart #halloween #happyhalloween #halloweenart #halloweenfun #elementaryart #homeschoolart #homeschool #homeschoolfun #capturingparenthood
I decided that these six little pumpkins needed a I decided that these six little pumpkins needed a permanent place on our feed...because WE GREW THEM OURSELVES!!! πŸŽƒ
That's right...first-time pumpkin-growers over here...and it was all actually a bit of a surprise. πŸ˜ƒ
...
You see, when we went to prep our garden beds this spring, we noticed a plant that had already started growing. We assumed it was a cucumber plant, since it was in the same place we had cucumbers last year.
We left it alone and planted a couple of other cucumber plants nearby. πŸ₯’
At first, the leaves on our mystery plant looked very similar to the leaves on our other cucumber plants.
But a couple of weeks later the plant had grown A LOT bigger. It was now obvious that it was not a cucumber plant. But what was it? πŸ€·β€β™€οΈ
...
And that's when it suddenly dawned on these exhausted parents, that our daughter had spontaneously tossed seeds from her pumpkin (last Halloween), into the garden bed. πŸ€¦β€β™€οΈ The mystery was finally solved...and by the looks of the large golden flowers that were emerging all over the vines...we figured we might have a few pumpkins come fall! πŸ™ŒπŸŽƒπŸ™Œ
...
It was so much fun to watch the pumpkin plant grow! 🀩 We had to cut down the wire on one side of our garden bed to let the vines out...and they ended up growing 6-10 feet long in both directions! 😳 It was crazy!
They put out the most gorgeous flowers...that the bees absolutely loved! 🧑 And soon enough, we spotted a few round gourds growing at the base of some of the flowers. They grew quickly...and then turned a beautiful shade of orange! 😍
...
Needless to say, we are now officially pumpkin-growing people! πŸ˜‚ My husband can't wait to plant more next year...and he's already looking in to different varieties - hoping to grow some larger jack-o-lantern style ones next season! πŸŽƒ
…
#pumpkins #growingpumpkins #ourpumpkinpatch #homegrownpumpkins #homegrown #homegarden #pumpkingrowing #gardening #fallharvest #happyhalloween #timetocarvesomepumpkins #gardensurprises #gardenfun #capturingparenthood
Free the Frankensteins from the Frozen Rainbow Bra Free the Frankensteins from the Frozen Rainbow Brain! 😬🌈🧠
…
Yesterday, we shared how we made this colorful, frozen rainbow brain - full of Frankenstein mini erasers…and today we wanted to show you what became of our beautiful brain! πŸ˜ƒ
…
We popped it out onto a tray, grabbed a shaker of salt, a bottle of warm water (colored red for added effect), and some tongs.
And then it was time to Free the Frankensteins (our daughter coined the phrase)! πŸ˜‰
…
This spooky activity provides chilly sensory play, motor skills practice, and scientific exploration (salt and warm water speed-up the melting process)! πŸ™ŒπŸ™ŒπŸ™Œ
As an added bonus…you also get some color-mixing! And the addition of the salt makes it extra sparkly too! 😍🀩😍
…
Eventually, all you’re left with is some mini erasers floating in a pool of colorful water…and a happy kid! ❀️❀️❀️
…
#frozenbrain #rainbowbrain #frozenrainbowbrain #brains #freethefrankensteins #halloween #happyhalloween #halloweenactivities #halloweenactivitiesforkids #halloweensensoryplay #sensoryplay #sensoryexploration #motorskills #motorskillsdevelopment #scienceforkids #kidscience #funactivities #funactivitiesforkids #halloweenfun #capturingparenthood
We are definitely getting into the fall and Hallow We are definitely getting into the fall and Halloween spirit...so during a recent homeschool art session, we decided to make some air-dry clay pumpkins and jack-o-lanterns! πŸŽƒπŸŽƒπŸŽƒ
...
Back in 2019, Lauralee @2art.chambers shared several colorful, air-dry clay pumpkins that her students made...and after rediscovering the saved post, I decided that it would be a perfect October art lesson for us too! 🧑
...
We used various colors of air-dry clay, and rolled each color into whatever pumpkin shape we wanted...and then we added our lines/indentations using the side of a credit card. πŸ’³ The stems are just small, broken pieces of old crayons (another genius idea from Lauralee). πŸ– And we topped our stems with pieces of pipe cleaner, to create the little curly cues. 😍
...
Once we had our pumpkins...we decided to change things up a bit, and grabbed our stash of googly eyes. πŸ‘€ (Most of) our fall pumpkins then transformed into Halloween jack-o-lanterns! πŸŽƒ
We pressed the googly eyes into the clay, and we used a few small tools (that came with our box of air-dry clay) to add their mouths. πŸ˜ƒ
...
And now we have a cute and colorful crew of clay pumpkins adorning our mantle! πŸŽƒπŸ§‘πŸŽƒ
...
#pumpkins #jackolanterns #claypumpkins #airdryclay #airdryclaycreation #airdryclayart #airdryclaypumpkins #elementaryart #fallartprojects #fallartprojectsforkids #halloweenart #halloweenartprojects #halloweenartprojectsforkids #homeschool #homeschoolart #homeschoolfun #halloween #happyhalloween #capturingparenthood
Andrew from @elementaryarts shared a patterned, bl Andrew from @elementaryarts shared a patterned, block letter name project a couple of weeks ago (I'll share the post in stories today), and I immediately added it to our list of art projects to do this year! 😍
But we decided to switch things up a little bit! Instead of using our names, we each picked a color that we like...wrote the name of the color in block letters on our paper...and created our color patterns using at least two different shades of our chosen color. πŸ–
...
This colorful project ended up being a lot of fun, and also very relaxing...as we all quietly focused, and zoned in on adding the color patterns around all of our letters. It was actually a bit hypnotizing! 🀩
...
Needless to say, we are really happy with the way our block letter color project turned out! πŸ™Œ We even had a special guest who wanted to join in on this art project! ❀️
...
P.S. We also used Andrew’s free TPT handout on how to make block letters! The bundle includes bubble letters, cursive letters, graffiti letters, and more! πŸ‘
…
#blockletters #blocklettering #colors #color #colorful #artproject #artforkids #kidart #elementaryart #artactivity #artactivities #artactivitiesforkids #colorfun #homeschool #homeschoolart #homeschoolfun #capturingparenthood
We created self-portraits for our first art projec We created self-portraits for our first art project of our homeschool year...and we are pretty obsessed with them! 🀩✏️🀩
...
I love the idea of doing a self-portrait project at the beginning of the year, and then again at the end of the year...so that we can see how much we've grown and changed.
...
We used Kaitlyn's @artwithmrs.e Simple Self-Portrait Drawing Guide and it was so incredibly helpful (especially for this new homeschool teacher who wouldn't necessarily list drawing as one of her stronger suits). πŸ˜‰
We actually purchased her entire Guided Drawing Bundle (over on Teachers Pay Teachers) and we highly recommend it! πŸ™ŒπŸ™ŒπŸ™Œ
...
We looked through the self-portrait drawing guide to get different ideas for our eyes, nose, mouth, and hair. πŸ‘€πŸ‘ƒπŸ‘„
...
Now...if you caught our stories earlier this week, you know that our daughter recently made a pretty big change to her hair (that included a partial side-shave and bob-length cut - she also dyed it blue). πŸ’‡β€β™€οΈ
She was used to drawing pictures of herself with her long, blonde locks...and her new hairstyle proved rather difficult. But she persevered, and ended up with a self-portrait that she was truly proud of! πŸ₯°
...
When we were finished drawing our likenesses, we decided to cut them out and create a special background to glue them onto. I went with random black and white designs...and our nugget decided to draw various things that she loves (her family, winter, candy, books, dolphins...and more)! ❀️
...
It was such a fun project...and I can't wait to see what our self-portraits look like at the end of our school year! πŸ˜ƒ
...
#selfportrait #selfportraits #homeschool #homeschoolart #elementaryart #artactivities #artactivitiesforkids #artforkids #kidart #homeschoolfun #capturingparenthood
Follow on Instagram

Copyright © 2025 · glam theme by Restored 316

  • Policies + Disclosure
  • Contact