• Home
  • About
  • Kid Zone
    • Activities
    • Arts + Crafts
    • Books Books Books
  • Food
    • Family-Friendly
    • Kids
    • Sweets
    • Dog-Friendly
  • Life + Motherhood
    • Pregnancy
    • Parenting
    • House + Home
  • Let’s Party
    • Birthdays
    • Holidays
    • Instagram
    • Pinterest

Capturing Parenthood

Our Potty Training Journey

in Life + Motherhood, Parenting on March 21, 2017

If you ask any parent what their biggest stressors were during the first few years of their child’s life, you will likely hear very similar responses. There is the initial panic that comes with realizing that you now have a very small and fragile human being to care for and raise. Then their is the struggle to get your little one to consistently sleep through the night – this is a huge one for most parents. And then you usually stumble upon the stress of potty training. Yep…it’s stressful before it even begins, and it’s stressful throughout the entire process. Potty training is an important milestone. And, as with lots of things in the parenting world, there are numerous ways to go about it, a multitude of opinions on the best methods, thousands of thoughts on when you should start the process…the list goes on. But, as I’ve discovered in my short time as a parent, the best method you can choose (and this goes for most parenting decisions) is the one that works best for you and your family.

On that note, I’ve decided to share our potty training journey with you. Not so I can preach about the best potty training method out there…or to tell you that you must absolutely follow these rules for fail-safe and successful potty training. I’m not going to judge you for doing it differently, or for choosing a different approach. I just want to share our experience…share the things that worked for us, as well as our lessons learned.

I think one of the best decisions we made in regard to potty training was buying a little potty early on. We purchased aΒ BabyBjorn Potty Chair, when our little nugget was right around 12-months old. We wanted to have it in the bathroom so that she could get accustomed to it. We just let it sit there until she showed an interest in it, at which point we told her all about it. We told her that it was her very own potty and that it was just like the big potty that mommy and daddy used. We allowed our daughter to come to the bathroom with us, so that she could see how mommy and daddy use the potty. We followed our daughter’s lead, and when she expressed the desire to sit on the potty, we took off her diaper and let her sit – with zero expectations. This eventually evolved into her sitting on the potty (and actually peeing) every morning when she woke up and every afternoon when she got up from her nap. Whenever she did go potty we would clap and cheer with lots of enthusiasm, and we would tell her that she was such a big girl, and that we were very proud of her for using the potty!

Our Potty Training Journey Β© Capturing Parenthood

This happened before she turned 1-1/2. At her school, the classrooms do not have an attached bathroom until they reach the 18-month-and-up rooms, so even though our little nugget was showing interest in the potty, I knew that we couldn’t start full-fledged potty-training until she had an actual bathroom to use at school as well. So, we continued just letting her sit and use the little potty at home whenever she so desired.

Upon moving to her new classroom (bathroom included) we started thinking more and more about our potty training approach. I scoured Pinterest and read so many different articles on the topic. It was a bit overwhelming. I was inundated with all of the posts about how to potty train your child in 3-days, a week, one weekend. You know the ones…they are all the rage these days. The idea that we could have a potty-trained child in as little as a few days was certainly appealing, but in all honesty, it didn’t seem all that realistic. And I for one, wasn’t sold on having to sit in the bathroom (or close to one) forcing my child to drink lots of fluids and eat lots of snacks for several days on end. I just couldn’t picture it being remotely enjoyable…for any of us.

And as luck would have it, it was right around the time that our daughter advanced to her new classroom, that her enthusiasm for using the potty dwindled. We also had a big vacation planned (our little nugget’s first plane ride). If I had read anything useful in all of those potty training articles, it was that you should refrain from starting the potty training process when there are other big events happening. This includes moving to a new home, welcoming a new sibling, moving to a toddler bed, starting a new class, and going on a big trip. I chatted with our daughter’s new teachers and learned that while they did have a potty in their classroom, it was basically introductory…the kids could sit and go if they so desired, but the school didn’t start trying to fully potty train kids until they reached the 2-year-old room – a room with two little potties! Another potty-training trick that people swear by, is having your child go with (and observe) their classmates and peers using the potty. This is likely the one instance where peer pressure might actually be beneficial.

Anyways…about a month after our wonderful vacation, I figured it might be time to give potty training some real effort. I spoke with our daughter’s teachers again. I mentioned the 3-day methods and how I just wasn’t sure. One of her teachers (a mother of two) warned me that she had begun to notice serious regression in kids who had been potty trained using one of the quick 2-day or 3-day methods. She said that while the methods seem to work initially, for whatever reason, they didn’t seem to stick. Since I was already skeptical, I decided to pool together different ideas that I had come across for a more easy-going and gradual potty training approach.

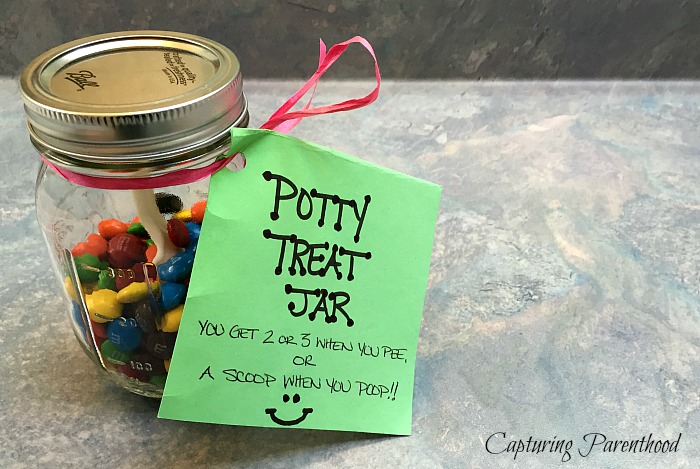
We purchased a second BabyBjorn Potty Chair, so that we had one on each level of our home.Β After deciding that potty rewards were a good idea, I crafted a potty sticker chart (modeled after one I had seen on Pinterest – http://sherbertcafe.blogspot.com/2012/07/free-potty-chart-printable.html?spref=pi). Our potty chart contained a few spots that garnered lollipops, and when you reached the very end, you got ice cream!!! I also put together a potty-treat jar filled with M&M’s. The motto was, you get two or three when you pee, and a whole scoop when you poop. Yep…a whole scoop (i.e. a small spoonful). The reason for this is due to the fact that getting a toddler to poop on the potty is a way bigger feat than getting them to pee on the potty. Pooping requires extra big rewards.

Our Potty Training Journey Β© Capturing Parenthood

I also acquired a few potty books for us to read while we were in the bathroom using the potty…sitting down for a longer period of time, while reading stories about other big boys and girls using the potty, also encourages those precious poops. If you have not caught on by now…pooping on the potty is a HUGE deal and it is something that parents get extremely excited about. If you’re new to this whole parenting thing, consider yourself warned…there will be a day when your social media accounts contain an elated message about your little one going #2 on the potty. It’s going to happen. Just accept it.

Now…back to those potty books. I am so glad that I decided to buy a few, they truly make a big difference in helping your little one not only grasp the concept, but also feel more comfortable and confident with the potty. I love our potty books so much that I am sharing a separate blog post this Thursday, so you can read all about our favorite potty-related tales!

Once I had everything ready to go, we fully committed to potty training. We knew that our little one wasn’t going to get the full potty training treatment at school just yet, but we still wanted to do something that would signify a transition, and so we decided to switch her to “big girl” pull-ups (we like Pampers Easy-Ups). We made a really big deal about how special it was to switch to big girl pull-ups and that it meant that she really needed to try to use the potty whenever she had to go to the bathroom. We introduced her to the potty sticker chart, and the potty treat jar, and the next morning, we dove right in.

I fully believe that when you are just starting out with potty training, lots of rewards is a good thing. We applauded her for sitting on the potty, we rewarded her for every pee (and poop), even if it was the tiniest little bit. The first couple of days it felt like we were handing out stickers and potty treats left and right. And I began to feel that with the M&M’s, and the occasional lollipops, that my little nugget was getting way too much sugar, so we decided to forgo the lollipops. I did not make new sticker charts…we just stopped taking note of the lollipop spots and focused on the end-game…the ice cream!

As far as potty treats go, the M&M’s have been a huge success. In fact, when I take my little one to the grocery store and we happen to pass by the candy aisle, she always loudly exclaims, “POTTY TREATS!” Every single time. But the real icing on the cake is the ice cream. We made sure to make the ice cream reward extra exciting, by actually going out for ice cream. It is a real treat, and therefore a goal that she always looks forward to accomplishing.

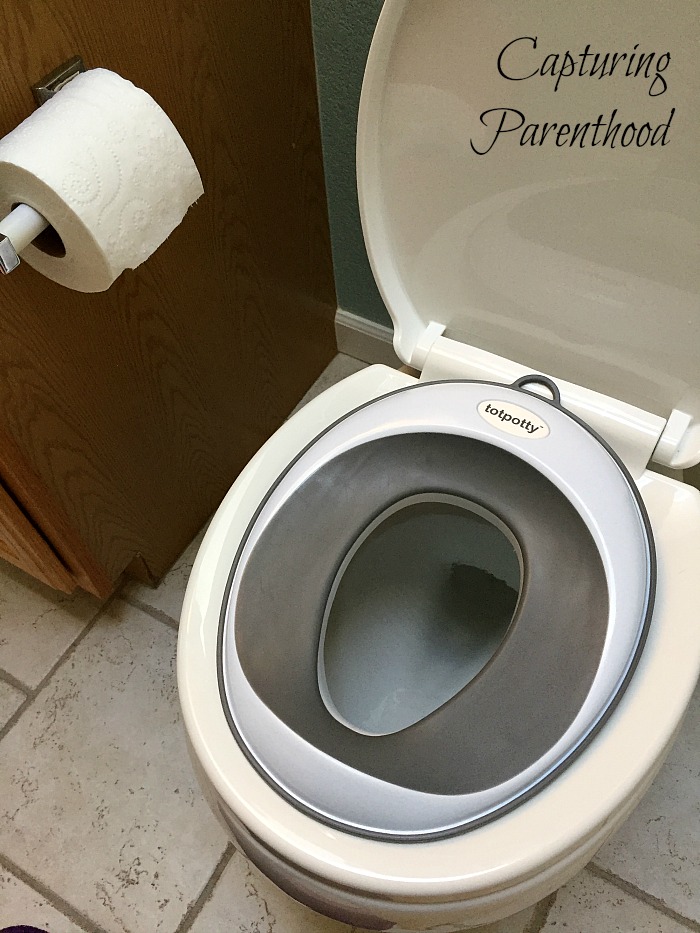
There also came a point in our journey when our daughter decided that she no longer wanted to use the little potty. She wanted to use the big potty like mommy and daddy. I rushed to buy a potty seat to fit on top of our standard toilet seats (so she did not fall in). Obviously, any parent is psyched when their child can use the regular potty, because that means no more rinsing and cleaning the little potty. Well, eventually. Our little nugget now enjoys the choice that she has in which potty to use. Sometimes she sits on the big potty (often when she has to poop, which I fully support), and sometimes she’s in the mood to relax on her little potty. Either way…she’s using the potty, so we don’t mind.

Our Potty Training Journey Β© Capturing Parenthood

It did not take long for our daughter to master peeing on the potty. Pooping came not too long after. And when our daughter moved to the 2-year-old room at school, we took her shopping to buy her very first set of big girl panties. She got to pick out the ones she wanted – this is key! After a brief discussion about big girl panties, we set the pull-ups aside and made the big switch to underwear. Granted there were still accidents…lots of accidents…and lots of laundry. But the laundry starts to dwindle and before you know it, you feel like you can actually (and proudly) claim that your child is officially potty trained!

Our potty training journey was one that was always evolving…in fact, it still is. We still use our potty sticker charts and potty treats, but as time has passed, the requirements that need to be met in order to earn a potty reward, have become harder. In the beginning, everything was rewarded. Every trip to the potty earned a sticker on the chart. After awhile, she had to poop on the potty to earn a sticker. Then she had to tell us that she had to go potty (without us asking her to go first). Now, she gets a sticker if she goes all day at school without having any accidents. And I’m proud to report that she’s getting a sticker each and every school day. Which also means that our sticker chart requirements are likely to be revised again soon. She still gets potty treats on a fairly regular basis…just fewer (one when she pees, and two when she poops) and only when she asks.

In addition to receiving a sticker for an accident-free day, she also gets what she likes to call a “trick-or-treaty.” This trend obviously started after Halloween, but on those accident-free days she gets to choose a small treat to have at the end of the day (i.e. dessert).

So…this is where we are now. Our daughter is consistently having accident-free days. She tells us (and her teachers) when she needs to go potty. By all standards, she’s potty trained!!!

I know that there will still be accidents, that is just the nature of things. But I’m so proud of my little nugget for her big accomplishment. And I’m proud of my husband and myself for our accomplishment, as well. Potty training is hard work, dirty, gross, and stressful. But there’s light at the end of the tunnel.

Wow…this is a long post. If I still have your attention…I feel like I should share a few more things on the topic. One important one…our daughter still sleeps in a pull-up. I’ve read that it is difficult for a child to go all-night without having an accident, until they reach 3-4 years of age. A good rule of thumb is to monitor their pull-ups after they wake up…if they are consistently dry, then they are likely ready to wear their big girl/big boy undies day and night. Night time potty training is also easier if they are in a big kid bed, so that they can get up and go to the bathroom if they really need to.

I’ve also put together a few quick tips that we felt were helpful during our potty training journey.

Our Potty Training Journey Β© Capturing Parenthood

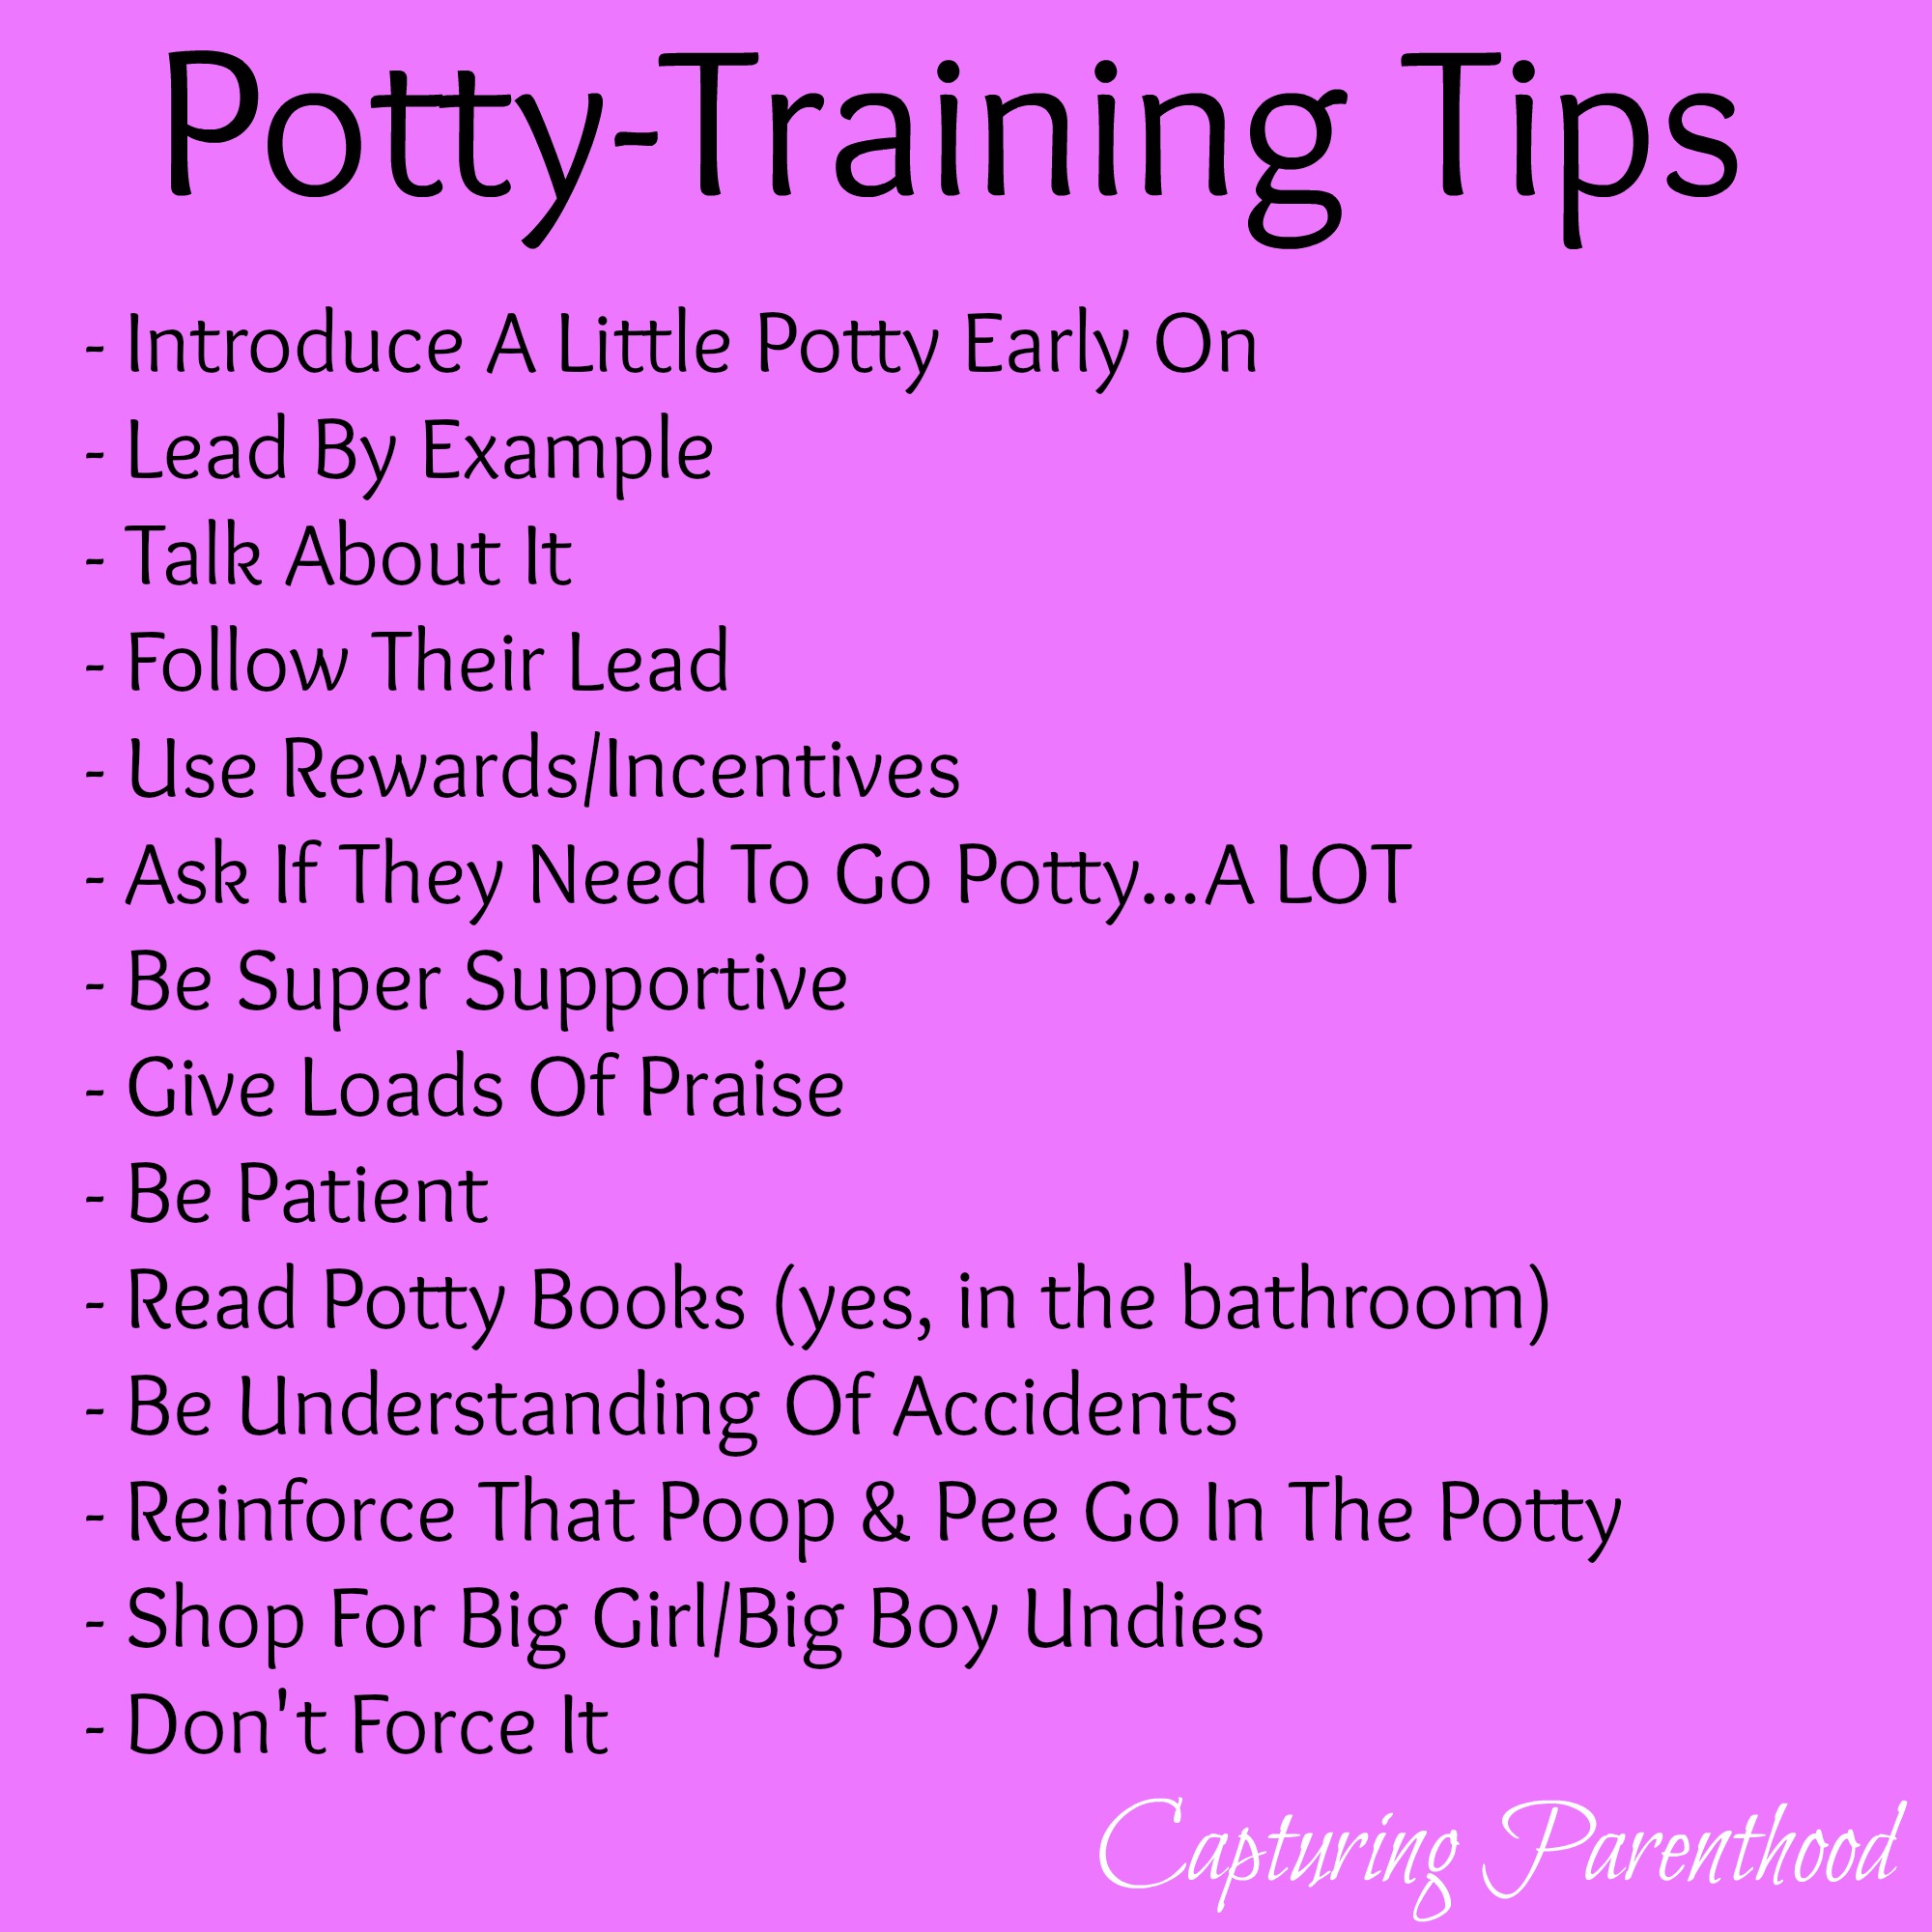
A few notes on the above tips:

  • Ask if they need to go potty…A LOT. In the early days, this was every 15-20 minutes. Then we gradually pushed it to every 30 minutes, and so on, and so on. Now our little nugget can regularly hold it for up to two hours.
  • Be super supportive. This one is so very important. It is very easy to get discouraged and frustrated after a day full of accidents. But we found that a positive attitude was always more productive and helpful for our little girl. We would notice her hesitation to use the potty following an occasion where we became stressed or upset about accidents. When an accident happens, just say “uh oh” and let them know that it’s ok, and then reinforce that pee and poop belong in the potty.
  • Branching off of the above…freely and frequently give that positive praise. It really will go a long way. Cheer and applaud the use of the potty. Let your little one know how proud of them you are for using the potty.
  • Most importantly, don’t force potty training. If you feel like your child is uninterested or you find yourself struggling, take a break for a month or two. Wait and watch for those signs from your child, and then start over when you’re both ready.
START SPREADING THE NEWS!

Related Posts

  • Shapes Sponge PaintingShapes Sponge Painting
  • Fall Tree Crafts for KidsFall Tree Crafts for Kids
  • Chalkboard Door ArtChalkboard Door Art
  • Halloween SuncatchersHalloween Suncatchers
« Shaving Cream Rain Clouds
Potty Books »

Hello! Nice to meet you!

Welcome to the Capturing Parenthood blog! I'm Stacey...wife and first-time parent, former full-time working mom, turned stay-at-home mom. Join me as I capture and share my thoughts and experiences on this crazy adventure we call parenthood! Click here to learn more about me!

Search Capturing Parenthood

Instagram

Ok...@artwithmrs.e Haunted House project is hands- Ok...@artwithmrs.e Haunted House project is hands-down the best Halloween-themed art project out there! πŸ™ŒπŸ™ŒπŸ™Œ
We had a blast creating haunted houses for homeschool art this month! 🧑
...
We followed Kaitlyn's extremely helpful Haunted House Drawing Guide (you can find it over on her Teachers Pay Teachers account) and completed the project over the course of 3 lessons.
...
During our first lesson, we sketched our houses in pencil, and added some eerie exterior landscaping. πŸͺ¦πŸ¦‡
We popped in a few spooky characters (ghosts, spiders, pumpkins, and a vampire). πŸ‘»πŸ•·πŸŽƒπŸ§›
And then we traced over our pencil lines with black Sharpie.
...
During our next lesson, we used a coloring technique that we learned from Kristian @friendsartlab ❀️ We colored our pictures with oil pastels...and then painted over the top of the oil pastels with baby oil...it causes the oil pastels to bleed and blend together! 🀩
...
During our final lesson...we added more spooky characters to the inside of our house...that can peek out behind the doors and windows. πŸ’€πŸ§™β€β™€οΈπŸ‘»
To do this...I used an X-acto knife and carefully cut around the outside edges of the doors/windows (leaving the hinge sides intact so that they could fold open and closed).
We placed yellow construction paper in the background...and added witches, ghosts, skeletons, a mummy, and a Frankenstein! 😍
This step made our haunted houses really come to life...and we just can't thank Kaitlyn @artwithmrs.e enough for sharing this awesome lesson and drawing guide! THE ABSOLUTE BEST! ❀️❀️❀️
...
It was very evident how much our daughter loved this project...as we worked through each step...but the thing that solidified just how much she enjoyed it was - one weekend morning I walked downstairs to find her and her dad sitting at the table - and she was very excitedly teaching him how to draw his own haunted house - while she drew a few more herself (scroll to the last picture in the carousel)! πŸ₯°
...
#hauntedhouse #hauntedhouses #hauntedhousedrawing #directeddrawing #spookyart #halloween #happyhalloween #halloweenart #halloweenfun #elementaryart #homeschoolart #homeschool #homeschoolfun #capturingparenthood
I decided that these six little pumpkins needed a I decided that these six little pumpkins needed a permanent place on our feed...because WE GREW THEM OURSELVES!!! πŸŽƒ
That's right...first-time pumpkin-growers over here...and it was all actually a bit of a surprise. πŸ˜ƒ
...
You see, when we went to prep our garden beds this spring, we noticed a plant that had already started growing. We assumed it was a cucumber plant, since it was in the same place we had cucumbers last year.
We left it alone and planted a couple of other cucumber plants nearby. πŸ₯’
At first, the leaves on our mystery plant looked very similar to the leaves on our other cucumber plants.
But a couple of weeks later the plant had grown A LOT bigger. It was now obvious that it was not a cucumber plant. But what was it? πŸ€·β€β™€οΈ
...
And that's when it suddenly dawned on these exhausted parents, that our daughter had spontaneously tossed seeds from her pumpkin (last Halloween), into the garden bed. πŸ€¦β€β™€οΈ The mystery was finally solved...and by the looks of the large golden flowers that were emerging all over the vines...we figured we might have a few pumpkins come fall! πŸ™ŒπŸŽƒπŸ™Œ
...
It was so much fun to watch the pumpkin plant grow! 🀩 We had to cut down the wire on one side of our garden bed to let the vines out...and they ended up growing 6-10 feet long in both directions! 😳 It was crazy!
They put out the most gorgeous flowers...that the bees absolutely loved! 🧑 And soon enough, we spotted a few round gourds growing at the base of some of the flowers. They grew quickly...and then turned a beautiful shade of orange! 😍
...
Needless to say, we are now officially pumpkin-growing people! πŸ˜‚ My husband can't wait to plant more next year...and he's already looking in to different varieties - hoping to grow some larger jack-o-lantern style ones next season! πŸŽƒ
…
#pumpkins #growingpumpkins #ourpumpkinpatch #homegrownpumpkins #homegrown #homegarden #pumpkingrowing #gardening #fallharvest #happyhalloween #timetocarvesomepumpkins #gardensurprises #gardenfun #capturingparenthood
Free the Frankensteins from the Frozen Rainbow Bra Free the Frankensteins from the Frozen Rainbow Brain! 😬🌈🧠
…
Yesterday, we shared how we made this colorful, frozen rainbow brain - full of Frankenstein mini erasers…and today we wanted to show you what became of our beautiful brain! πŸ˜ƒ
…
We popped it out onto a tray, grabbed a shaker of salt, a bottle of warm water (colored red for added effect), and some tongs.
And then it was time to Free the Frankensteins (our daughter coined the phrase)! πŸ˜‰
…
This spooky activity provides chilly sensory play, motor skills practice, and scientific exploration (salt and warm water speed-up the melting process)! πŸ™ŒπŸ™ŒπŸ™Œ
As an added bonus…you also get some color-mixing! And the addition of the salt makes it extra sparkly too! 😍🀩😍
…
Eventually, all you’re left with is some mini erasers floating in a pool of colorful water…and a happy kid! ❀️❀️❀️
…
#frozenbrain #rainbowbrain #frozenrainbowbrain #brains #freethefrankensteins #halloween #happyhalloween #halloweenactivities #halloweenactivitiesforkids #halloweensensoryplay #sensoryplay #sensoryexploration #motorskills #motorskillsdevelopment #scienceforkids #kidscience #funactivities #funactivitiesforkids #halloweenfun #capturingparenthood
We are definitely getting into the fall and Hallow We are definitely getting into the fall and Halloween spirit...so during a recent homeschool art session, we decided to make some air-dry clay pumpkins and jack-o-lanterns! πŸŽƒπŸŽƒπŸŽƒ
...
Back in 2019, Lauralee @2art.chambers shared several colorful, air-dry clay pumpkins that her students made...and after rediscovering the saved post, I decided that it would be a perfect October art lesson for us too! 🧑
...
We used various colors of air-dry clay, and rolled each color into whatever pumpkin shape we wanted...and then we added our lines/indentations using the side of a credit card. πŸ’³ The stems are just small, broken pieces of old crayons (another genius idea from Lauralee). πŸ– And we topped our stems with pieces of pipe cleaner, to create the little curly cues. 😍
...
Once we had our pumpkins...we decided to change things up a bit, and grabbed our stash of googly eyes. πŸ‘€ (Most of) our fall pumpkins then transformed into Halloween jack-o-lanterns! πŸŽƒ
We pressed the googly eyes into the clay, and we used a few small tools (that came with our box of air-dry clay) to add their mouths. πŸ˜ƒ
...
And now we have a cute and colorful crew of clay pumpkins adorning our mantle! πŸŽƒπŸ§‘πŸŽƒ
...
#pumpkins #jackolanterns #claypumpkins #airdryclay #airdryclaycreation #airdryclayart #airdryclaypumpkins #elementaryart #fallartprojects #fallartprojectsforkids #halloweenart #halloweenartprojects #halloweenartprojectsforkids #homeschool #homeschoolart #homeschoolfun #halloween #happyhalloween #capturingparenthood
Andrew from @elementaryarts shared a patterned, bl Andrew from @elementaryarts shared a patterned, block letter name project a couple of weeks ago (I'll share the post in stories today), and I immediately added it to our list of art projects to do this year! 😍
But we decided to switch things up a little bit! Instead of using our names, we each picked a color that we like...wrote the name of the color in block letters on our paper...and created our color patterns using at least two different shades of our chosen color. πŸ–
...
This colorful project ended up being a lot of fun, and also very relaxing...as we all quietly focused, and zoned in on adding the color patterns around all of our letters. It was actually a bit hypnotizing! 🀩
...
Needless to say, we are really happy with the way our block letter color project turned out! πŸ™Œ We even had a special guest who wanted to join in on this art project! ❀️
...
P.S. We also used Andrew’s free TPT handout on how to make block letters! The bundle includes bubble letters, cursive letters, graffiti letters, and more! πŸ‘
…
#blockletters #blocklettering #colors #color #colorful #artproject #artforkids #kidart #elementaryart #artactivity #artactivities #artactivitiesforkids #colorfun #homeschool #homeschoolart #homeschoolfun #capturingparenthood
We created self-portraits for our first art projec We created self-portraits for our first art project of our homeschool year...and we are pretty obsessed with them! 🀩✏️🀩
...
I love the idea of doing a self-portrait project at the beginning of the year, and then again at the end of the year...so that we can see how much we've grown and changed.
...
We used Kaitlyn's @artwithmrs.e Simple Self-Portrait Drawing Guide and it was so incredibly helpful (especially for this new homeschool teacher who wouldn't necessarily list drawing as one of her stronger suits). πŸ˜‰
We actually purchased her entire Guided Drawing Bundle (over on Teachers Pay Teachers) and we highly recommend it! πŸ™ŒπŸ™ŒπŸ™Œ
...
We looked through the self-portrait drawing guide to get different ideas for our eyes, nose, mouth, and hair. πŸ‘€πŸ‘ƒπŸ‘„
...
Now...if you caught our stories earlier this week, you know that our daughter recently made a pretty big change to her hair (that included a partial side-shave and bob-length cut - she also dyed it blue). πŸ’‡β€β™€οΈ
She was used to drawing pictures of herself with her long, blonde locks...and her new hairstyle proved rather difficult. But she persevered, and ended up with a self-portrait that she was truly proud of! πŸ₯°
...
When we were finished drawing our likenesses, we decided to cut them out and create a special background to glue them onto. I went with random black and white designs...and our nugget decided to draw various things that she loves (her family, winter, candy, books, dolphins...and more)! ❀️
...
It was such a fun project...and I can't wait to see what our self-portraits look like at the end of our school year! πŸ˜ƒ
...
#selfportrait #selfportraits #homeschool #homeschoolart #elementaryart #artactivities #artactivitiesforkids #artforkids #kidart #homeschoolfun #capturingparenthood
Follow on Instagram

Popular Posts

Virtual Spring Break: Day Five - New York City

Virtual Spring Break: Day Five – New York City

Virtual Spring Break: Day Four - Mexico

Virtual Spring Break: Day Four – Mexico

Virtual Spring Break: Day Three - India

Virtual Spring Break: Day Three – India

Join Us on Instagram

Ok...@artwithmrs.e Haunted House project is hands- Ok...@artwithmrs.e Haunted House project is hands-down the best Halloween-themed art project out there! πŸ™ŒπŸ™ŒπŸ™Œ
We had a blast creating haunted houses for homeschool art this month! 🧑
...
We followed Kaitlyn's extremely helpful Haunted House Drawing Guide (you can find it over on her Teachers Pay Teachers account) and completed the project over the course of 3 lessons.
...
During our first lesson, we sketched our houses in pencil, and added some eerie exterior landscaping. πŸͺ¦πŸ¦‡
We popped in a few spooky characters (ghosts, spiders, pumpkins, and a vampire). πŸ‘»πŸ•·πŸŽƒπŸ§›
And then we traced over our pencil lines with black Sharpie.
...
During our next lesson, we used a coloring technique that we learned from Kristian @friendsartlab ❀️ We colored our pictures with oil pastels...and then painted over the top of the oil pastels with baby oil...it causes the oil pastels to bleed and blend together! 🀩
...
During our final lesson...we added more spooky characters to the inside of our house...that can peek out behind the doors and windows. πŸ’€πŸ§™β€β™€οΈπŸ‘»
To do this...I used an X-acto knife and carefully cut around the outside edges of the doors/windows (leaving the hinge sides intact so that they could fold open and closed).
We placed yellow construction paper in the background...and added witches, ghosts, skeletons, a mummy, and a Frankenstein! 😍
This step made our haunted houses really come to life...and we just can't thank Kaitlyn @artwithmrs.e enough for sharing this awesome lesson and drawing guide! THE ABSOLUTE BEST! ❀️❀️❀️
...
It was very evident how much our daughter loved this project...as we worked through each step...but the thing that solidified just how much she enjoyed it was - one weekend morning I walked downstairs to find her and her dad sitting at the table - and she was very excitedly teaching him how to draw his own haunted house - while she drew a few more herself (scroll to the last picture in the carousel)! πŸ₯°
...
#hauntedhouse #hauntedhouses #hauntedhousedrawing #directeddrawing #spookyart #halloween #happyhalloween #halloweenart #halloweenfun #elementaryart #homeschoolart #homeschool #homeschoolfun #capturingparenthood
I decided that these six little pumpkins needed a I decided that these six little pumpkins needed a permanent place on our feed...because WE GREW THEM OURSELVES!!! πŸŽƒ
That's right...first-time pumpkin-growers over here...and it was all actually a bit of a surprise. πŸ˜ƒ
...
You see, when we went to prep our garden beds this spring, we noticed a plant that had already started growing. We assumed it was a cucumber plant, since it was in the same place we had cucumbers last year.
We left it alone and planted a couple of other cucumber plants nearby. πŸ₯’
At first, the leaves on our mystery plant looked very similar to the leaves on our other cucumber plants.
But a couple of weeks later the plant had grown A LOT bigger. It was now obvious that it was not a cucumber plant. But what was it? πŸ€·β€β™€οΈ
...
And that's when it suddenly dawned on these exhausted parents, that our daughter had spontaneously tossed seeds from her pumpkin (last Halloween), into the garden bed. πŸ€¦β€β™€οΈ The mystery was finally solved...and by the looks of the large golden flowers that were emerging all over the vines...we figured we might have a few pumpkins come fall! πŸ™ŒπŸŽƒπŸ™Œ
...
It was so much fun to watch the pumpkin plant grow! 🀩 We had to cut down the wire on one side of our garden bed to let the vines out...and they ended up growing 6-10 feet long in both directions! 😳 It was crazy!
They put out the most gorgeous flowers...that the bees absolutely loved! 🧑 And soon enough, we spotted a few round gourds growing at the base of some of the flowers. They grew quickly...and then turned a beautiful shade of orange! 😍
...
Needless to say, we are now officially pumpkin-growing people! πŸ˜‚ My husband can't wait to plant more next year...and he's already looking in to different varieties - hoping to grow some larger jack-o-lantern style ones next season! πŸŽƒ
…
#pumpkins #growingpumpkins #ourpumpkinpatch #homegrownpumpkins #homegrown #homegarden #pumpkingrowing #gardening #fallharvest #happyhalloween #timetocarvesomepumpkins #gardensurprises #gardenfun #capturingparenthood
Free the Frankensteins from the Frozen Rainbow Bra Free the Frankensteins from the Frozen Rainbow Brain! 😬🌈🧠
…
Yesterday, we shared how we made this colorful, frozen rainbow brain - full of Frankenstein mini erasers…and today we wanted to show you what became of our beautiful brain! πŸ˜ƒ
…
We popped it out onto a tray, grabbed a shaker of salt, a bottle of warm water (colored red for added effect), and some tongs.
And then it was time to Free the Frankensteins (our daughter coined the phrase)! πŸ˜‰
…
This spooky activity provides chilly sensory play, motor skills practice, and scientific exploration (salt and warm water speed-up the melting process)! πŸ™ŒπŸ™ŒπŸ™Œ
As an added bonus…you also get some color-mixing! And the addition of the salt makes it extra sparkly too! 😍🀩😍
…
Eventually, all you’re left with is some mini erasers floating in a pool of colorful water…and a happy kid! ❀️❀️❀️
…
#frozenbrain #rainbowbrain #frozenrainbowbrain #brains #freethefrankensteins #halloween #happyhalloween #halloweenactivities #halloweenactivitiesforkids #halloweensensoryplay #sensoryplay #sensoryexploration #motorskills #motorskillsdevelopment #scienceforkids #kidscience #funactivities #funactivitiesforkids #halloweenfun #capturingparenthood
We are definitely getting into the fall and Hallow We are definitely getting into the fall and Halloween spirit...so during a recent homeschool art session, we decided to make some air-dry clay pumpkins and jack-o-lanterns! πŸŽƒπŸŽƒπŸŽƒ
...
Back in 2019, Lauralee @2art.chambers shared several colorful, air-dry clay pumpkins that her students made...and after rediscovering the saved post, I decided that it would be a perfect October art lesson for us too! 🧑
...
We used various colors of air-dry clay, and rolled each color into whatever pumpkin shape we wanted...and then we added our lines/indentations using the side of a credit card. πŸ’³ The stems are just small, broken pieces of old crayons (another genius idea from Lauralee). πŸ– And we topped our stems with pieces of pipe cleaner, to create the little curly cues. 😍
...
Once we had our pumpkins...we decided to change things up a bit, and grabbed our stash of googly eyes. πŸ‘€ (Most of) our fall pumpkins then transformed into Halloween jack-o-lanterns! πŸŽƒ
We pressed the googly eyes into the clay, and we used a few small tools (that came with our box of air-dry clay) to add their mouths. πŸ˜ƒ
...
And now we have a cute and colorful crew of clay pumpkins adorning our mantle! πŸŽƒπŸ§‘πŸŽƒ
...
#pumpkins #jackolanterns #claypumpkins #airdryclay #airdryclaycreation #airdryclayart #airdryclaypumpkins #elementaryart #fallartprojects #fallartprojectsforkids #halloweenart #halloweenartprojects #halloweenartprojectsforkids #homeschool #homeschoolart #homeschoolfun #halloween #happyhalloween #capturingparenthood
Andrew from @elementaryarts shared a patterned, bl Andrew from @elementaryarts shared a patterned, block letter name project a couple of weeks ago (I'll share the post in stories today), and I immediately added it to our list of art projects to do this year! 😍
But we decided to switch things up a little bit! Instead of using our names, we each picked a color that we like...wrote the name of the color in block letters on our paper...and created our color patterns using at least two different shades of our chosen color. πŸ–
...
This colorful project ended up being a lot of fun, and also very relaxing...as we all quietly focused, and zoned in on adding the color patterns around all of our letters. It was actually a bit hypnotizing! 🀩
...
Needless to say, we are really happy with the way our block letter color project turned out! πŸ™Œ We even had a special guest who wanted to join in on this art project! ❀️
...
P.S. We also used Andrew’s free TPT handout on how to make block letters! The bundle includes bubble letters, cursive letters, graffiti letters, and more! πŸ‘
…
#blockletters #blocklettering #colors #color #colorful #artproject #artforkids #kidart #elementaryart #artactivity #artactivities #artactivitiesforkids #colorfun #homeschool #homeschoolart #homeschoolfun #capturingparenthood
We created self-portraits for our first art projec We created self-portraits for our first art project of our homeschool year...and we are pretty obsessed with them! 🀩✏️🀩
...
I love the idea of doing a self-portrait project at the beginning of the year, and then again at the end of the year...so that we can see how much we've grown and changed.
...
We used Kaitlyn's @artwithmrs.e Simple Self-Portrait Drawing Guide and it was so incredibly helpful (especially for this new homeschool teacher who wouldn't necessarily list drawing as one of her stronger suits). πŸ˜‰
We actually purchased her entire Guided Drawing Bundle (over on Teachers Pay Teachers) and we highly recommend it! πŸ™ŒπŸ™ŒπŸ™Œ
...
We looked through the self-portrait drawing guide to get different ideas for our eyes, nose, mouth, and hair. πŸ‘€πŸ‘ƒπŸ‘„
...
Now...if you caught our stories earlier this week, you know that our daughter recently made a pretty big change to her hair (that included a partial side-shave and bob-length cut - she also dyed it blue). πŸ’‡β€β™€οΈ
She was used to drawing pictures of herself with her long, blonde locks...and her new hairstyle proved rather difficult. But she persevered, and ended up with a self-portrait that she was truly proud of! πŸ₯°
...
When we were finished drawing our likenesses, we decided to cut them out and create a special background to glue them onto. I went with random black and white designs...and our nugget decided to draw various things that she loves (her family, winter, candy, books, dolphins...and more)! ❀️
...
It was such a fun project...and I can't wait to see what our self-portraits look like at the end of our school year! πŸ˜ƒ
...
#selfportrait #selfportraits #homeschool #homeschoolart #elementaryart #artactivities #artactivitiesforkids #artforkids #kidart #homeschoolfun #capturingparenthood
Follow on Instagram

Copyright © 2025 · glam theme by Restored 316

  • Policies + Disclosure
  • Contact