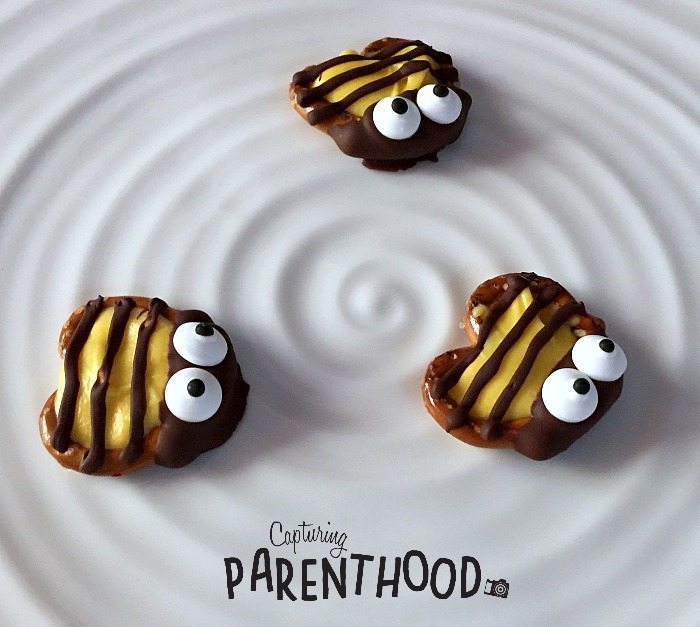
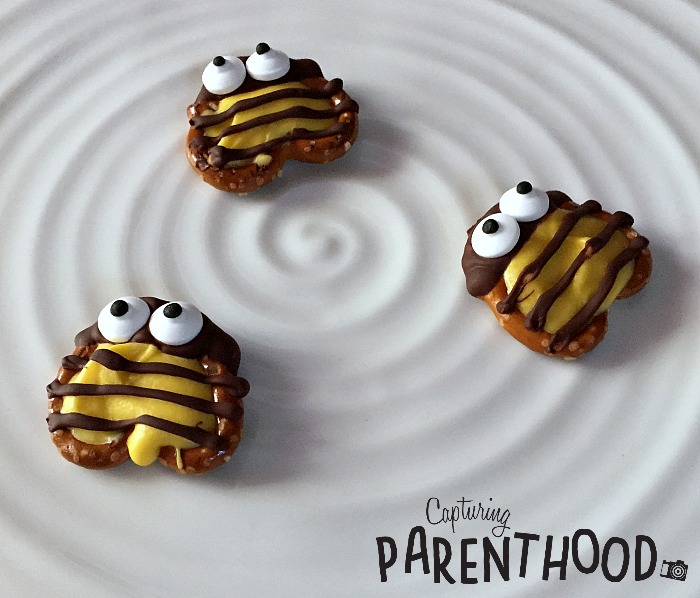
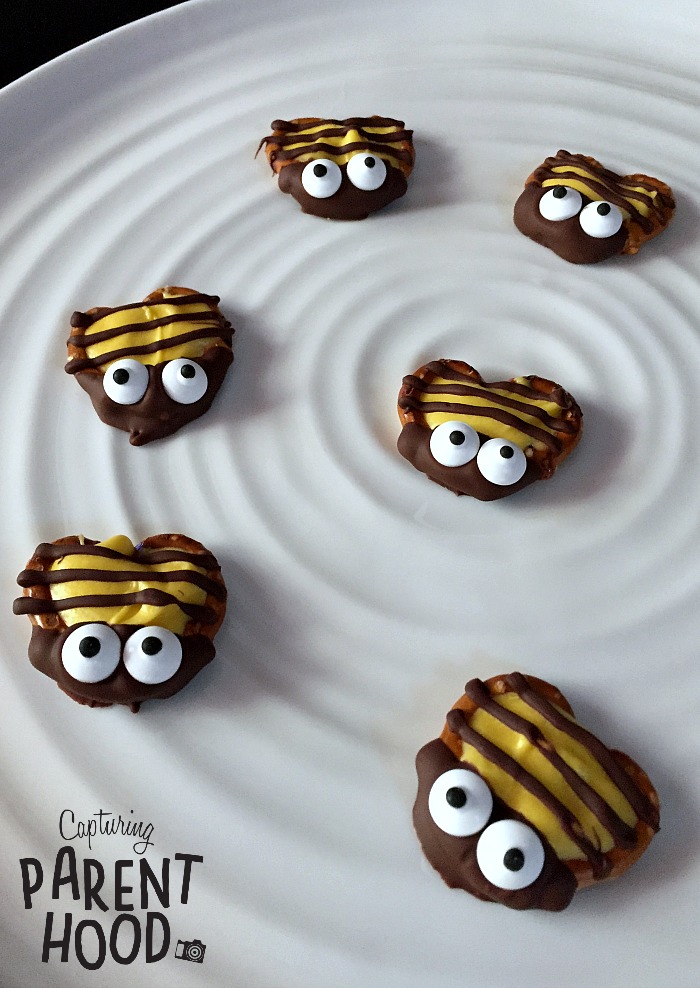
Hap-Bee Thursday! As I mentioned on Tuesday, it’s all about bees on Capturing Parenthood this week. And boy, are you in for a treat. These Pretzel Bumblebees are the perfect little morsels for an afternoon snack…or even dessert. Delicious, bite-sized, and incredibly cute…your little ones are going to jump for joy!
When we decided to embark on a bee-themed week this summer, I just knew we had to try this Pretzel Bumblebees recipe, that I discovered over on One Little Project. Debbie shares so many wonderful ideas on her blog (it’s truly one of my favorites to follow) and she definitely hit the mark with this delightful idea. So, make sure to pop on over and check it out…she even provides instructions on how to make the most adorable pretzel ladybugs (in the same post)!
These buzz-tastic Pretzel Bumblebees are really easy to make, and they only require a few ingredients. The hardest part is just waiting for the candy melts and chocolate to harden, before you eat them! Not that you can’t taste-test one while the chocolate is still soft…it’s a perk to being the chef, right? 🙂
Pretzel Bumblebees
Ingredients:
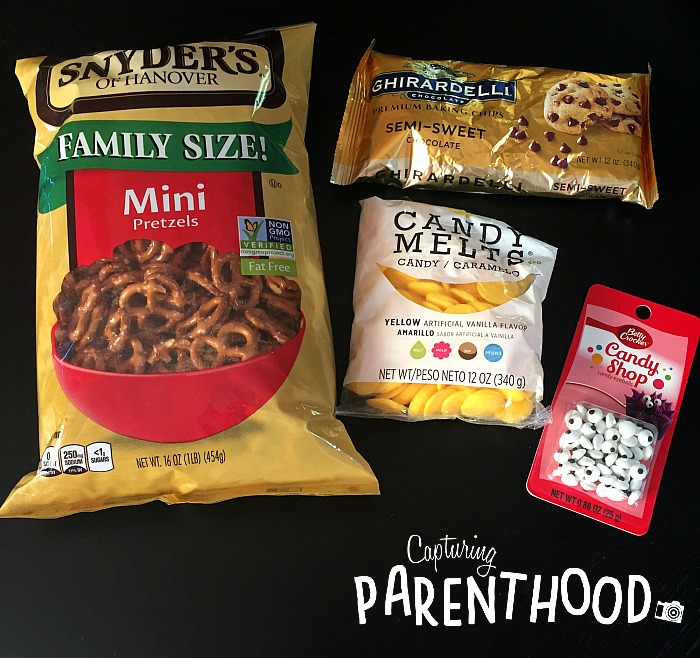
- Mini Pretzels
- Semi-Sweet Chocolate Chips
- Yellow Candy Melts
- Candy Eyeballs
Instructions:
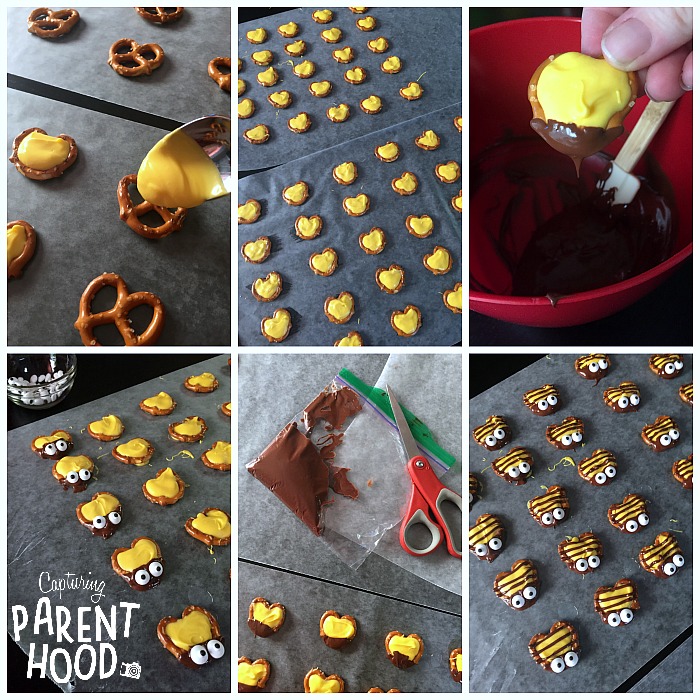
- Lay the mini pretzels flat on a sheet of wax paper.
- In a microwave-safe bowl, add the yellow candy melts and microwave in 30-second bursts. Stir between each microwave session. When they are almost melted, cut the microwave time in half. Trust me, you don’t want to burn the candy melts in the microwave and have to wait for Amazon to deliver more. 🙂
- Using a small spoon, fill the inside of each pretzel with the melted yellow candy melts. If the mixture is a bit too thick, thin it out by adding 1 teaspoon of vegetable oil (mixing thoroughly).
- Once the pretzels have all been filled with the melted candy melts, let them harden for 30-45 minutes.
- In another microwave-safe bowl, add approximately 1 cup of semi-sweet chocolate chips. Microwave for 30-second bursts, until melted, stirring between each microwave session.
- Working with one pretzel at a time, dunk the tip of each pretzel into the melted chocolate. If you want to add candy eyes (we made some with eyes and some without) place two candy eyeballs into the melted chocolate, before it hardens.
- Once the tips of every pretzel has been dunked in the chocolate, and candy eyeballs have been adhered, place the remainder of the melted semi-sweet chocolate into a small Ziploc bag.
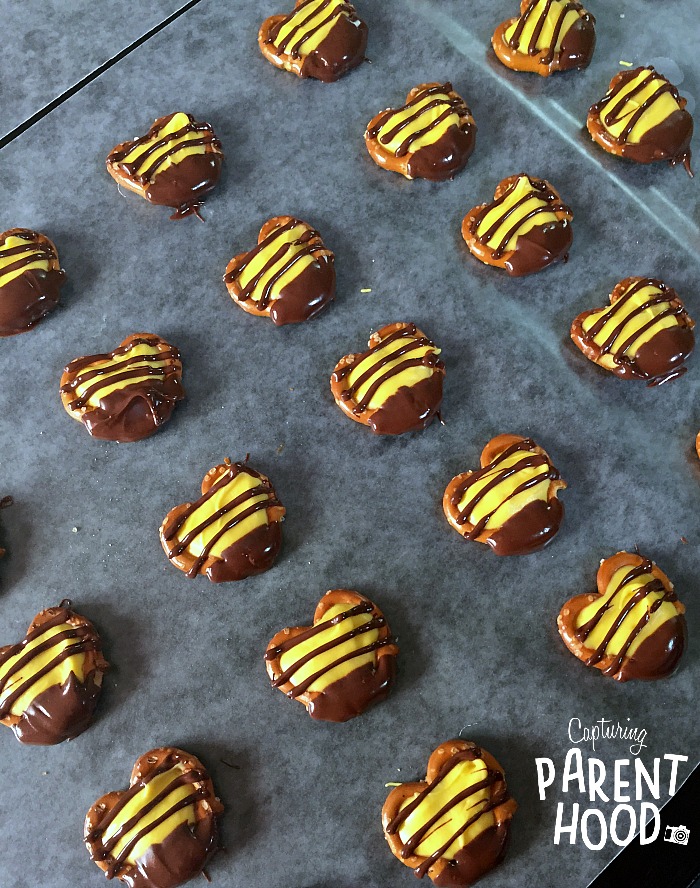
- Cut a tiny hole in one corner of the Ziploc bag, and carefully pipe chocolate stripes onto each pretzel bee.
- Let the bees sit until the chocolate has hardened completely. The chocolate will likely take longer to harden, than the candy melts.
- Fly a buzzing pretzel bumblebee right into your mouth…and enjoy!
One 12 oz. bag of yellow candy melts yielded approximately 75 pretzel bumblebees.
I love how these little guys turned out! They are almost too cute to eat…almost!
Pretzel Bumblebees would make a great addition to any summer bash. Add in Debbie’s adorable pretzel ladybugs and you would have the perfect bite-sized treats for a kid’s bug-themed, or garden-themed, birthday party!