We had a spectacular time rocketing around outer space with our little flying saucer friends last week, but we just couldn’t continue our space exploration without incorporating some fun sensory play. So…we decided to create this stellar Space Sensory Bin with Painted-Rock Solar System!
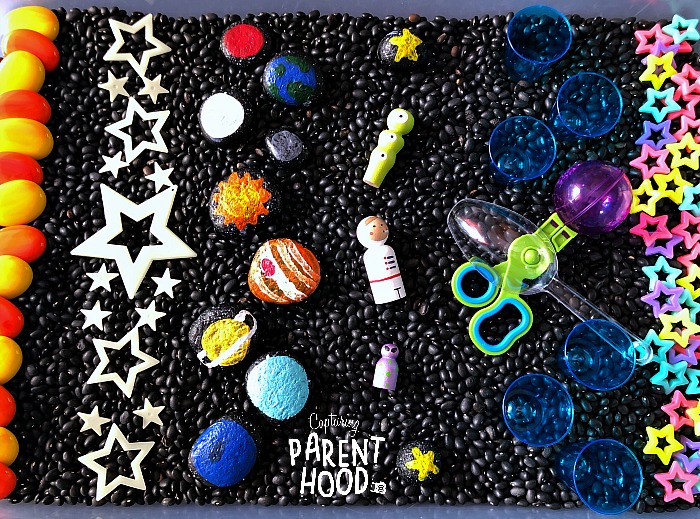
This space-themed sensory bin is simply out of this world! It has certainly sky-rocketed to the top of my list of favorites. I just can’t get enough of the sharp contrast between the dried black beans and all of the other bright and colorful space elements.
And clearly, I’m not the only earthling that has fallen head over heels! 🙂
Space Sensory Bin with Painted-Rock Solar System
Step One: Painted-Rock Solar System
Supplies:
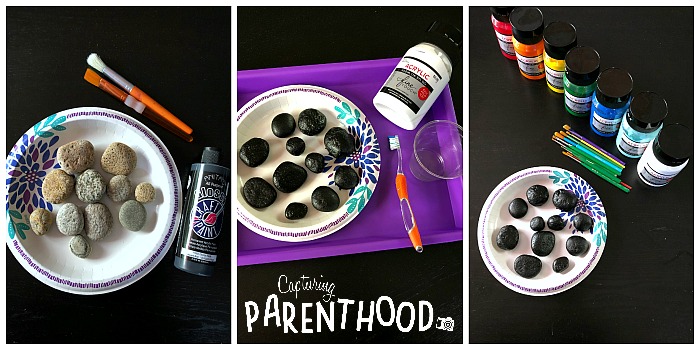
- Small Rocks/Pebbles (we went on a rock hunt in our neighborhood)
- Acrylic Paint (black, white, red, orange, yellow, green, dark blue, and light blue)
- Paintbrushes (various shapes and sizes)
- Small Plastic Cup/Container
- Water
- Old Toothbrush
- Plastic Tablecloth (optional)
Instructions:
- Start by painting all of your rocks with black acrylic paint. Place your rocks on a tray (or paper plate) and paint one side of each rock. Set the rocks aside to dry completely, before flipping them over and painting the remaining area. Once again, set the rocks aside to dry completely.
- When the black paint has dried, it’s time to add a bit of white acrylic paint to a small plastic cup or container. You will want to thin out the white paint with a few drops of water…so that the paint is easier to splatter.
- Feel free to lay down a plastic tablecloth to catch any excess paint splatter. Grab an old toothbrush and dip it into the watered-down white paint. Tap off any excess drips. Hold the toothbrush up over your black rocks (bristles pointing downward) and gently run your thumb or finger across the bristles…causing the white paint to splatter down onto the black rocks. Continue splattering, until you’re satisfied with the look of the paint-splattered rocks.
- Set the rocks aside to dry, before flipping them over and repeating the splatter process on the remaining side. Once again, set the rocks aside to dry completely.
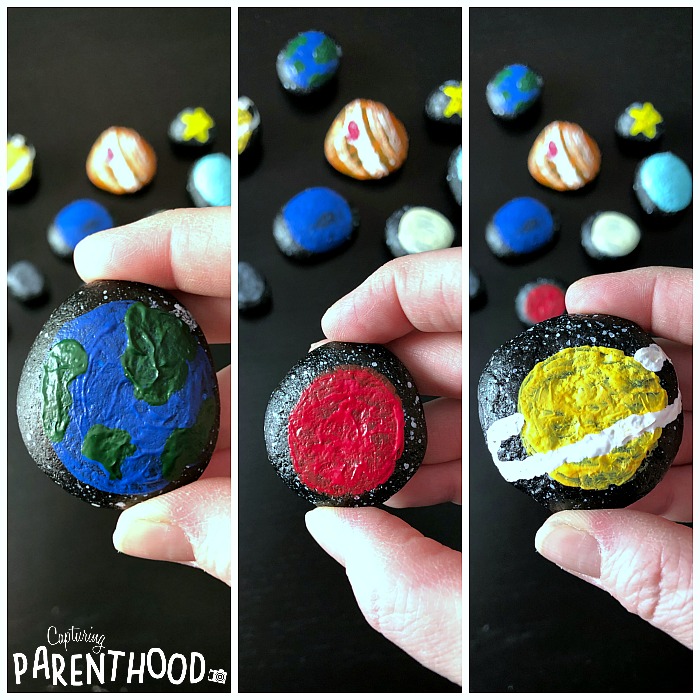
- Now, it’s time to add some color! We used one of our favorite space books as a reference, and painted each element in our solar system with the following colors:
- Sun – a mixture (and swirls) of yellow and orange
- Mercury – a mixture of black and white to create a base gray, with a few darker black spots
- Venus – a mixture of yellow and white, using mostly white
- Earth – dark blue (for the water) with areas of green (for the land)
- Mars – red
- Jupiter – orange and white stripes with a red dot (for the Great Red Spot)
- Saturn – yellow for the planet and white for the rings
- Uranus – light blue
- Neptune – dark blue (and we mixed a bit of dark blue with black to create the Great Dark Spot)
- Stars – yellow
Step Two: Space Sensory Bin Set-Up
Supplies:
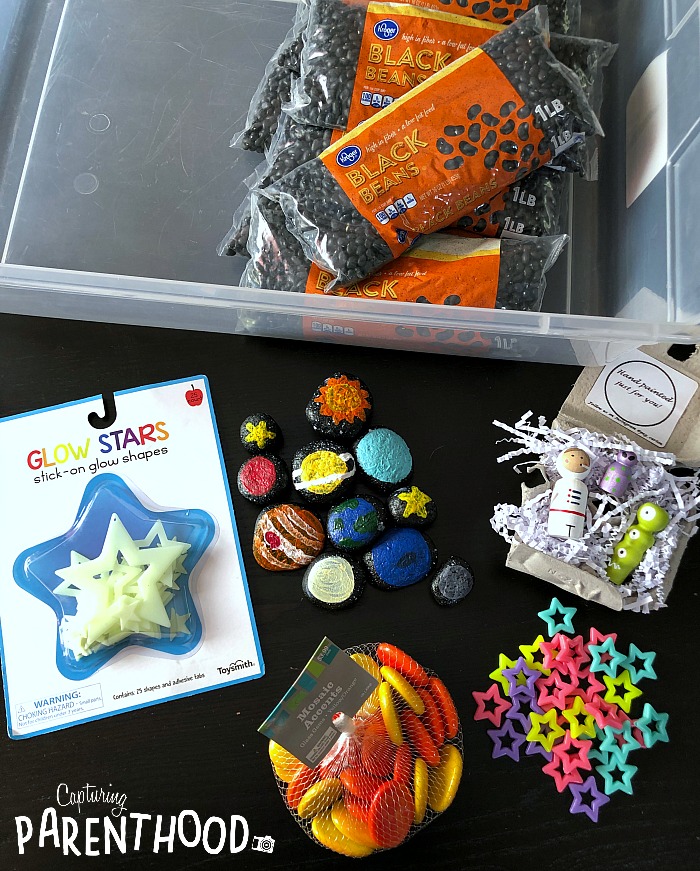
- Under-Bed Storage Tub with Lid (Target)
- 8 lbs. Dried Black Beans (Grocery Store)
- Glow-in-the-Dark Stars (Target)
- Painted-Rock Solar System (from Step One)
- Peg Doll Astronaut and Aliens (I ordered this adorable set from Frances at Peg Carton – @peg_carton)
- Orange and Yellow Large Mosaic Glass Gems (Hobby Lobby)
- Plastic Star Beads (Hobby Lobby)
- Blue 1 oz. Plastic Shot Glasses
- Clear Plastic Scoop (Hobby Lobby)
- Purple Handy Scooper (from the Learning Resources Helping Hands Set)
Instructions:
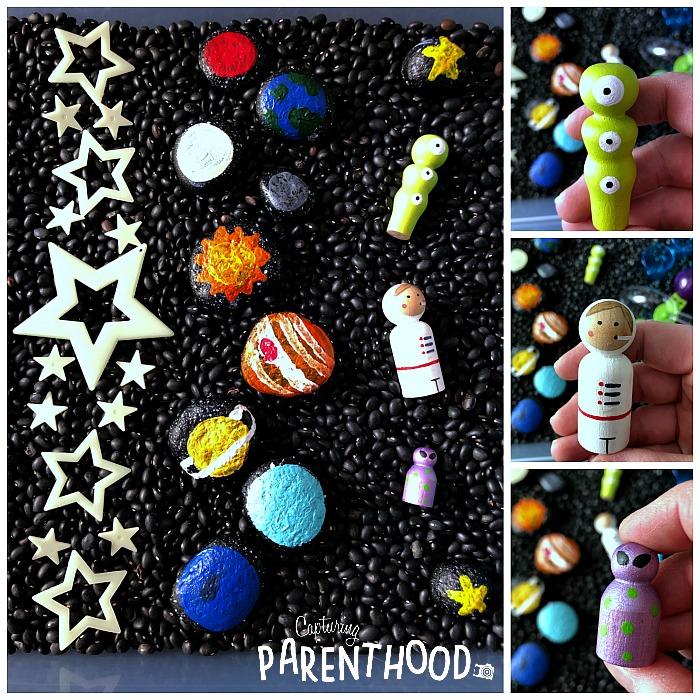
You can literally setup your bin in any way that your heart desires. I’m partial to Katy’s (@prekwolfpack) style of setting up sensory bins in a linear manner. Laying everything out in a nice clean way tends to result in more creativity and imaginative play from the kiddos – because they can see absolutely everything that they can use, and it’s not just piled into one big jumbled mess.
That being said, this space bin is a bit different than all of the other sensory bins that I’ve put together recently, because I decided to utilize just one base sensory material – dried black beans. I covered the bottom of the entire bin with dried black beans, and then added my linear elements on top. I placed the large orange and yellow glass gems in a line on the left-hand side of the bin. Next to those, I placed the glow-in-the-dark stars. In the middle of the bin, I placed our painted-rock solar system and our peg doll astronaut and aliens. To the right of the peg dolls, I setup an array of blue plastic shot glasses and two different scoops (because our daughter loves to scoop, fill and pour). Lastly, I placed a line of colorful star beads on the very right-hand side of the bin. Ta Da!
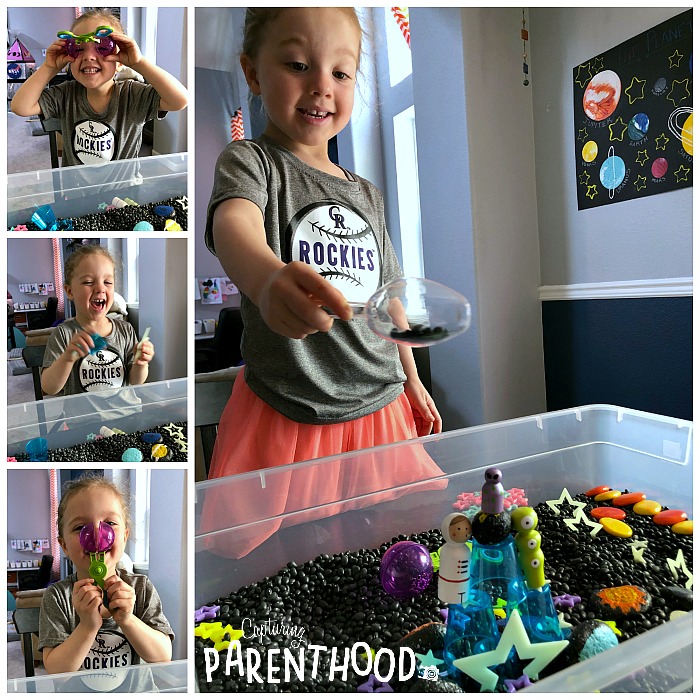
Our little nugget is having an absolute blast playing with her Space Sensory Bin with Painted-Rock Solar System! She’s orchestrated numerous expeditions for her little astronaut and alien space team – rocketing to each of the planets in our solar system…making sure not to get too close to the sun (since it’s blazing hot)…shooting past the stars…avoiding asteroids…and even constructing a magnificent blue space castle!
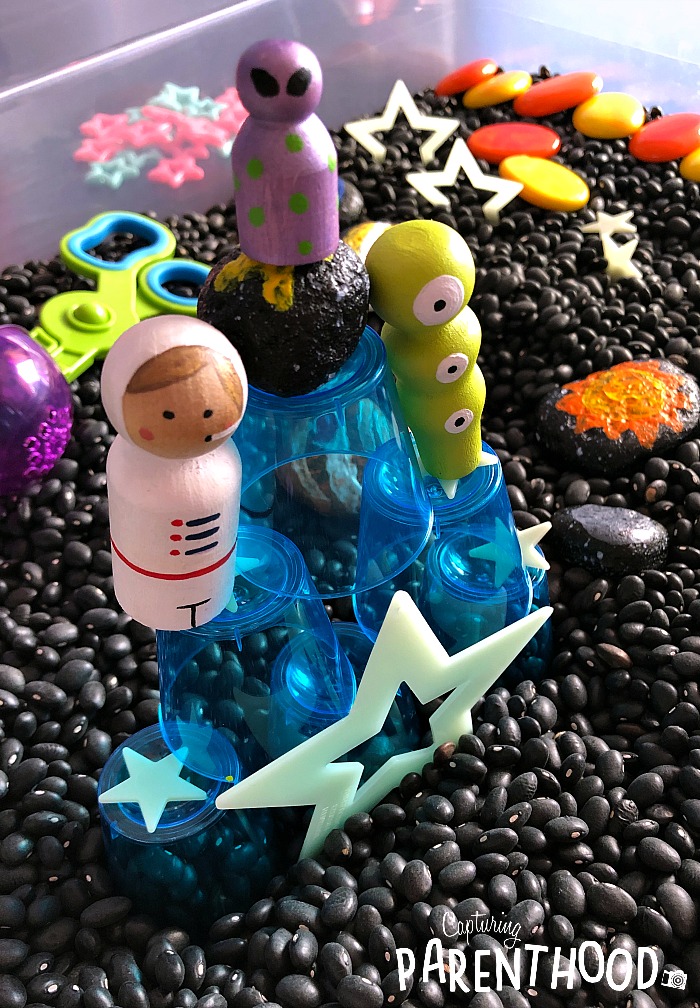
There has been loads of laughs and giggles when it comes to this sensory bin…which always makes my heart happy! I love being able to put together a sensory experience that our daughter can explore and enjoy for days on end!
If you’re interested in taking a peek at some of our other recent sensory bins – feel free to click on the following links to find our Spring Sensory Bin, our Easter Sensory Bin with Dyed Garbanzo Beans, and our Rainbow Pasta Sensory Bin! And make sure to keep an eye on our Instagram feed later this month…because this stellar space bin is scheduled for a fun sensory makeover! 🙂

