The kiddos are officially out of school for the holiday break. But you might find yourself scrambling to finish up the holiday shopping, gift-wrapping, and holiday baking. And if there’s one thing I know…it’s that it’s nearly impossible to accomplish anything, when your little ones are bouncing around the house with all of that extra holiday cheer. 🙂 That’s why I always try to have a handful of fun crafts, activities, and sensory experiences at my disposal. They keep our little nugget focused and entertained (without the use of the television), and they give us the dedicated time that we need to finish our various tasks on time. So, if your kiddos are anything like mine, they are going to love making these Spin Art Ornament Place Cards!
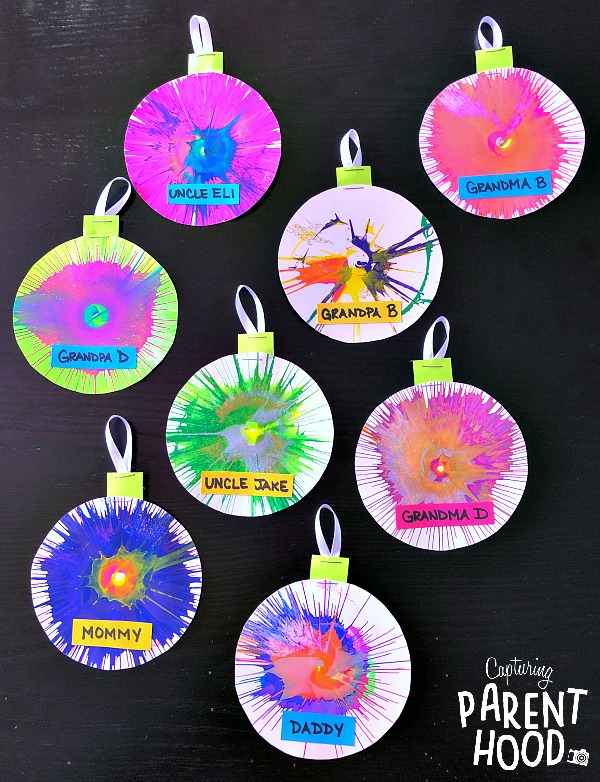
I have yet to meet a child who did not spring enthusiastically into the air at the mere mention of spin art! 🙂 Our little nugget has been spin art-obsessed for years now. There’s just something so mesmerizing about the process – watching bright colors of paint fly across paper at high speed. And every single spin art masterpiece looks different from the next – even if you use the same exact colors. It’s process art at its very finest!
As if creating beautiful spin art isn’t enough…your little ones will surely jump for joy at the idea of transforming their colorful masterpieces into dazzling Christmas ornaments – one for each Christmas dinner guest!
Spin Art Ornament Place Cards
Supplies:
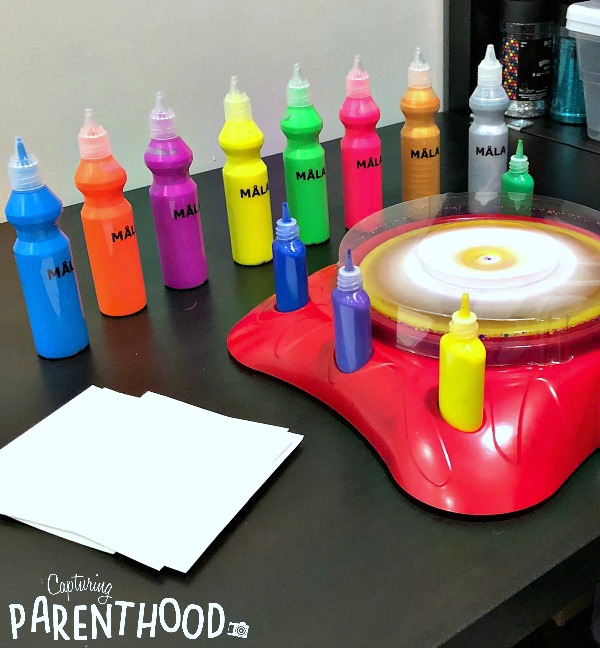
- Art Spinner – Our little nugget was gifted a 4-in-1 Super Wheel set…but it you want something with less frills, all you really need is a standard salad spinner. We like the ones with a pour spout in the lid, because it makes it a lot easier to add paint. But if you have an IKEA nearby, you can always grab one of their salad spinners for under $5.
- Non-Toxic Paint – We love using these fluorescent/glitter MALA paints from IKEA!
- White Card Stock
- Construction Paper
- Scissors
- Black Marker
- Glue Stick
- Stapler
- Ribbon
Instructions:
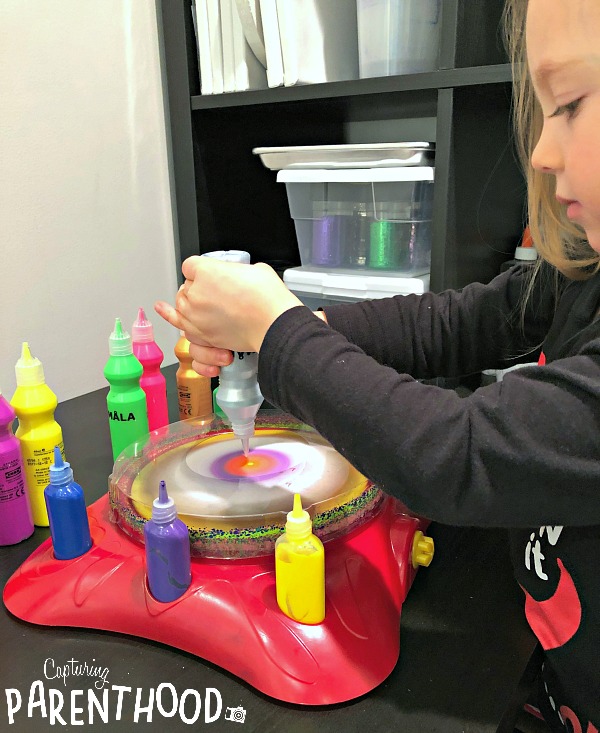
- Start by adding one square (or circle) of white card stock to the art spinner. Our art spinner only works with squares of paper (so we just cut our ornaments into circles once the paint dried).
- Let your little ones get creative, adding various colors of paint and glitter, as the art spinner twirls the paper around in circles.
- Once your little ones are satisfied with each ornament, remove it from the spinner, and set it aside to dry completely.
- Continue the painting process, until you have all of the spin art ornaments that you require.
- While the paint is drying on the ornaments, go ahead and grab some colorful construction paper, a pair of scissors, and a black marker.
- Cut small rectangles out of the construction paper – you will need one for each ornament.
- Using a black marker, write (or have your kiddos write) the names of each family member who will be attending Christmas dinner.
- Once the paint on the spin art ornaments is completely dry, go ahead and glue each name to their respective ornament.
- Cut some small squares of construction paper (these will be the tops of your ornaments). Staple one square to the top of each ornament.
- Cut a piece of ribbon for each ornament, and tie the ribbon in a knot on each end.
- Place the two knotted ends of the ribbon on the backside of the construction paper square (this should create a loop of ribbon above the ornament top). Carefully staple the ribbon in place.
- Repeat this process for the remaining ornaments.
- When you’re ready to set the table for Christmas dinner, have your kiddos set a spin art ornament place card at each place setting. Ta Da!
These colorful, kid-crafted place cards are sure to make your dinner guests feel extra special this holiday season!
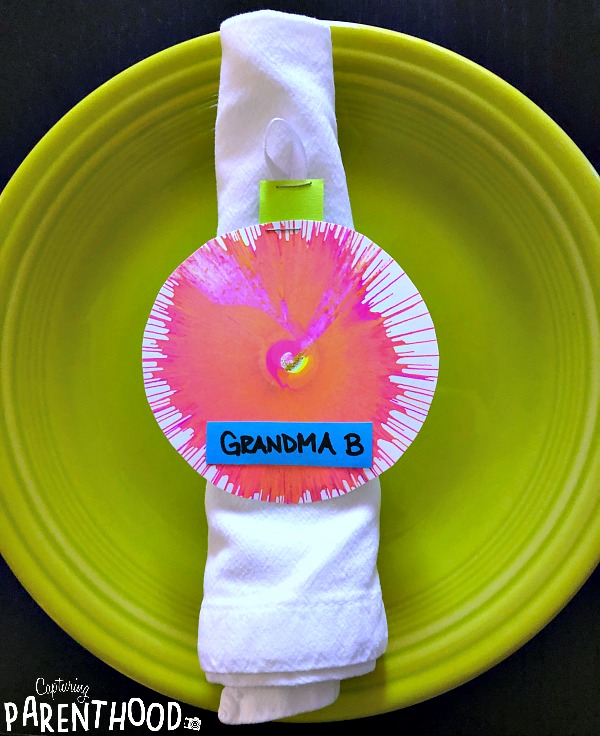
We hope that you have a wonderful time gathering with your family and friends. And we look forward to bringing you more fun content in the new year!
HAPPY HOLIDAYS!
