Our kitchen table is covered in red, pink, and purple construction paper. Hearts are fluttering all over the table and floor. And, SweeTARTS Hearts fill our candy dish.
Valentine’s Day must be near!
What better way to celebrate this loving holiday, than by spending some extra time with your little ones, creating some fun Valentine’s Day crafts together?
Here are the heart-filled Valentine’s Day crafts we’ve enjoyed making this year!

Bee-Mine Bumble Bee
I came across this cute craft idea on Housing A Forest (http://www.housingaforest.com/heart-bee-valentine-craft/). Since my little nugget has been running around the house singing “I’m bringing home a baby bumble bee” lately, I decided that this Bee Mine Bumble Bee would be the perfect Valentine’s Day creation.
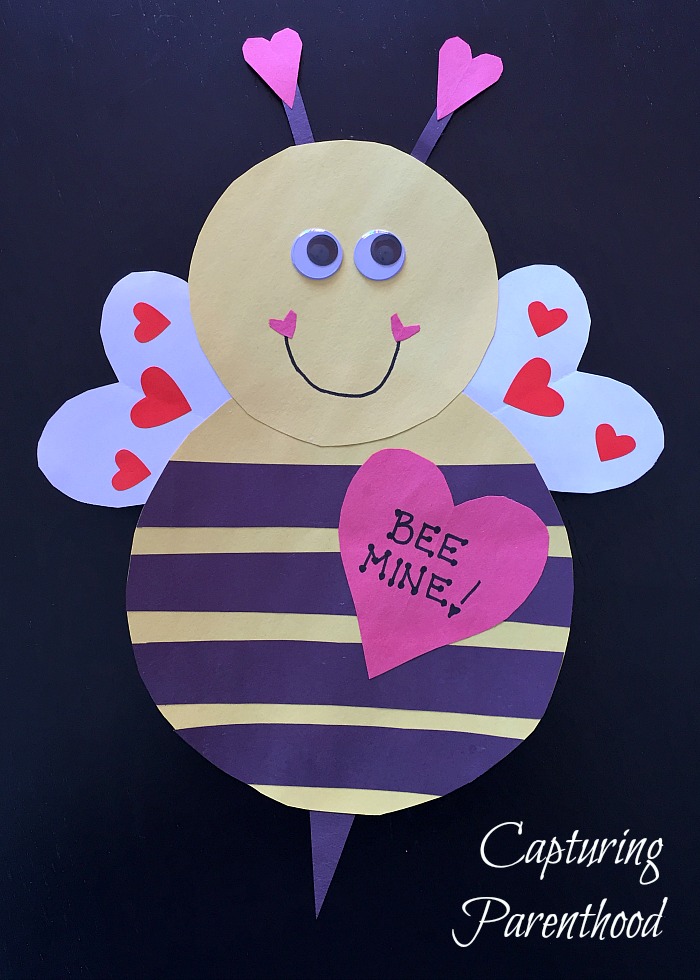
The only thing you really need to make this adorable bee is construction paper (black, white, yellow, and red), scissors, a Sharpie (to draw on the smile), and a glue stick. Since we had them on hand, we decided to use a couple of googly eyes and a few heart stickers, as well.
Valentine’s Day Heart Wreath
If you have not checked out Kim’s blog over at The Resourceful Mama, you should! She is always sharing amazing ideas, including this Valentine’s Day Heart Wreath (http://www.theresourcefulmama.com/paper-plate-valentines-day-heart-wreath/).
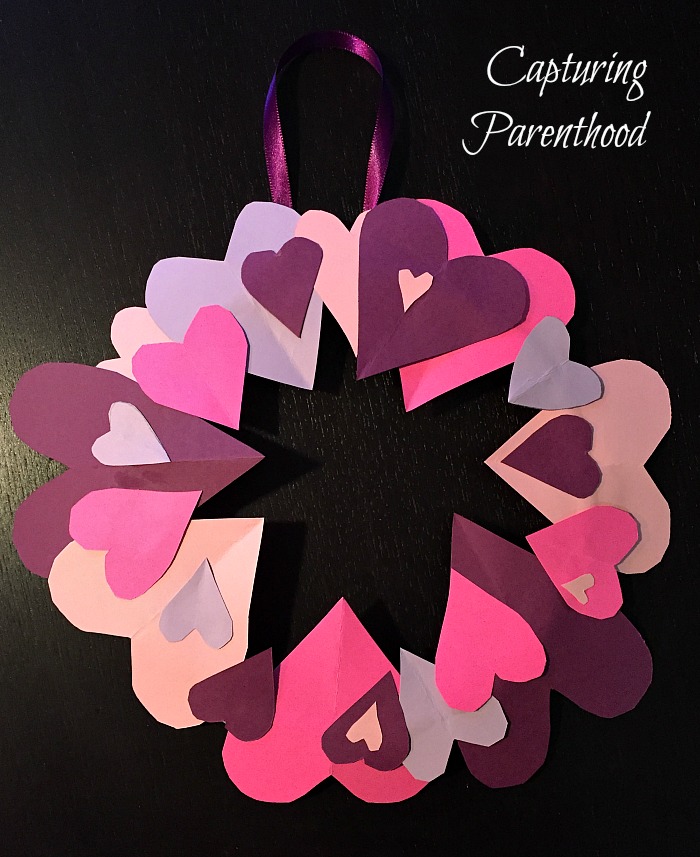
Kim provides a nice hearts printable on her blog, however, we decided to just cut out our our own hearts in varying colors and sizes (because our printer is not currently working). I moved on to cut out the inner circle of a paper plate and discarded it, leaving just the outer ring. We then set to work applying Elmer’s glue around the entire ring, and then quickly adhered all of our hearts. Once the glue was set, I stapled a little piece of ribbon at the top and now our beautiful wreath is hanging proudly on our front door, adding a much-needed pop of color!
Tinfoil Hearts
Coloring on tinfoil with Sharpie markers is something I remember doing when I was younger, and so I figured we would use the idea to create a big Valentine for my daughter’s teachers. I was not at all surprised at the enthusiasm my little nugget showed with this new craft. For one…I’ve never let her color with Sharpie markers before (yes, you should supervise this activity if you want to make sure the marker stays in the appropriate places). And two…she’s never really played with tinfoil before, let alone created an artistic masterpiece on it. She was so excited!
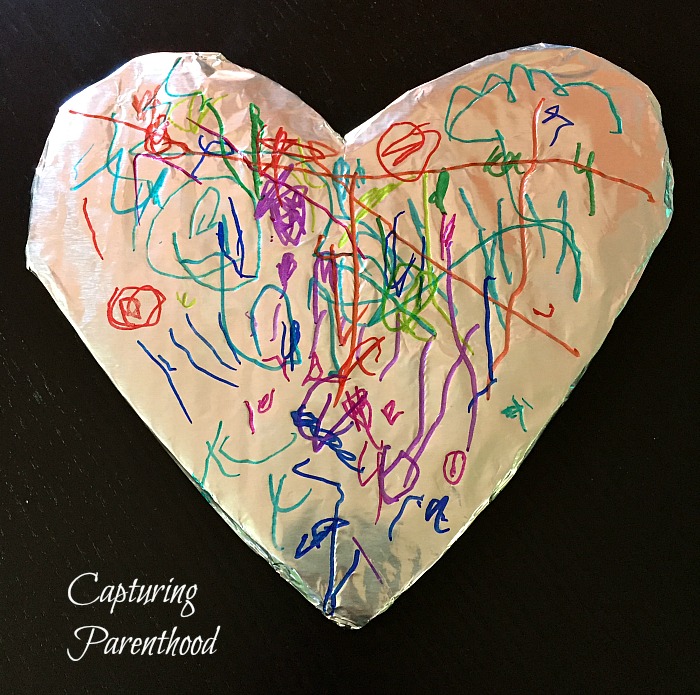
This craft was incredibly simple to setup. I cut a heart out of a cardboard box (from Amazon, of course) so that it would be sturdy, and then I wrapped it in tinfoil. I handed it to my toddler, with the box of Sharpies, and let her creativity run wild. It actually took quite a bit of time, because she found it was best to meticulously color a very small amount in each color, as she made her way through the line-up of markers. Once she had utilized every color, she lined the markers back up again and set back to work – repeating the cycle for the next 10-15 minutes. Watching her process made me smile. She never ceases to amaze me!
Shaving Cream Marbled Hearts
We had crafted a a marbled leaf using shaving cream, during a craft session at the museum last fall, so when I saw these marbled hearts on Teaching 2 and 3 Year Olds (http://teaching2and3yearolds.com/toddler-valentine-art/) I knew I wanted to try this fun idea again!
However, if I’m being honest, I set out on this craft excursion before actually reading over the instructions on Sheryl’s blog, and so I ended up using red food coloring, instead of paint. The good news is that they both work for this craft, but I think the paint might be the better option, if you would like to refrain from staining your hands, clothes, and kitchen utensils for awhile.
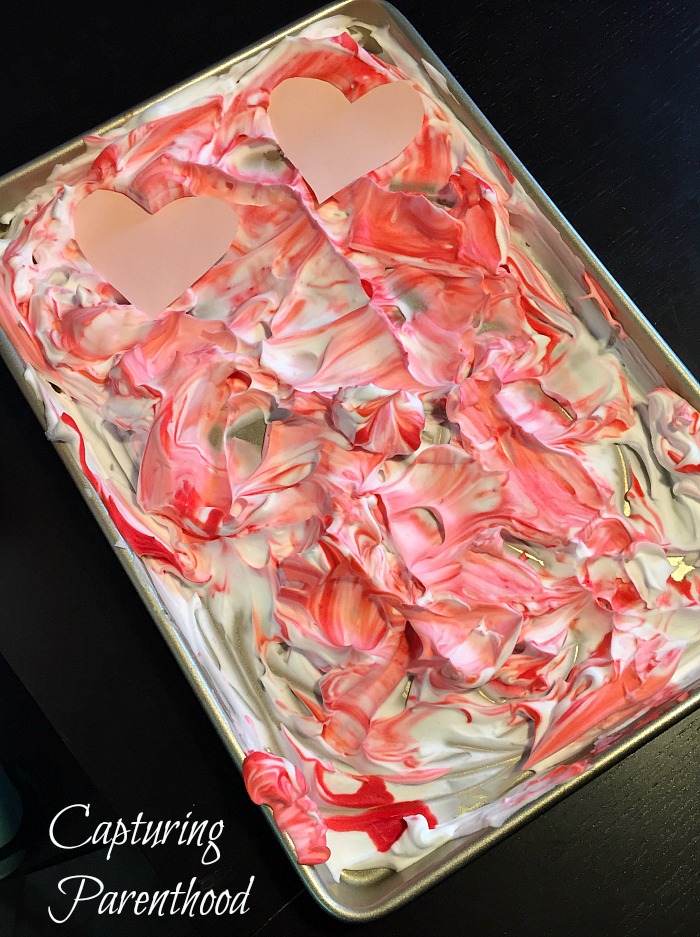
I sprayed a baking sheet full of shaving cream and evened it out with a rubber spatula. Then I added my drops of food coloring (remember paint is likely the better choice here) and swirled it around using the same spatula. Once the color was integrated and it appeared marbled, we dropped our hearts (made out of construction paper) into the mixture and pressed them down to get them fully coated. My little nugget had a blast squishing them into the shaving cream! We then moved them over to a clean baking sheet, and using a ruler, I scraped off the shaving cream mixture and set our newly-crafted marbled hearts aside to dry.
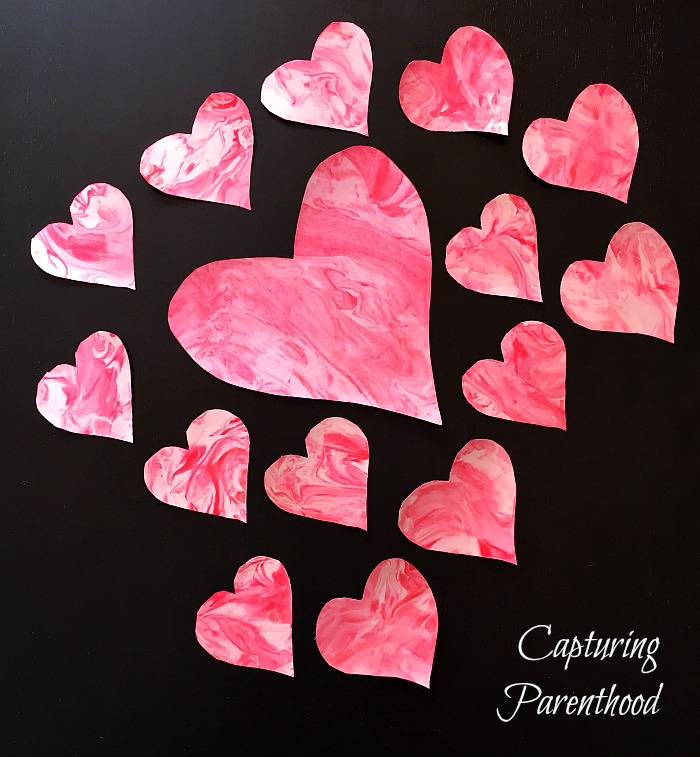
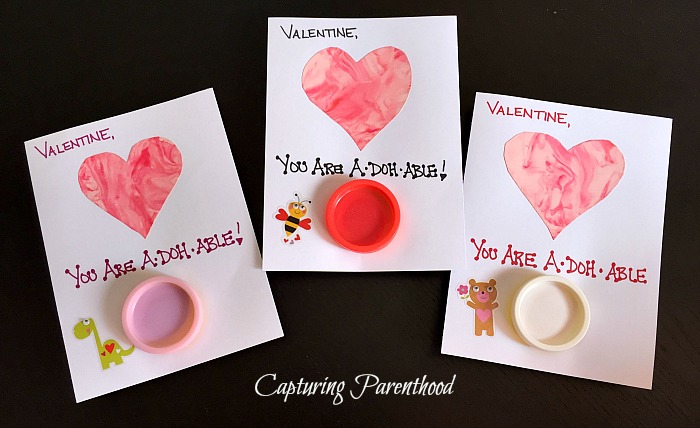
We then decided to utilize these gorgeous marbled hearts for our valentines for school this year – branching off of another idea that I found on Grace and Good Eats (http://www.graceandgoodeats.com/play-doh-valentine-free-printable/).
I bought some card stock at Hobby Lobby, a Valentine’s Day Play-Doh Party Pack on Amazon, and some googly-eyed Valentine’s Day stickers at Target. The end result?
If you’re looking for another quick heart-filled activity to adorn your home, check out our Valentine’s Day Heart Garland: http://capturingparenthood.com/valentines-day-heart-garland/.
Happy Valentine’s Day!!!


