“Be a rainbow in someone else’s cloud.”
– Dr. Maya Angelou
Rainbows are magical! As a child, I certainly believed that a pot of gold could be found at the end of every rainbow…though I never found one. 🙂 As an adult, I love the graceful reminder that they provide…that something incredibly beautiful can come from a dark and dreary thunderstorm – all you need is a little bit of sunshine! Rainbows can brighten our cloudiest days. And when I think of St. Patrick’s Day, I immediately think of rainbows…with leprechauns and giant pots of gold, of course. That’s why this year, we went all out with these amazingly fun St. Patrick’s Day – Rainbow Arts + Crafts!
I’m happy to say that our house is looking incredibly festive, with pops of rainbow colors everywhere! The array of beautiful colors brightens my day, every morning when I walk downstairs! I love them so much, I might have to find an excuse to keep them up year-round. 🙂
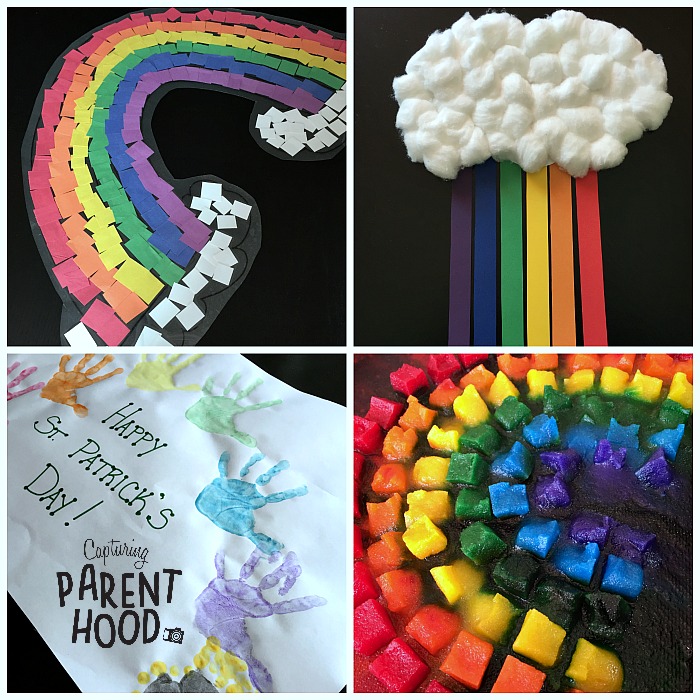
Sticky Wall Rainbow
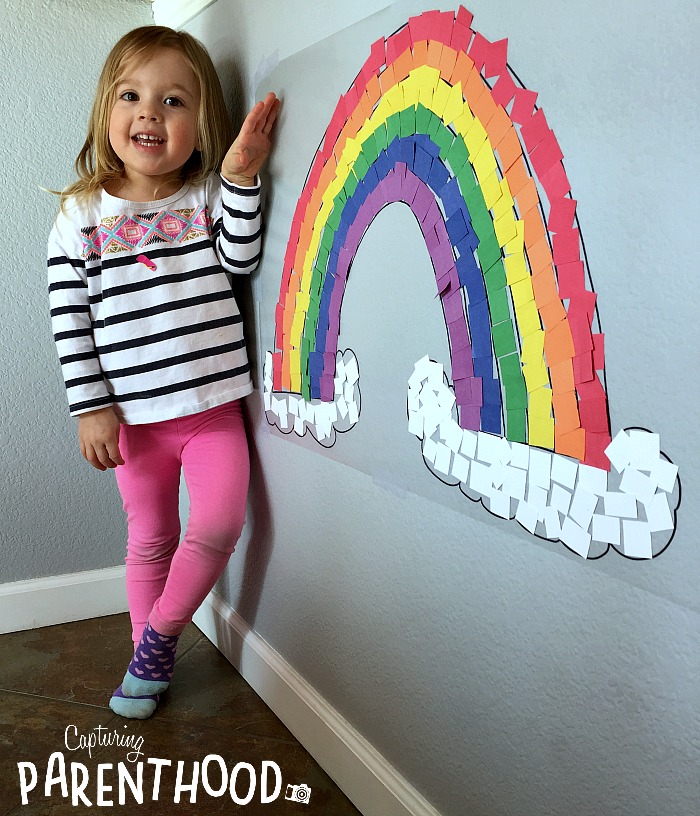
This Sticky Wall Rainbow, inspired by Mama. Papa. Bubba. was hands-down our little nugget’s favorite rainbow craft this year! She loved practicing her cutting skills…cutting an array of colorful squares. But her favorite part was sticking the paper onto the wall, to create a giant rainbow!
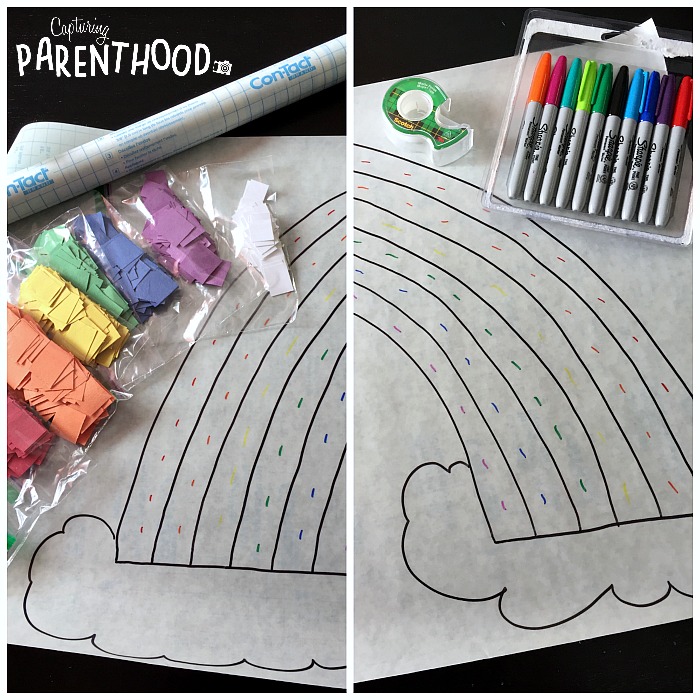
All you need to complete this rainbow craft, is a large sheet of Contact paper, black marker (other colors optional), tape, small squares of paper in all the colors of the rainbow (red, orange, yellow, green, blue, and purple), and some small squares of white paper…for the clouds. We used construction paper, but tissue paper works just as well.
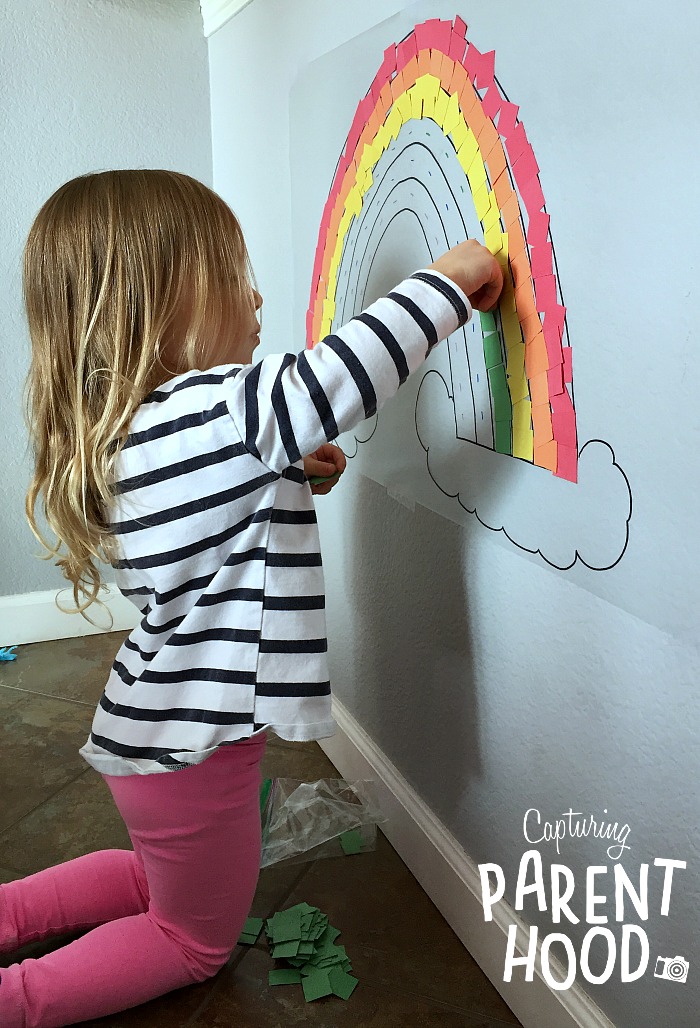
I outlined our rainbow (and clouds) onto the sheet of Contact paper, using a black marker. I also added little red, orange, yellow, green, blue, and purple dashes inside the rainbow…to remind our little nugget where each color belongs. We both set to work cutting out our various squares of paper, and when we were all ready, I removed the backing from the Contact paper, and taped the rainbow to the wall (sticky side out)! And then, our little nugget created a big, beautiful rainbow! When she was satisfied with her work of art, I cut another piece of Contact paper, and placed it over the top (pressing firmly to seal). We cut out the rainbow and taped it to our sliding glass door…and now, we have a magnificent sun-catcher!
Paper Rainbow Craft
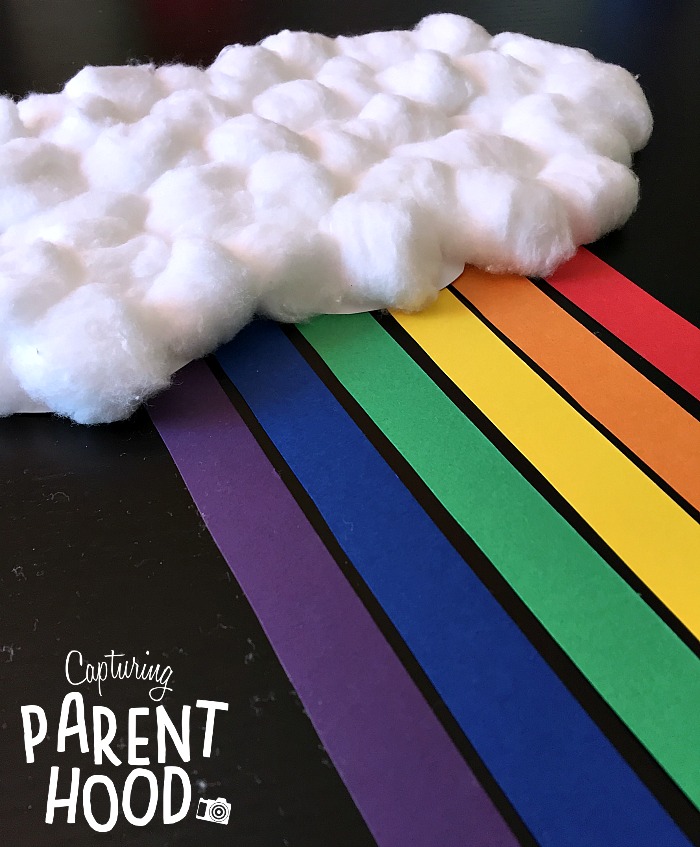
I came across this Paper Rainbow Craft over on Easy Peasy and Fun. Andreja is always sharing awesome crafts for kids! Once again, our little nugget was able to indulge in her new-found love for cutting paper! After constructing our paper rainbow, we decided to take it one step further, by adding some cotton balls to our cloud…to give it a little three-dimensional/sensory twist!
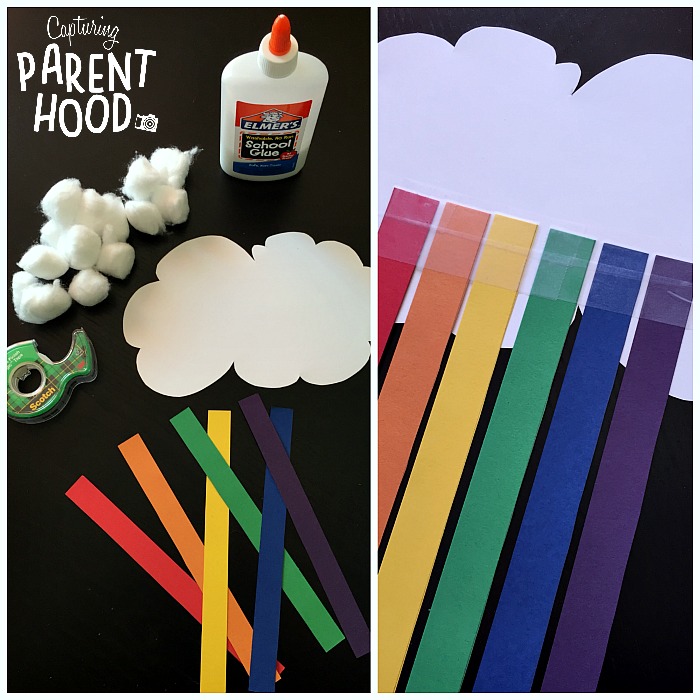
This simple craft requires the following supplies: one strip of paper for each color of the rainbow (red, orange, yellow, green, blue, and purple), white paper for the cloud, scissors, tape, glue, and cotton balls. To start, cut a cloud out of white piece of paper. Cut a 1/2″ – 1″ wide strip from each piece of colored paper. Line the strips of paper up on the back of the cloud. Make sure to place your strips in reverse order on the back of the cloud (so that they will be in the correct order when you flip it over). I completely failed to do this when we made our paper rainbow, but it’s still beautiful (even if it’s a little backwards). 🙂 Once you have your strips of paper lined up, secure them to the back of the cloud with tape. Flip the cloud over and get ready for the fun part!
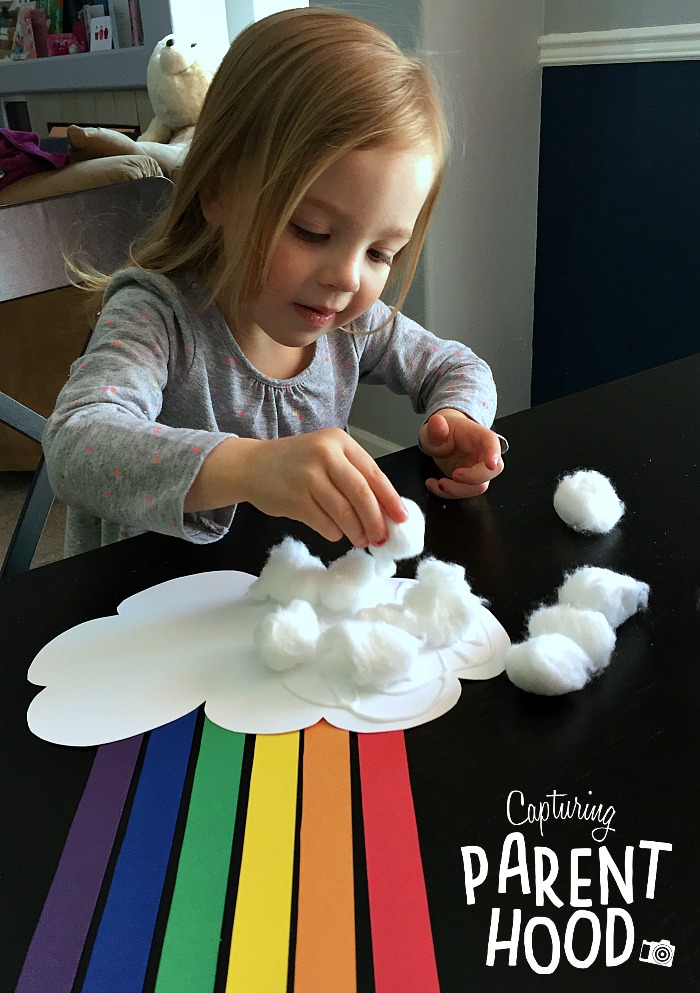
Our little nugget had the best time gluing all of the fluffy cotton balls to the front of our cloud! When our cloud was completely covered in fluff, we set our paper rainbow aside to dry. Once dry, we hung it on our art wall for all to see and admire!
Handprint Rainbow & Pot O’ Gold
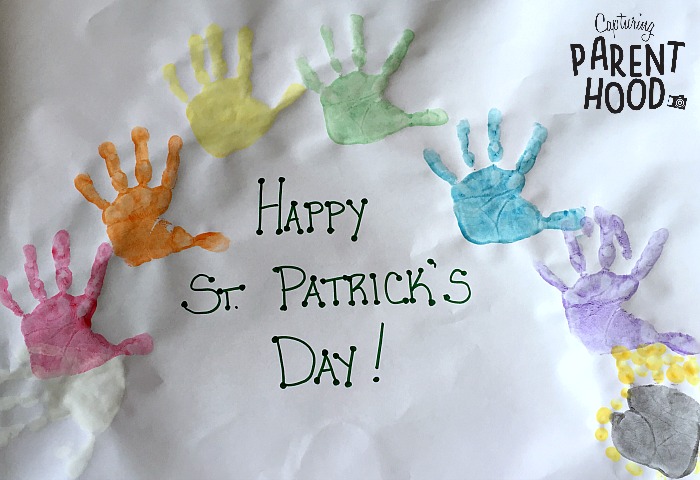
Our daughter loves making handprint and footprint art. There’s just something about having her hands and feet covered in paint, that makes her completely giddy! It’s probably the element of messiness…I’m sure most kids thoroughly enjoy getting covered with paint. 🙂 This craft was actually inspired by a giant handprint rainbow that caught my eye, as I was walking down the hallway at our daughter’s school. While that rainbow was comprised of hundreds of different handprints, it didn’t stop us from making a smaller version at home! Obviously, we had to include a pot o’ gold, since we’re trying to entice leprechauns to come and visit for St. Patrick’s Day!
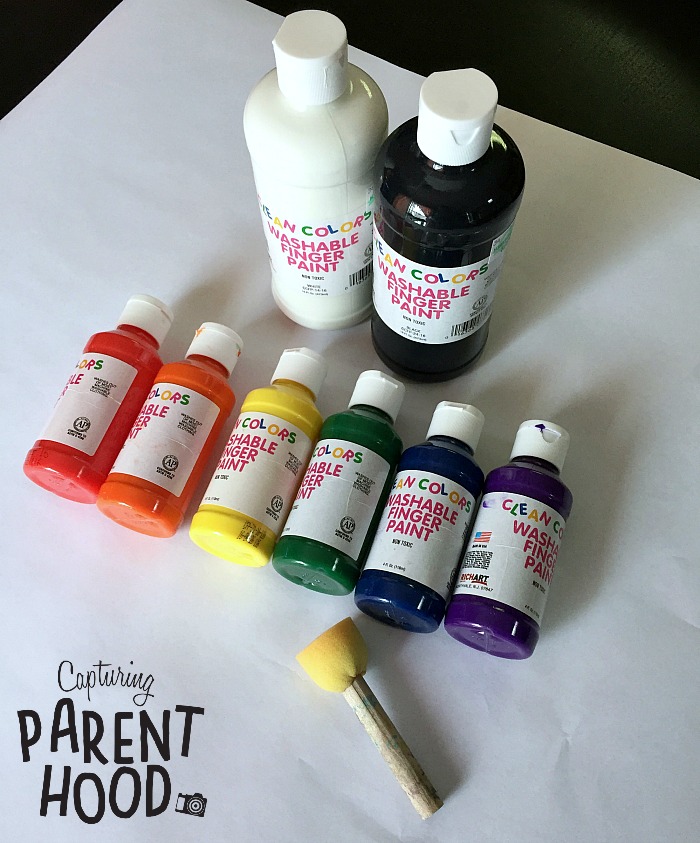
The supplies that you will need to complete this handprint rainbow craft, are as follows: a large sheet of white craft paper, paint in all of the colors of the rainbow (red, orange, yellow, green, blue, and purple), as well as some white and black paint, and a sponge brush/stamper.
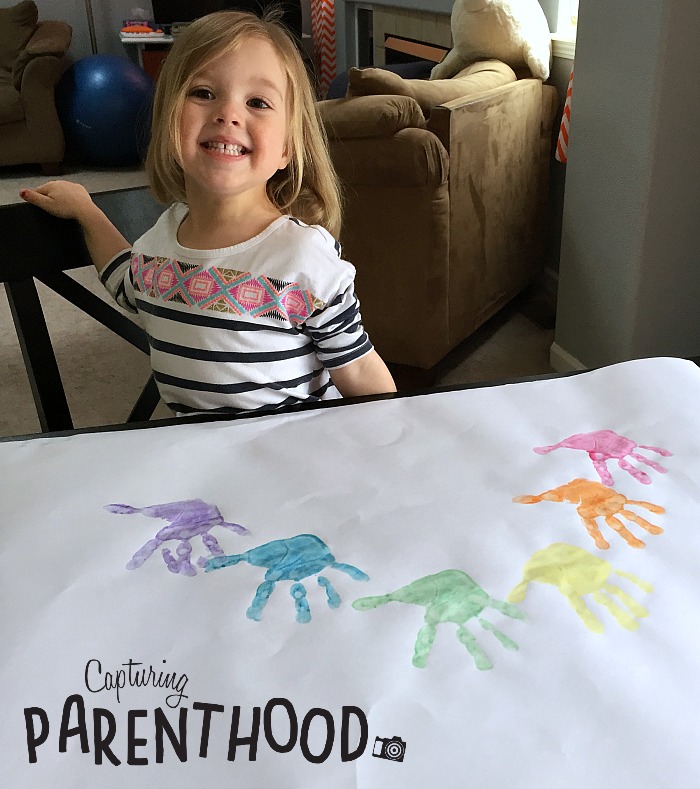
Through the years, I’ve found that we always get a better (cleaner) handprint, when we use the sponge stamper, as opposed to a standard paint brush. Have your little one choose a hand, sponge the red paint onto their hand, and then place their hand on the paper, pressing firmly. Repeat this process with each color, forming an arc with the handprints as you go. Once you have your rainbow in place, sponge a hand with white paint, and stamp the hand down on one end of the rainbow. It’s a little hard to see our white cloud handprint in the pictures, but it’s there!
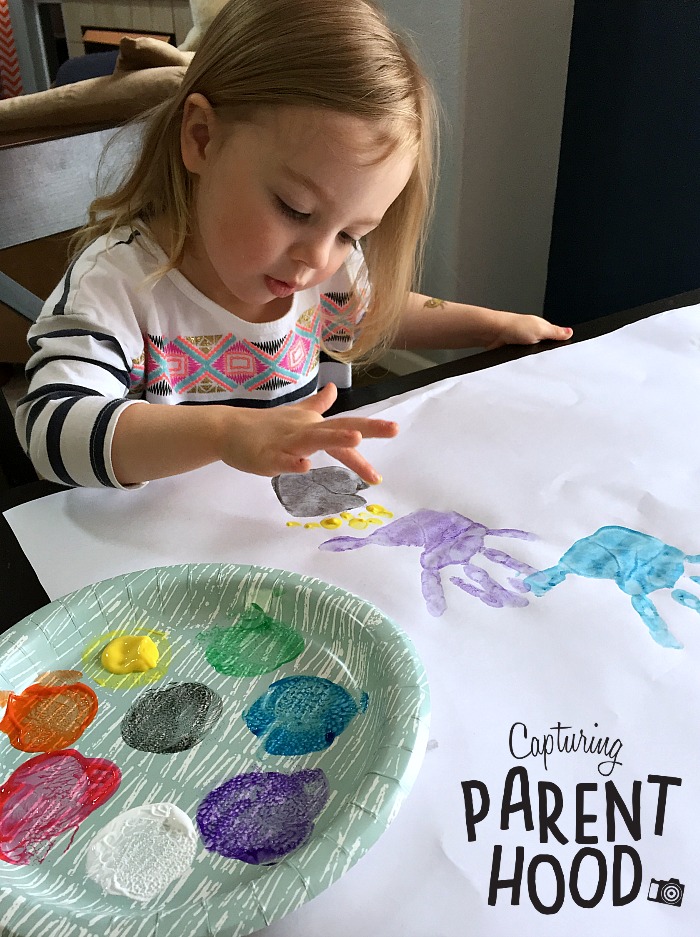
Lastly, sponge just the base of one hand (not the thumb or fingers) with the black paint, and press it firmly to the paper at the other end of the rainbow. This is your pot…now you just need to add the gold! Our little nugget used her fingertip and some yellow paint, to add little gold coins to our pot. Let’s see if a leprechaun can resist all of that gold. 🙂
Sugar Cube Rainbow
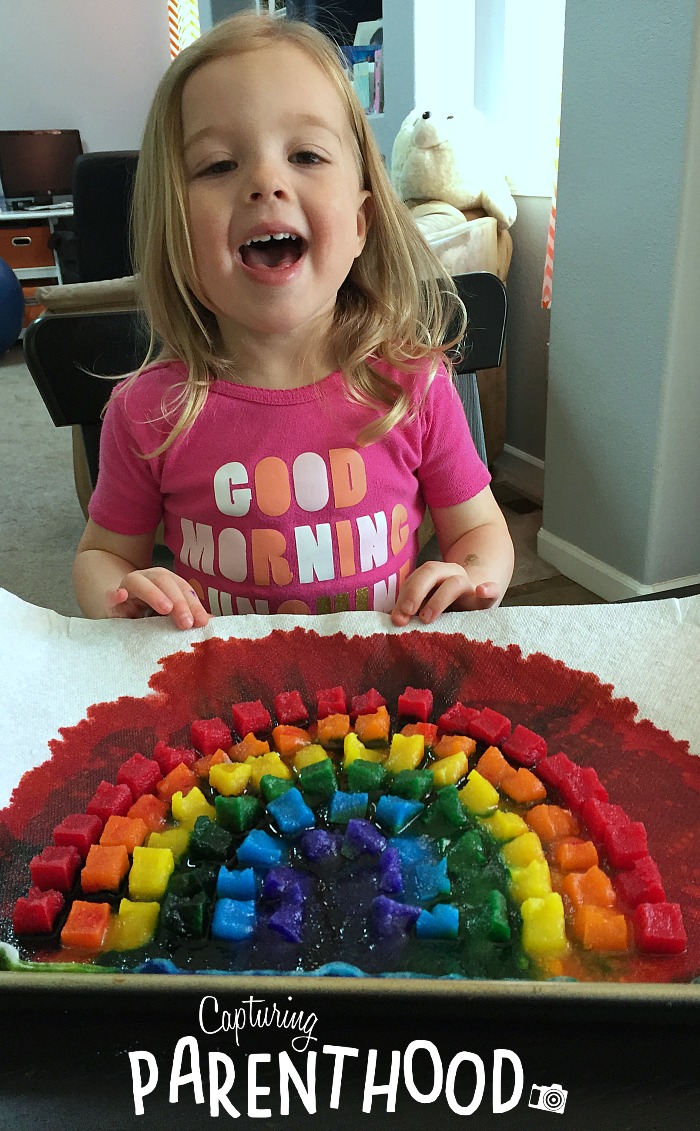
At the end of February we shared this Sugar Cube Watercolor Painting post. We had so much fun painting our sugar cubes, that I immediately ran to the store and bought another box. As we started creating all of our rainbow arts + crafts for St. Patrick’s Day, I just knew that a Sugar Cube Rainbow would be the perfect addition! I mean, how could we not?
I honestly figured that this rainbow activity could go one of two ways…the sugar cubes could all dissolve before we had all of the colors added, and we could end up with a big brown blob…OR…the watercolors would soak in and create the most exquisitely vibrant rainbow that we had ever laid eyes on. I’m happy to report that the latter option was the end result! And after seeing these pictures, I know that you are going to want to try this too!
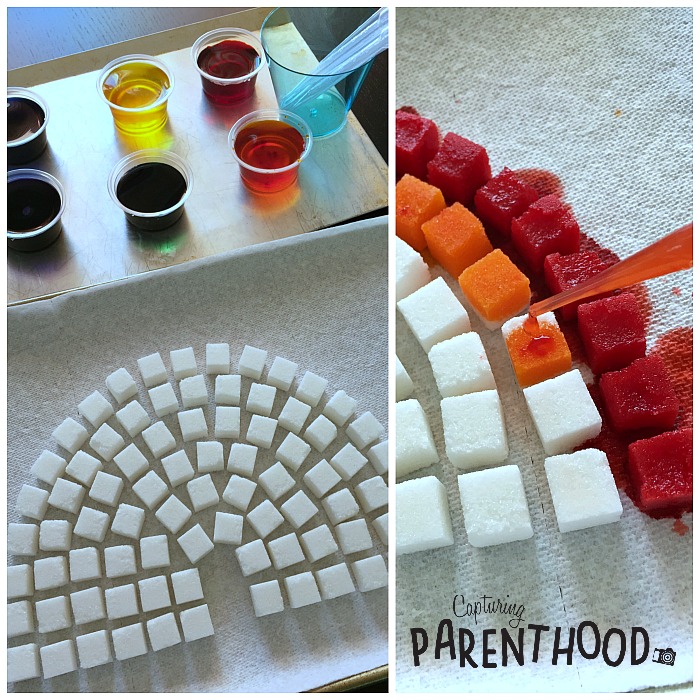
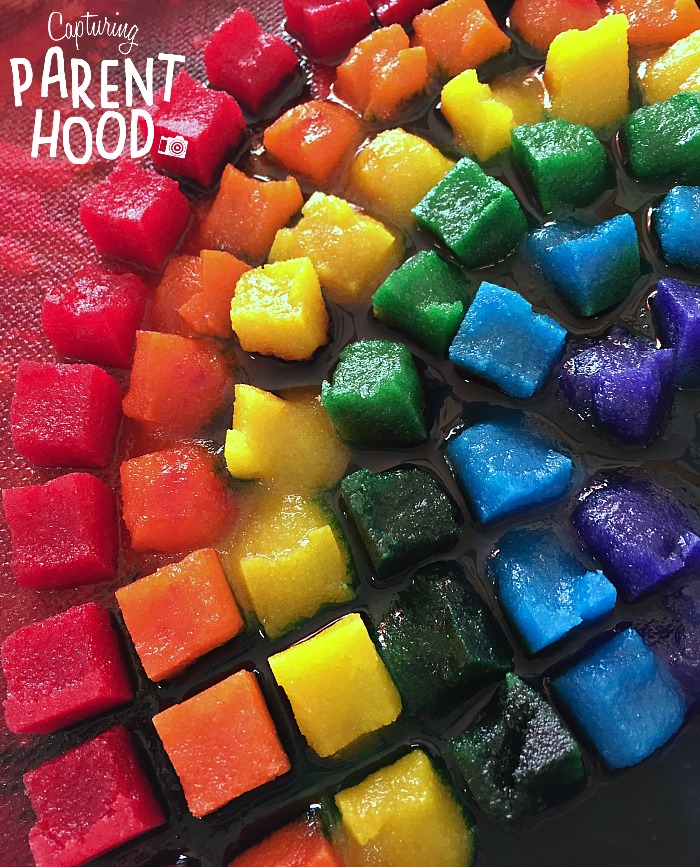
All you need to create a magnificent sugar cube rainbow of your own, is some sugar cubes, liquid watercolors in every color of the rainbow (red, orange, yellow, green, blue, and purple), and some pipettes or water droppers. Our Sugar Cube Watercolor Painting post contains all of the information on how we make our own liquid watercolors, and where we bought our bulk bag of pipettes. I also highly recommend placing a cookie sheet underneath your rainbow, to collect all of the liquid and make clean-up a breeze!
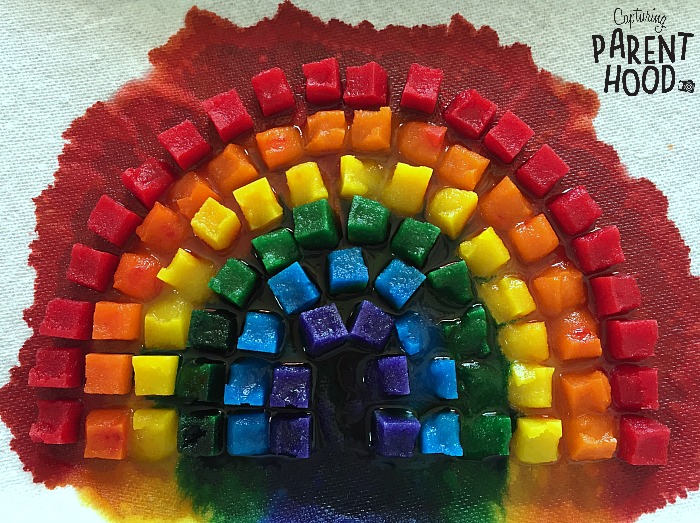
I chose to place a few paper towels on my cookie sheet first, because I wanted to have a white background (at least while it lasted). We created six arcs with our sugar cubes, and then it was time to add some color! Using the pipettes, we quickly colored each row of sugar cubes, starting with red and ending with purple. I loved how the rainbow colors started to bleed out onto the white paper towel, creating a magical double-rainbow at the base of our cookie sheet!
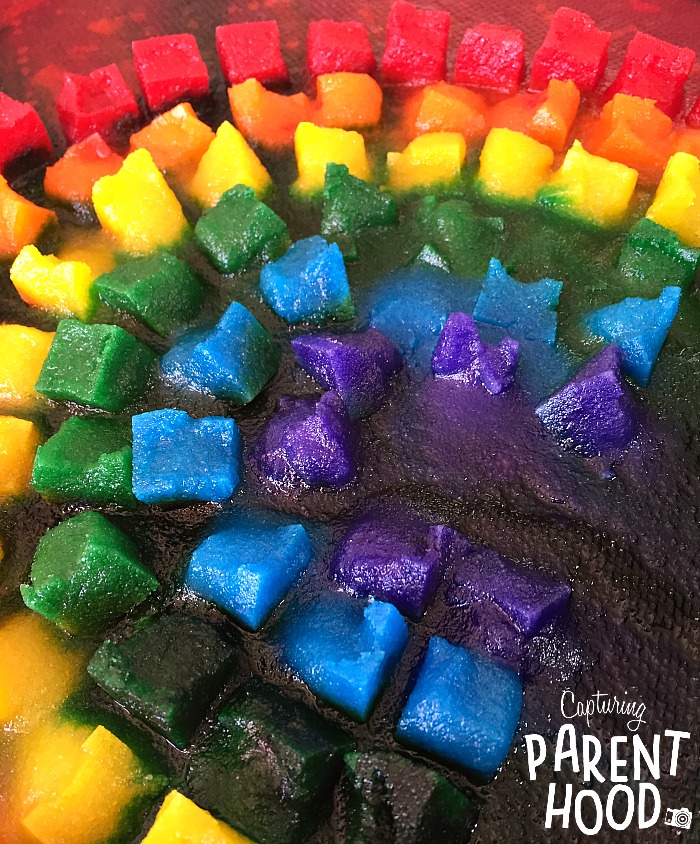
While our Sugar Cube Rainbow was not a piece of art that we could hang on display, it did sit on our dining room table for two full days! We could not stop staring at it! I absolutely love how this rainbow activity turned out…it was hands-down my favorite part of our St. Patrick’s Day – Rainbow Arts + Crafts!
If you’re looking for even more St. Patrick’s Day crafts, make sure to check out all of the fun crafts we made last year…including another creative take on a rainbow/cloud craft! If you’re kiddos are more interested in science experiments, you’ve got to check out our Fizzing Rainbow and our Walking Rainbow Experiment! We’ve even got you covered if your looking for some awesome rainbow sensory activities…like this amazing Rainbow Water Beads Sensory Bottle, or this Rainbow Rice Sensory Bin! In case you haven’t noticed…we LOVE rainbows!
HAPPY ST. PATRICK’S DAY!